Category: Software

Articles on photography-related software

Organizing Photos

As digital photographers, our photo collections can get out of hand. This page will discuss some ways of organizing your photos so you can back them up and find specific photos later on.
My iPhone, in particular, can have thousands of photos, screenshots, and videos. I have my iPhone photos automatically backup to my Google Drive. Plus iCloud Photos also keeps copies of these photos. These are a great backup for your photos, but if you want to free up space on your phone. You need to download them from iCloud so when you delete them from your phone. You will still have a copy.
From time to time, I tag my Google Drive photos and download them to my home computer. The hundreds of photos I tag are downloaded as a single zip file. When unzipped, they end up in a single directory and their names are non-descript.
So here are some of the ways to organize all these photos:

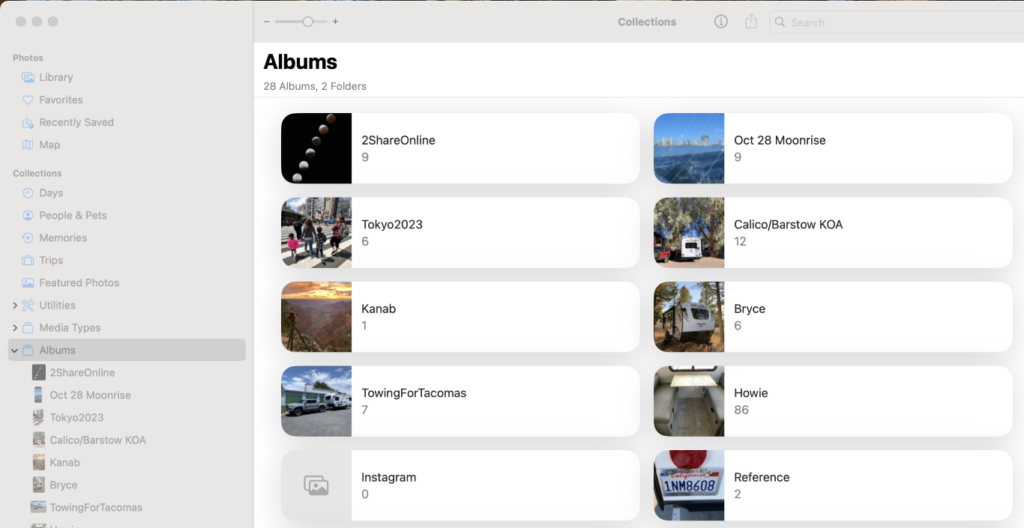
  • Apple Photos (free) – on MacOS & iOS, the Photos app can be used to organize your massive photo collection. Creating albums is the best way to organize large groups of photos. You can also setup Smart Albums, with criteria like “portraits” or “pets”, and Apple AI will auto-organize your photos.
    Apple laptops & iPhone are great at keeping all your photos safe. By backing all photos on your Mac, iPhone & iPad to iCloud automatically. This can be turned off or switched to Google Drive($). But unless you upgrade($) to more Apple storage, your large photo collection can max out the space. You can stop uploading to iCloud by setting your device to “not copy to the Photos library”. This will keep your photos from automatically going to iCloud.
    See next item if you want to move your Photos library from your main drive to an external drive.
  • Apple Photos (free) Part 2 – moving your Photos library to an external hard drive. Using Finder, under Favorites/Pictures find your Photos Library.photoslibrary file, then drag or copy it to your external drive. This can either become the primary location for your photos or act as a backup (second copy). I relabel the Photos Library.photoslibrary copy on the external drive something more descriptive, such as Photos2024 Library.photoslibrary. If you double-click this file or Option-Click the Photos app on the taskbar, you can select which .photoslibrary file you want to load. This will become your default Photos library until you select a different .photoslibrary or create a new one by option-clicking the Photos app.

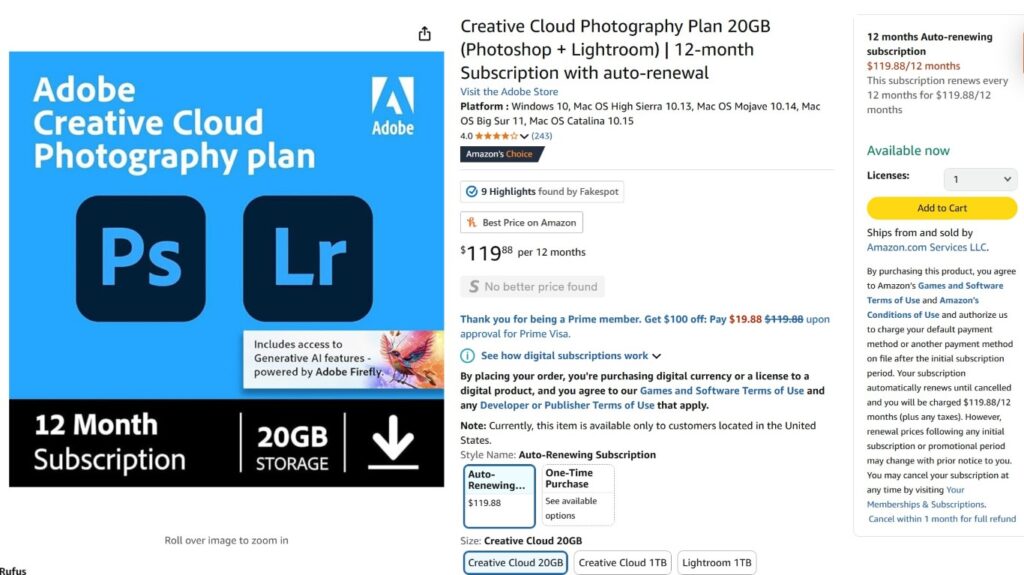
  • Adobe Lightroom Classic (Windows or Mac, $12/mo 0r $120/yr) – I use Lightroom Classic to import, organize, and process my digital images. I dislike subscribing to software but what Lightroom offers plus the continual updates of new features, makes the small monthly fee tolerable.
    When importing a memory card or photos folder, Lightroom has options for adding keywords, copying the photos/videos to a specific folder, sorting by date, and creating or adding to a collection, avoiding duplicates. It’s a great tool for a serious photographer although there is a learning curve.
    A Lightroom catalog (how Lightroom organizes your photos) can organize photos/videos located in different locations. Plus you can have multiple (even duplicate) catalogs to organize photos by subject or a single huge catalog that contains all your photos. Apple Photos does not give you this option, other than to load .photoslibrary files from different location.
  • Adobe Photoshop w/ Adobe Bridge (Windows or Mac, $12/mo 0r $120/yr) – Adobe sells Lightroom & Photoshop separately but the bundled price is pretty much the same price. Adobe Bridge offers similar photo-navigation features as Lightroom Classic. So if you prefer Photoshop over Lightroom (I use both interactively), Bridge is useful to organize and navigate your photo library.

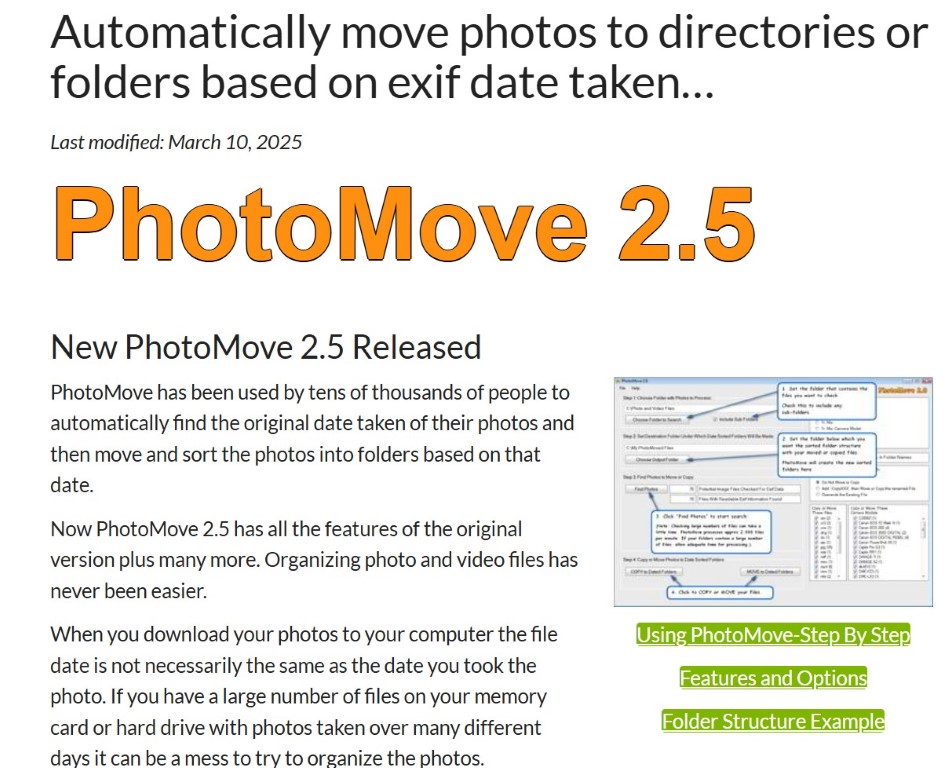
  • PhotoMove (Windows-only, free or $8 pro) – I use PhotoMove to organize all my iPhone photos and videos downloads. There are a couple Mac alternatives but they do not work as efficiently. So using PhotoMovePro ($8) on my Windows computer, I can organize all my iPhone photos into dated folders. Then I move these folders under the corresponding Lightroom folder then import them into Lightroom. Merging my iPhone photos with my mirrorless camera images. Since I often use a GoPro, iPhone, and mirrorless cameras when traveling. Photomove allows me to organize them into specific events. Lightroom could organize my iPhone downloads as well but having them pre-sorted before importing streamlines the process.

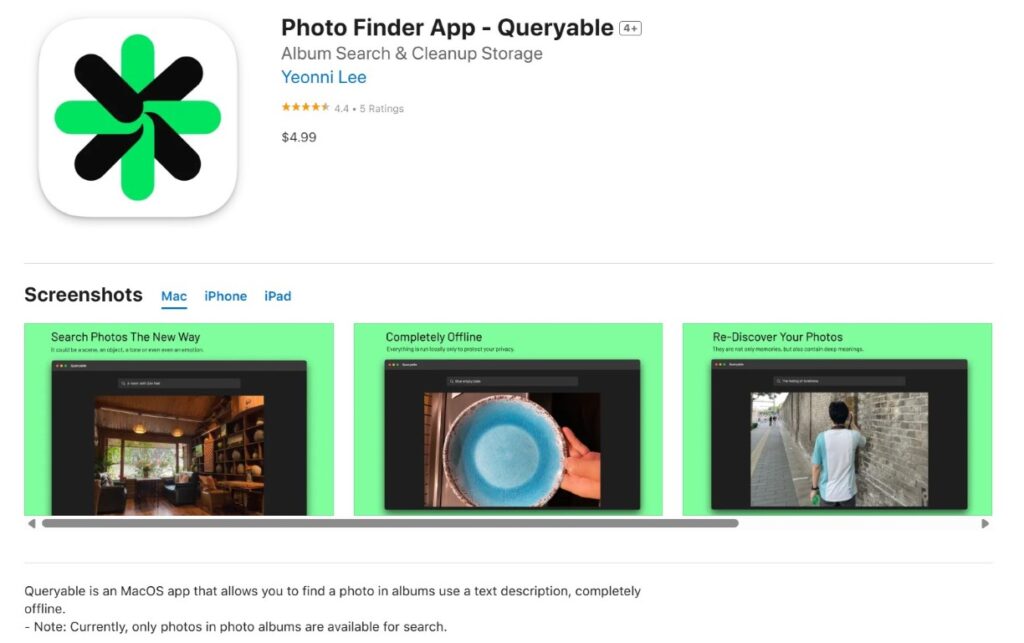
  • Photo Finder App – Queryable – ($5 MacOS, iPad & iPhone app) – this app does not organize your photos but is a great “fuzzy” search tool. Add a word or phrase to Queryable’s search field and it will display photos that match the word or phrase. It uses AI to search through all your photos and finds the matching photos. I’ve only used to a few times but it seems to do the job.

Photography Processing Software

Many photographers use Adobe Lightroom or Adobe Photoshop to process their photos. But since they changed to a subscription model, many of us would prefer software you buy once & own. Adobe’s $9.99/month Photography subscription is what I currently use. But with their recent change in ‘terms of service‘, I’m considering alternatives. I already own some other programs that I often use for specific tasks, like film simulations or black & white processing. But Lightroom & Photoshop are what I am most familiar with.

A list of all Adobe alternatives was compiled & posted on X (Twitter) here by xdaniel. I’ve outlined links below for some Photoshop & Lightroom alternatives I am familiar with.
Some can do most, if not all, of what the Adobe programs do. Some of the free versions look and act a lot like the Adobe programs with similar tools. Others may have a bit of a learning curve because they use different terminology and controls. Fortunately, there are plenty of YouTube tutorials to teach you how to edit photos using these alternatives. Plus if you haven’t used Photoshop or Lightroom, than learning the different tools aren’t an issue.
The listed Adobe alternatives are not limited to Windows PCs. There are universal versions that will work on Windows, Mac, iPad. Most buy-once MacOS apps are available through the App store. Here are the lists of Adobe alternatives, some free, some buy-once:

Photoshop alternatives

  • Free
    • Photopea – free online Photoshop alternative which can connect to Google Drive, OneDrive, & others
    • Gimp – GNU Image Manipulation Program is a free, open-source cross-platform image editor available for Linux, macOS, Windows. It’s a long-running Photoshop alternative with similar capabilities but ‘clunky’ interface.
    • Krita or Inkscape – open-source painting programs that can work on photos and create Photoshop PSD files with layers.
    • Paint.net – (Windows only) once mainly a free Windows Paint alternative, it now has some good photo editing tools.
    • PhotoscapeX – free or $40 Pro Version with extra features. Free version does most basic edits.
    • Apple Photos or Windows Photos – both these free OS programs have some great tools to improve photos.
  • Buy once
    • Affinity Photo – currently $35 for Mac or Windows, $9.29 for iPad or $82 for all three platforms. Really popular Mac/iPad photo processing app and there’s a Windows version.
    • Topaz PhotoAI – Topazlabs merged their separate programs: Topaz DenoiseAI, Topaz SharpenAI, & Topaz GigapixelAI into one program – Topaz PhotoAI. PhotoAI is simpler to use but I miss the flexibility of the individual apps. Edit your photos with single-click simplicity or user-controlled slider bars.
    • Pixelmator Pro – for MacOS only, $50, 7-day free trial

Refer to this icon key to identify the cost of the alternatives >>>
Like Adobe, many have started offering subscriptions for their premium features. But some offer Lifetime subscriptions for a higher one-time price, something Adobe doesn’t.

In my opinion, Affinity Photo is probably the best low cost Photoshop alternative for Windows, MacOS, or iPad, currently 50% off $35 (June 30 2024) for Windows, MacOS; $9.29 for iPad.
But the free & trial options are always worth checking out.

Lightroom Alternatives

  • Free
    • Darktable – powerful, full-feature free alternative to Lightroom but with a learning curve
    • RawTherapee – another cross-platform (Windows, Mac) powerful, full-feature free alternative but with a learning curve
    • DigiKam – strong photo organizer features, similar to Adobe Bridge, with photo editing features & social media tools
    • Lightzone – free Lightroom alternative, now hosted on GitHub after lightzoneproject.org website was retired.
  • Buy once
    • Capture One – a fully capable Lightroom alternative favored by many photographers. A bit expensive ($300 lifetime) unless on Black Friday sale. They also have various subscriptions.
    • ON1 – another popular Lightroom alternative with buy-once and subscription options. On sale today for $50 (June 30 2024 buy-once or wait till Black Friday).
    • DXO Photolab – my favorite Lightroom alternative with excellent Lens correction database, currently on sale 20% off (I bought mine last Black Friday).
    • Luminar Neo – easy to use with single click improvements, but also with user controls if you want to make your own adjustments. It has both subscription or buy-once options.

YouTube video describing all Adobe alternatives based on xdaniels X post

There are a tons of iPhone/Android phone and tablet apps that both take & edit photos.
Some favorites are:

  • Snapseed – a long-time iPhone/iPad/Android app that’s free and edits photos with east to use tools.
  • Adobe Photoshop Express – Adobe offers this for free but you do need a free Adobe account. This is a universal app available for all platforms. Some premium features are behind a pay-wall.
  • Google Photos (Google Drive) – free Google universal app that has the ‘magic eraser’ & other photo editing tools. Download/upload, organize, share, edit your photos. Of course, it requires a Google (ie gmail) account.
  • Too many others to list – many social media apps also will edit images before posting. Also cell phone video apps.
  • VLC Media Player to grab still frames from videos.

Don’t ignore free software from your camera manufacturer. They are optimized specifically for your camera’s raw photographs and features. Some are very useable offering photo importing, organizing & basic editing. Some are primarily designed just to transfer images from your camera to computer. All except Nikon, require your camera’s serial number to download their software or firmware.

  • Nikon offers NX Studio free for Windows or MacOS, which imports images from Nikon cameras to your computer and has basic photo editing features.
  • Canon offers Digital Photo Professional 4.18.10 for Windows, a free image importing and processing program. They also offer a MacOS version
  • Sony offers Imaging Edge Desktop and PlayMemories Home for Sony cameras. Imaging Edge Desktop can be used for editing raw images; PhotoMemories is mainly for importing and organizing your Sony camera photos. Sadly, Sony used to offer Capture One Express. Their free version of Capture One for only Sony cameras. Capture One is a full featured Lightroom replacement.
  • Fujifilm offers their free FUJIFILM X RAW STUDIO which imports their raw image from Fujifilm cameras. It has very basic editing and export capabilities.
  • Olympus/OM Systems offers OM Workspace for Windows or MacOS
  • Panasonic offers a basic photo import & editing program PHOTOfunSTUDIO for Windows or MacOS

Astrophotography Gear & Software

Some members of the UCSD Photography Interest Group are interested in astrophotography. This can be a challenging genre to master. Here are some tools & information that may help photographers create better images of the night sky.

Night sky photography requires a fast lens to help keep the ISO & shutter speeds as low as possible. Star movement or streaking occurs if the shutter speed is too long for the focal length. One tool that helps with this is a star tracker. I use a MoveShootMove Star Tracker and it allows minutes-long exposures (I use 2mins, ISO 1600, f4) with no star movement when properly align with Polaris. This is a very compact, affordable, simple to setup and use rechargeable device you attach between your camera and tripod. There are several affordable star trackers but it’s also possible to layer multiple shorter exposures and composite a night sky image.

If you do not use a star tracker, then image stacking software can help improve the image quality by reducing the noise. Image stacking software can also improve star-tracked image quality even further. Programs like Sequator will overlay and align several images to improve the resolution & noise of the night sky & stars. But if there is a foreground subject, it will require a separate single exposure to merge with the Sequator starry sky image.

  • Sequator for Windows PCs is a free program that’s fairly easy to use plus there are a variety of tutorials available online especially on YouTube.
  • Starry Sky Stacker for MacOS is a buy-once app popular for Macs. Similar to Sequator, it will stack and auto-align multiple night sky images.
  • StarStaX for Windows or MacOS is a free program for image stacking and blending primarily for Star Trail Photography.
  • StarXterminator & NoiseXterminator are paid plugins for Photoshop or PixInsight from RC-Astro.com. They can improve your processing of Milky Way images by separating the stars & Milky Way into separate layers. See this tutorial for more info: https://ucsdphoto.group/2024/05/processing-starry-images/
  • StarNet++ is a free executable that can remove stars from your astrophotography image. Like StarXterminator, it results in a starless 16bit tiff of the Milky Way. This allows the starless Milky Way tiff to be imported into Photoshop as a layer and processed independently from a stars layer.
  • Siril – is a free, popular technical night sky image processing suite for Windows, Mac, & Linux. But it requires watching some YouTube tutorials to understand how to get the most out of this powerful, free program designed by astrophotographers. You can add StarNet++ star eliminator as a scripting option.
  • Links & info to other programs like DeepSkyTracker can be found here: https://www.startools.org/links–tutorials/free-image-stacking-solutions
  • Other information on how to set your digital camera for astrophotography can also be found online at links such as https://www.startools.org/links–tutorials or on YouTube.

Film Simulations

Fujifilm cameras with their built-in film simulation settings are currently very popular for quickly generating images (jpgs) for social media. Other camera makers have camera menu settings or profiles such as ‘Vivid’ or ‘Monochrome’ that produce in-camera jpgs with similar results. But Fujifilm cameras take the color science further, by adding ‘analog film’ simulations. These result in photos that look like they were taken using a film camera using Fuji or Kodak roll film. These film simulation effects can also be applied to videos shot with Fujifilm cameras.

What are film simulations? They are basically a manipulation of the color and contrast to emphasize different color spectrum. Some presets even add grain to truly emulate particular film characteristics. Adjusting in-camera digital sensor settings can result in a photo that emulates a particular film stock. When I shot film, I chose Fuji film when I wanted to enhance the green; I’d use Kodak Velvia for neutral flesh tones; Kodachrome for reds; Ektachrome for blues.
There are websites dedicated to different camera ‘film recipes’ that photographers can program into their non-Fujifilm cameras. There are additional recipes for Fujifilm cameras (for specific sensor generations) that can also be added. Most newer digital cameras have custom settings that can save these recipes then apply them to jpgs when dialed-in.

Sources for film simulation presets:
Of course you can Google ‘Film simulation presets‘ and find many available. The ones I’ve tried are:

  • FreePSDvn.com – has many free presets organized by style or effect. They ask for a coffee donation if you find them useful.
  • DXO Filmpack – commercial film simulation with a 30-day trial. This is a great set of presets especially if you want to try nostalgic film processes as well as Agfa, Fuji, Illford, and Kodak film simulations. Wait for Black Friday when this goes on sale.
  • Nikonpc.com – this is a resource for the Nikon shooter. Unlike digital darkroom presets, this site has in-camera film simulations you can program into your Nikon camera. Then your Nikon can generate jpgs in-camera like Fujifilm cameras. Film simulations are selected from the in-camera menu and can be programmed to the custom buttons.
  • FujiXWeekly.com – has a collection of film simulation recipes that are compatible with Fujifilm cameras, sensor-specific: X-Trans V, IV, III, II, & I. They also have an app (iOS or Android) with recipes ie settings that can be programmed into Fujifilm cameras and saved.


Why use film simulations when shooting digitally? Digital cameras will produce neutrally-toned images based on the camera manufacturer’s color science. People often choose a camera based on this – some people prefer Sony’s color science, others like Canon or Nikon, especially in regards to skin tones. This is especially true for photographers generating jpgs directly from the camera not wanting to wait or post-process.
Some photographers, like myself, prefer to shoot jpg+raw. Raw format offers the most information & potential for post-processing in a digital darkroom – computer software like Lightroom, Adobe Camera Raw, Capture One, or PhotoLab. But camera-generated jpgs are handy to include since they are available to share immediately without post-processing.
My current workflow is to shoot raw and process the photos in Lightroom & Photoshop. This results in (potentially) the truest representation of what I was photographing. Allowing me to maximize the dynamic range, adjust the color, & balance the exposure of the scene. Any experienced Lightroom or Photoshop user can create their own presets and save them. These presets can then be applied at different percentages (<100%) and their intensity or effect adjusted using sliders.
I started photographing using Nikon film cameras a long time ago. So lately, I’ve been curious about making digital photos that emulate analog film from that time. The ability to generate images with analog film color science applied can results in photos that are more of an artistic interpretation. At least in my mind. So lately, my post-processing is to start with analog film presets professionally formulated then adjusting settings after their application.
Buying a Fujifilm camera and using their built-in film types is a very popular practice for photographers interested in analog film simulation. But, if like me, you are invested in another camera system. You can find film simulation presets (many free) that work on raw images or jpgs from any camera. I can shoot normally – raw+jpg – and in the digital darkroom (Lightroom) apply different film simulation presets after I’ve edited the raw image. This allows more flexibility than in-camera film simulation jpgs by allowing you to try different film simulations on a single (edited or unedited) image. You lose the immediacy of in-camera jpgs being uploadable to social media. But you can experiment with different film simulations and find the one most appealing for the subject matter – flesh tones for example.

Here are some results


Wes Anderson Presets (for @accidentallywesanderson)


Other Film Simulations

HEIC to JPG Conversion

The latest Apple iPhone camera format has a more efficient algorithm for storing image information in less space. Unfortunately, unless you work regularly in the Apple environment – MacBook, IPad, IPhone – the format may be unviewable. These are hopefully temporary growing-pain for this new efficient image format as more and more photography programs accept the new format. In the meantime, there are several workarounds to work with or convert HEIC to JPG:

  • HEIC to JPG (for Windows, free)      https://www.copytrans.net/copytransheic/
    I find converting the HEIC to JPG to be one of the easiest solutions and this free utility makes it pretty easy to convert multiple heic to jpg photos.
  • In Windows 10/11, you can convert a HEIC by viewing the photo in Windows Photo, usually accessed by double-clicking the heic file. You may need to install Microsoft Window’s free file extension:

then click the … in the upper right corner and ‘save as’

then select ‘jpg’. This is easy but if you are doing more than one photo, you’ll have to repeat the process for each image.

  • Microsoft Windows Store has a bunch of free and paid apps that will convert HEIC to JPG if you want more features:

Google ‘HEIC to JPG’ and there are plenty of articles that explain many ways to convert HEIC to JPG. I ended up changing my iPhone image format to JPG to eliminate the need to do the conversion since I post many photos online. Once HEIC works with WordPress and browsers, it will become my format of choice. But unitl then, the space savings of the new format are not compelling enough to add the inconvenience of the conversion step.

Googled “HEIC to JPG’ articles: How-To-Geek Article & Tom’s Guide Article