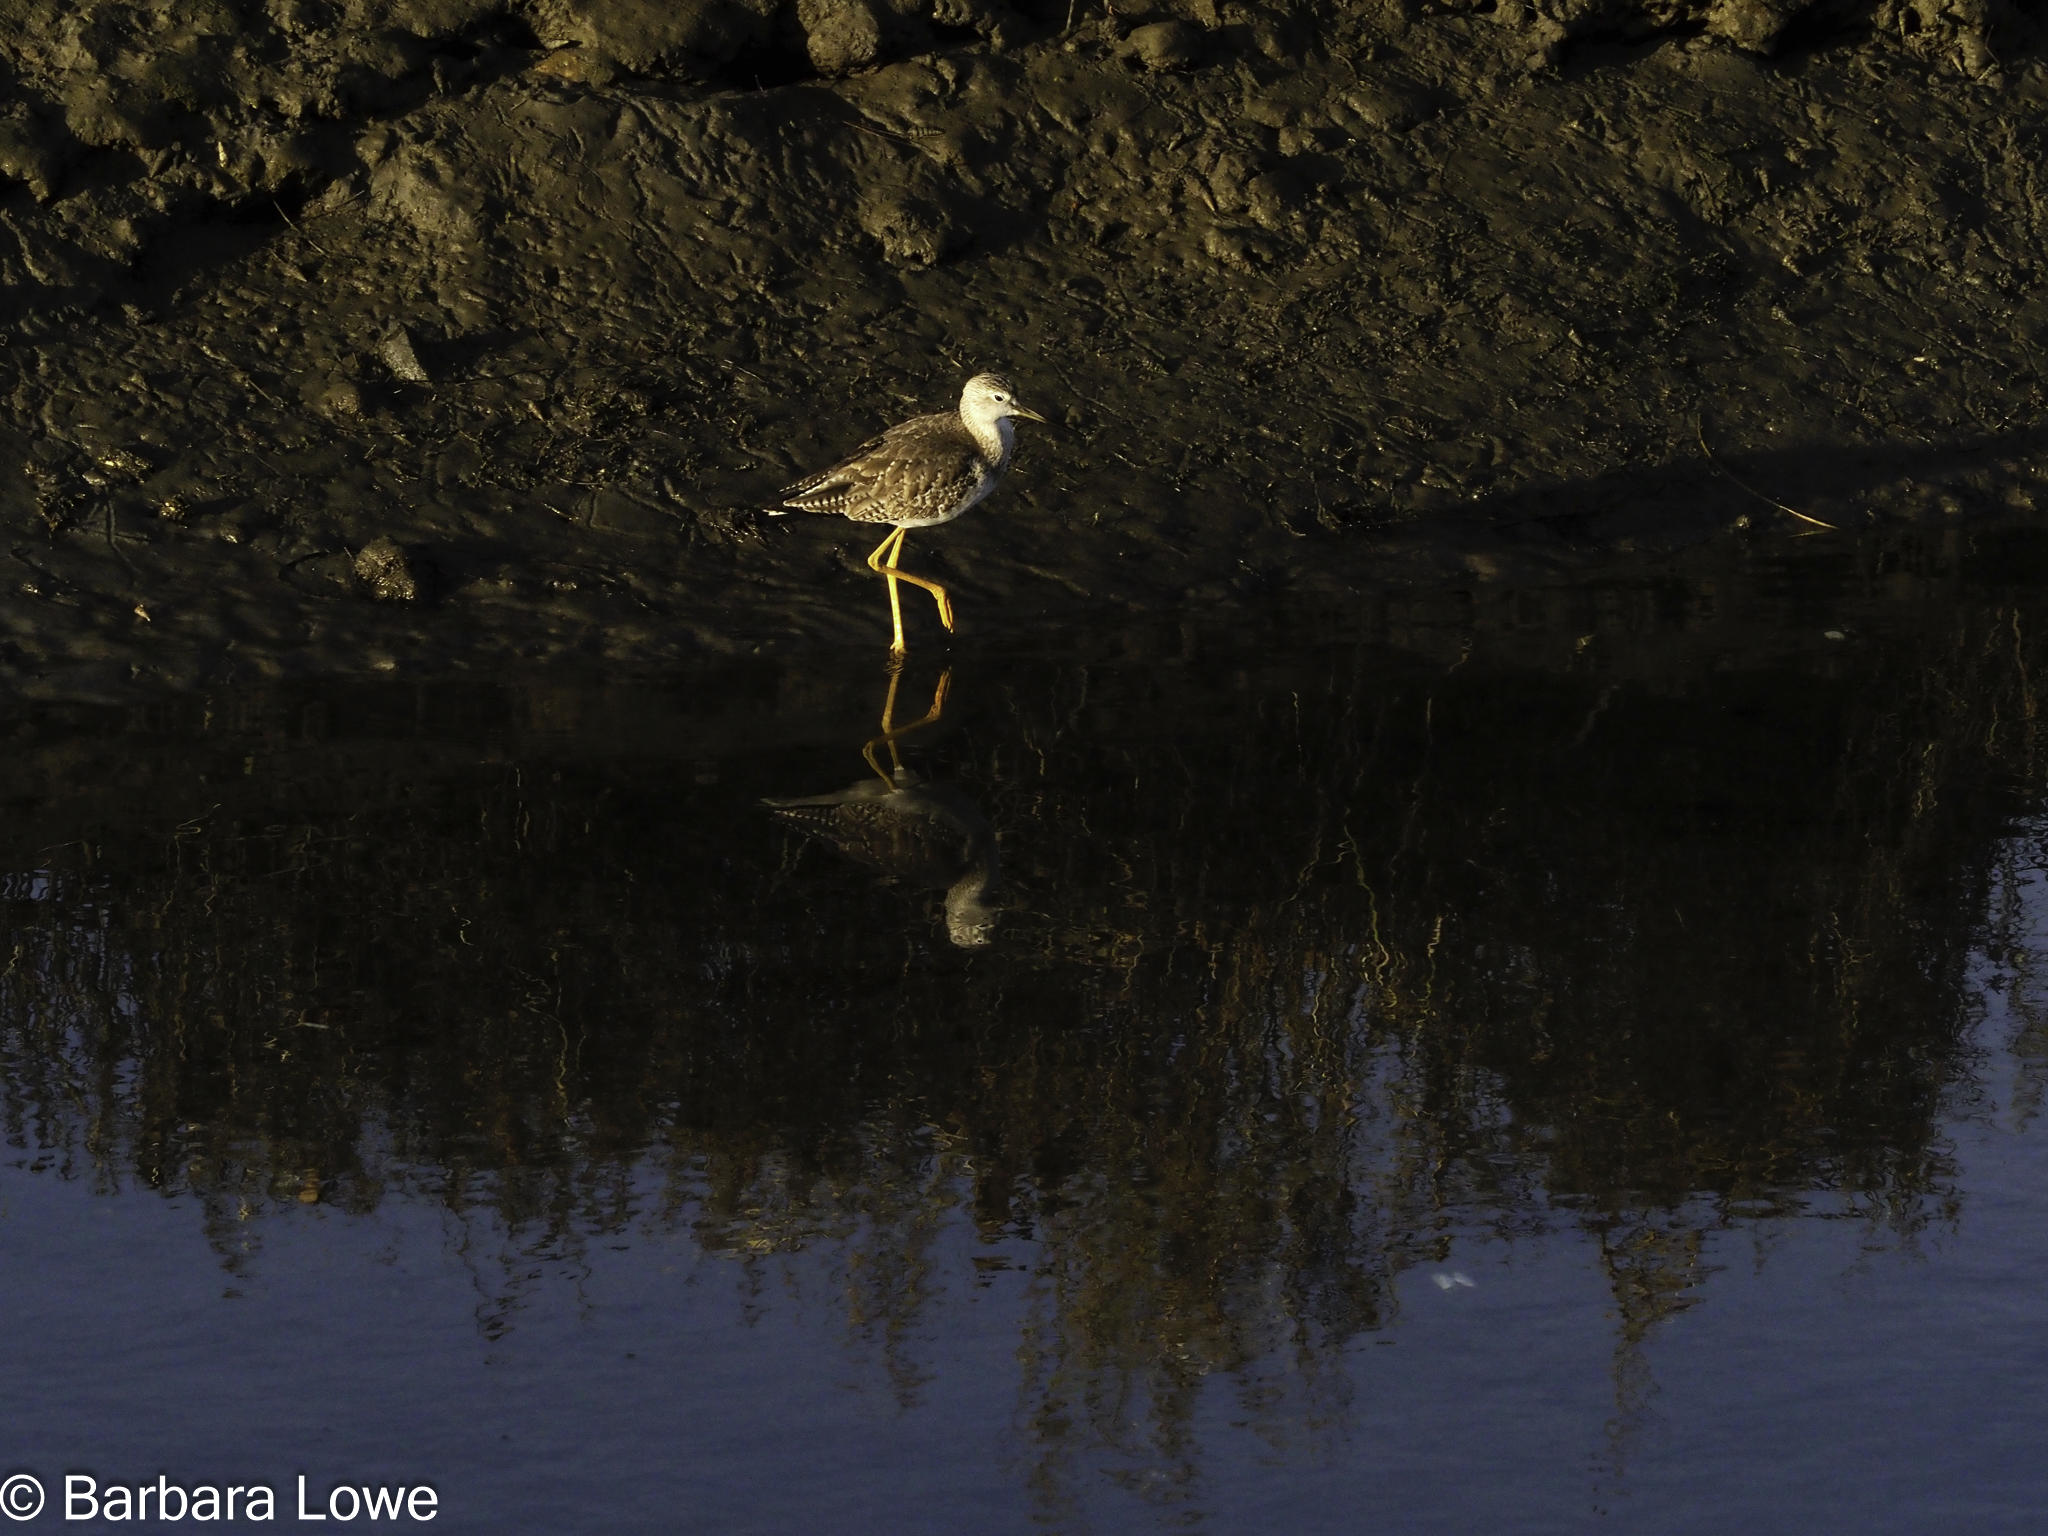
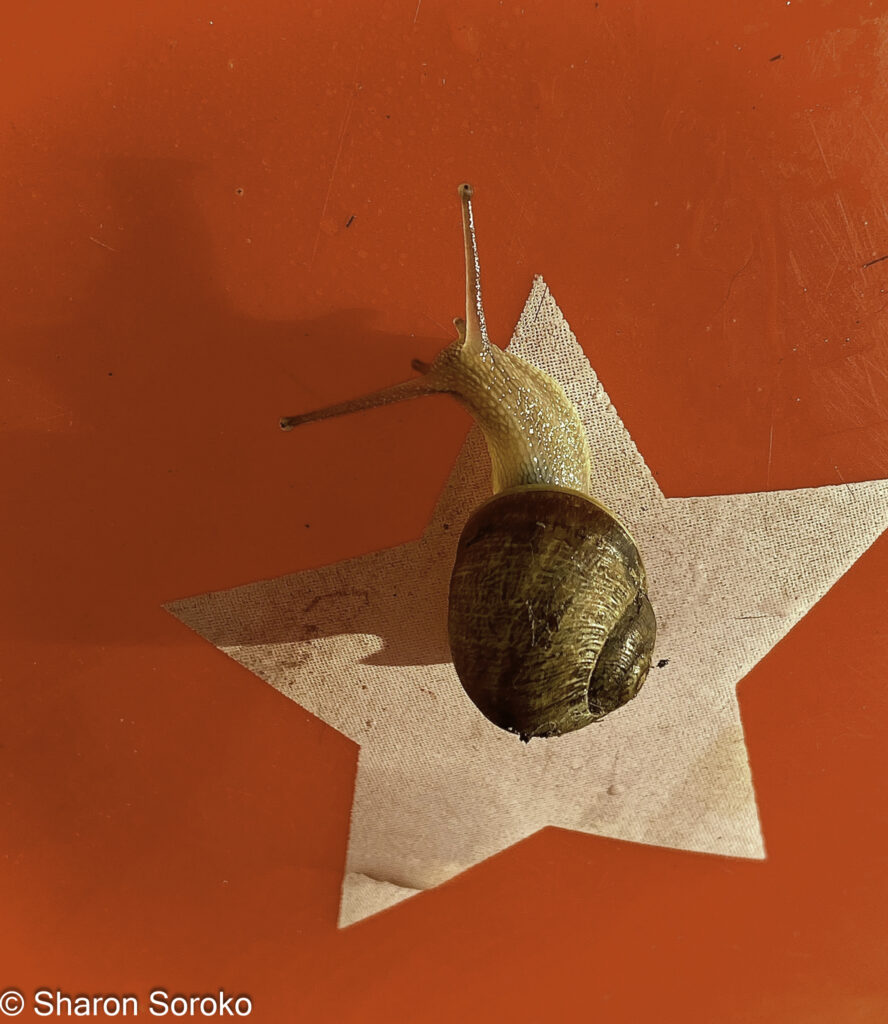
This photo group meeting’s themes were “reflections” and “komorebi” (light through foliage). Participants shared their favorite images that fit the themes and were of current interest.
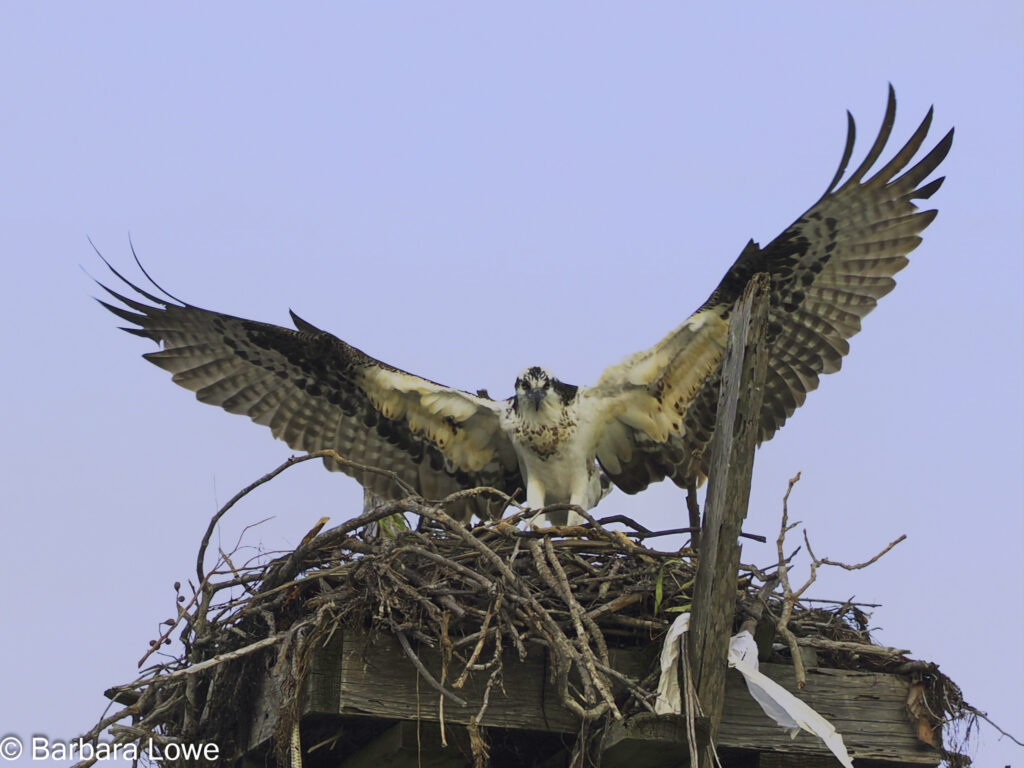
Barbara


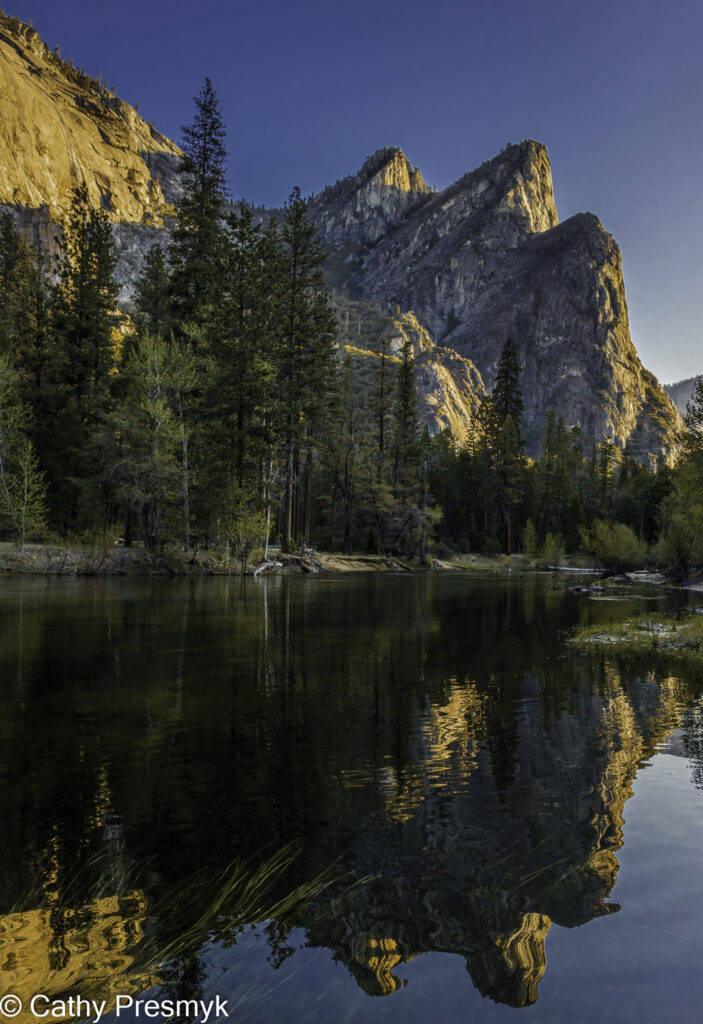
Cathy


Gary


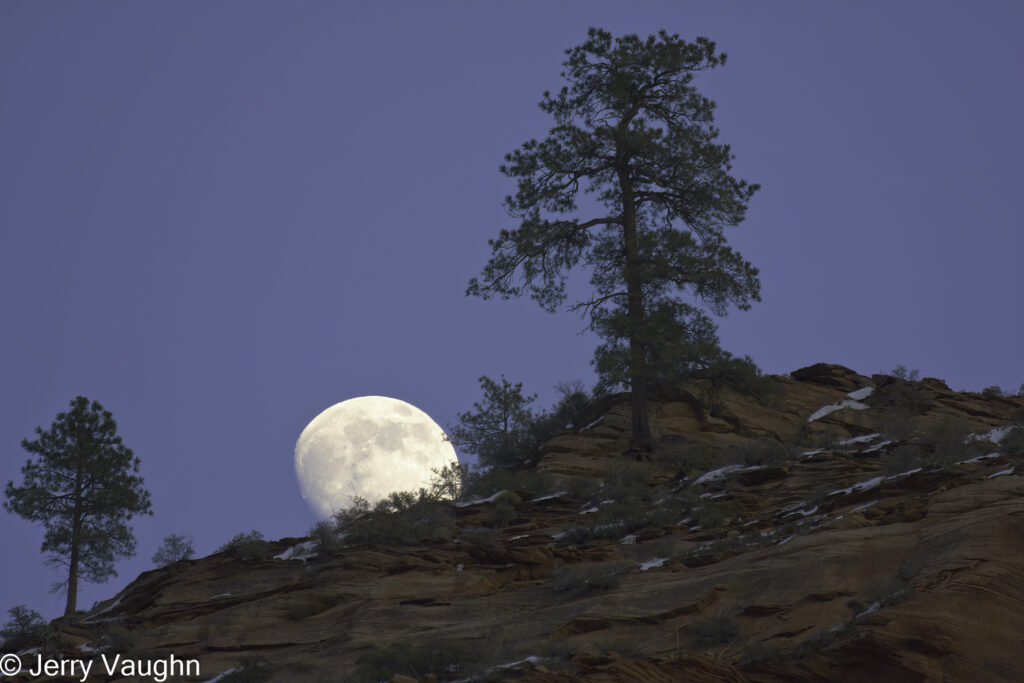
Jerry


Jim


Sharon


This photo group meeting’s themes were “reflections” and “komorebi” (light through foliage). Participants shared their favorite images that fit the themes and were of current interest.
Barbara
Cathy
Gary
Jerry
Jim
Sharon
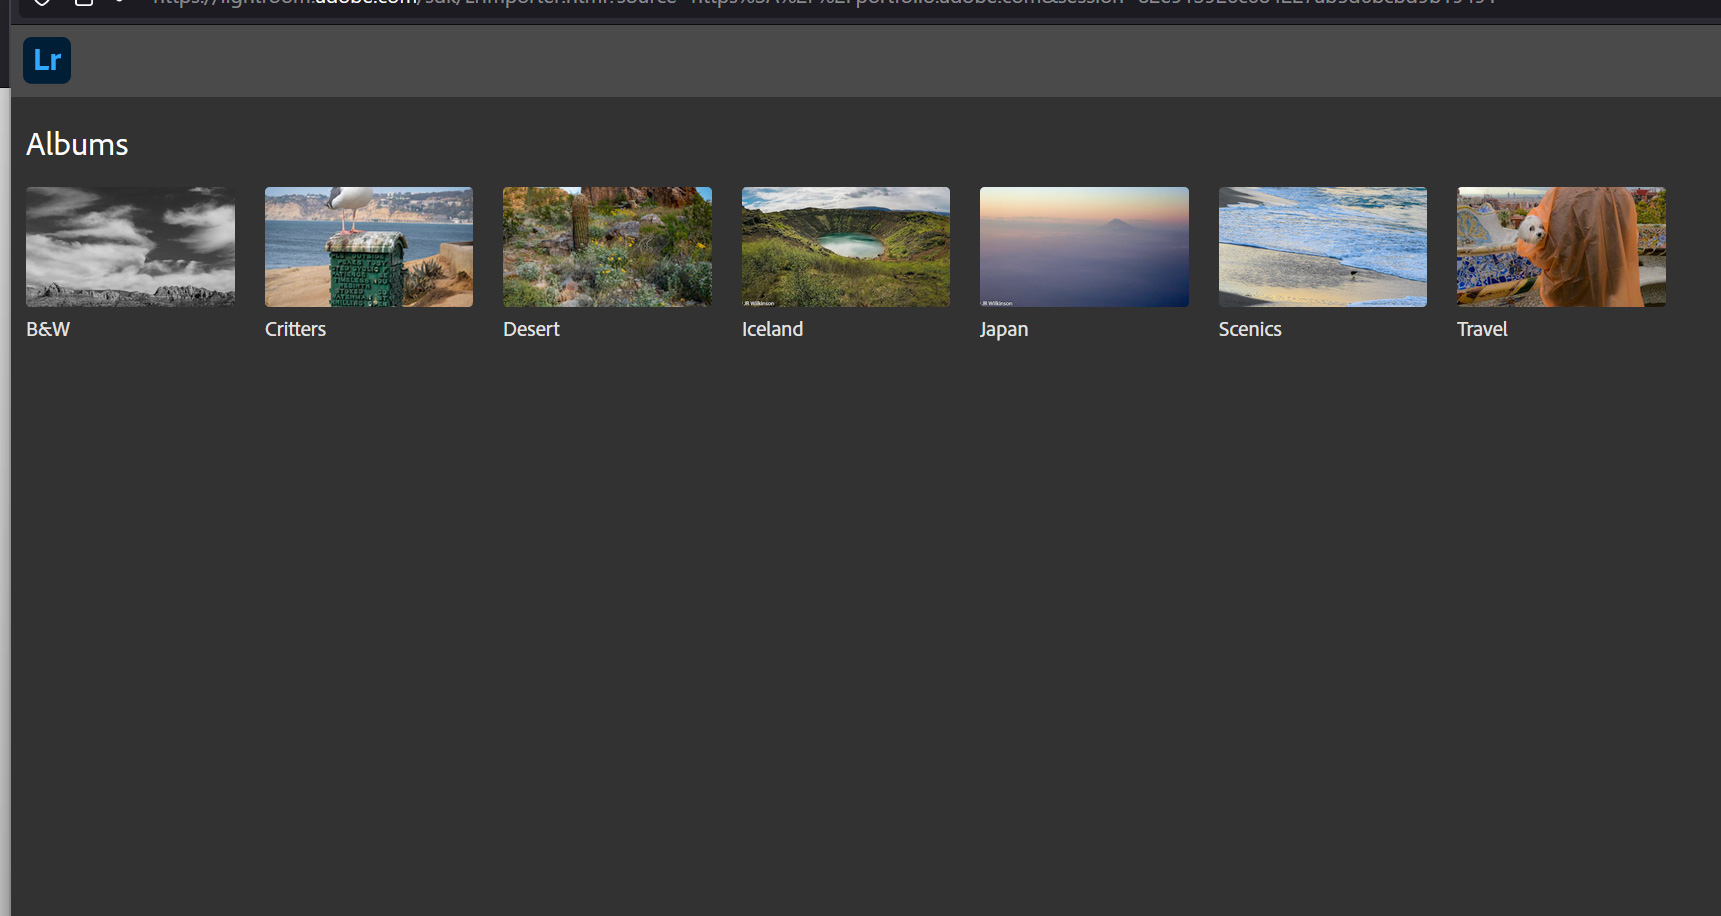
If you subscribe to Adobe Creative Cloud, you can create a free online portfolio. It’s not really free since it requires a subscription but it is a nice addition to their software suite.
There are plenty of YouTube tutorials on how to setup an Adobe portfolio website:
https://www.youtube.com/results?search_query=adobe+portfolio+for+photographers


Or you can follow the instructions below to get started, it’s easy if you’ve created web content before:
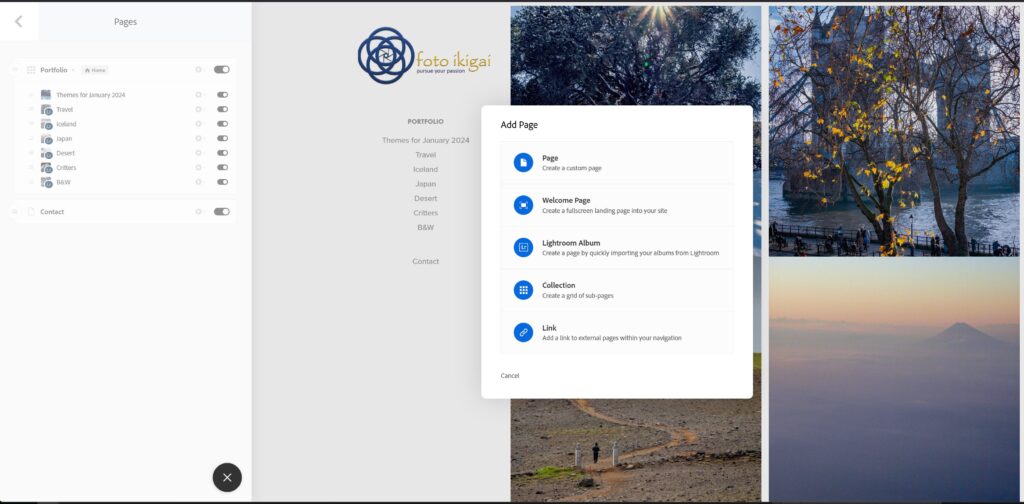
To create a Page, click the blue circle Add Page + in the upper left. Then select the type of content – I’ve been using Lightroom Album.
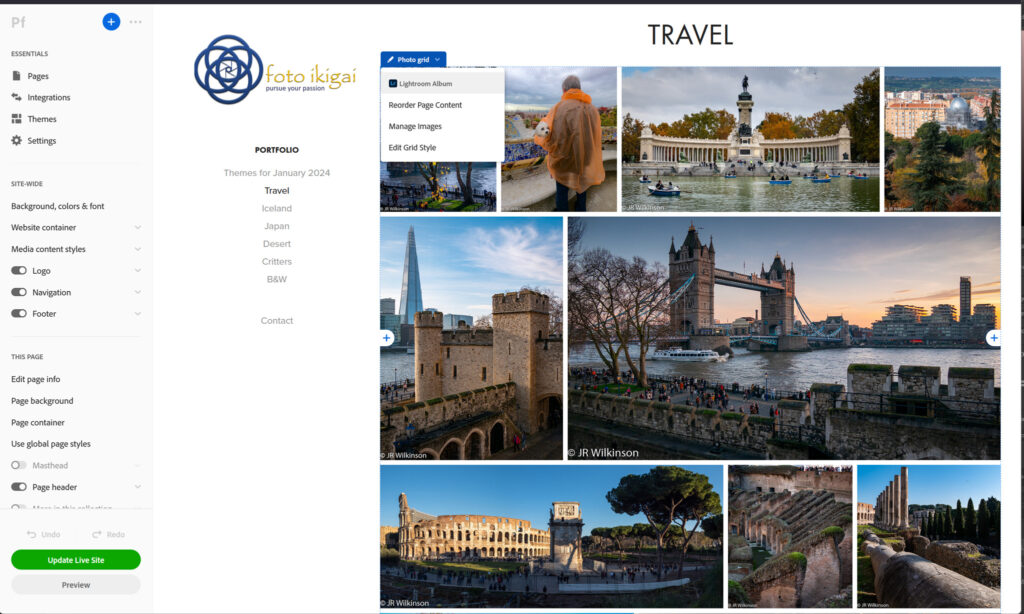
Once you create your portfolio pages, there are a few tips to reorganize your images. In the page editor, there are blue boxes in the upper left corner of each webpage element. Single-click these boxes for options on reorganizing the gallery.
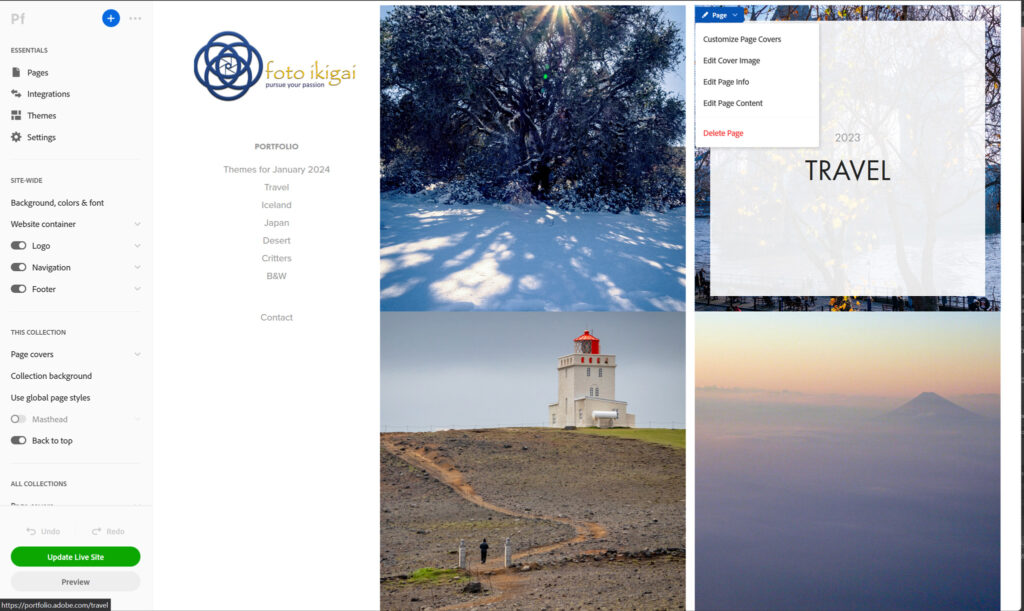
If you choose not to have a cover page and end up with a collection of album thumbnails. You can change which photo from an album is the cover image. Hover over the cover image you want to change, single-click the blue box labeled Page, then Edit Cover Image. Select the new image from the photo album to use as the cover then click Update Live Site to save the change.
As long as Adobe keeps the webhosting feature part of the Creative Cloud subscription. I think it’s a great add-on to their powerful photography, video, and graphic art software suite. 100gb of storage is plenty unless you store full-resolution images. They offer additional storage for a price of course. I’ll keep using Adobe myportfolio and assess its performance compared to independent webhosting. So far it looks pretty promising although the template themes are limiting.
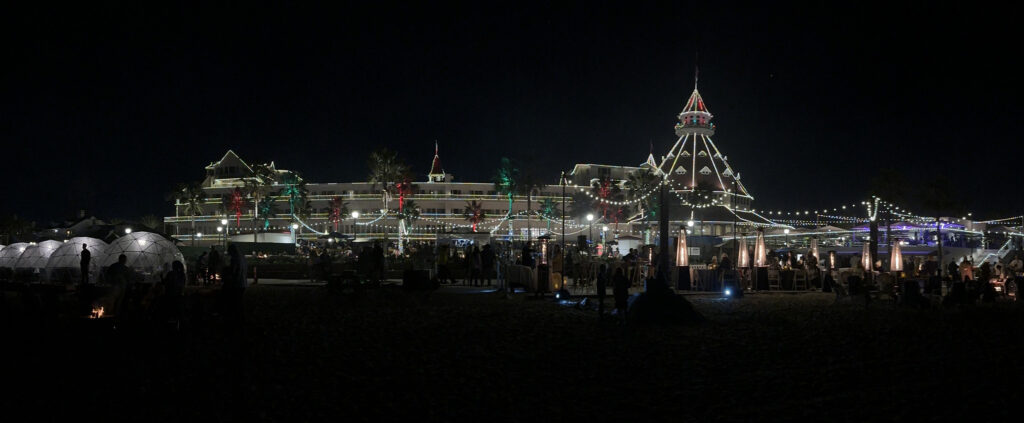
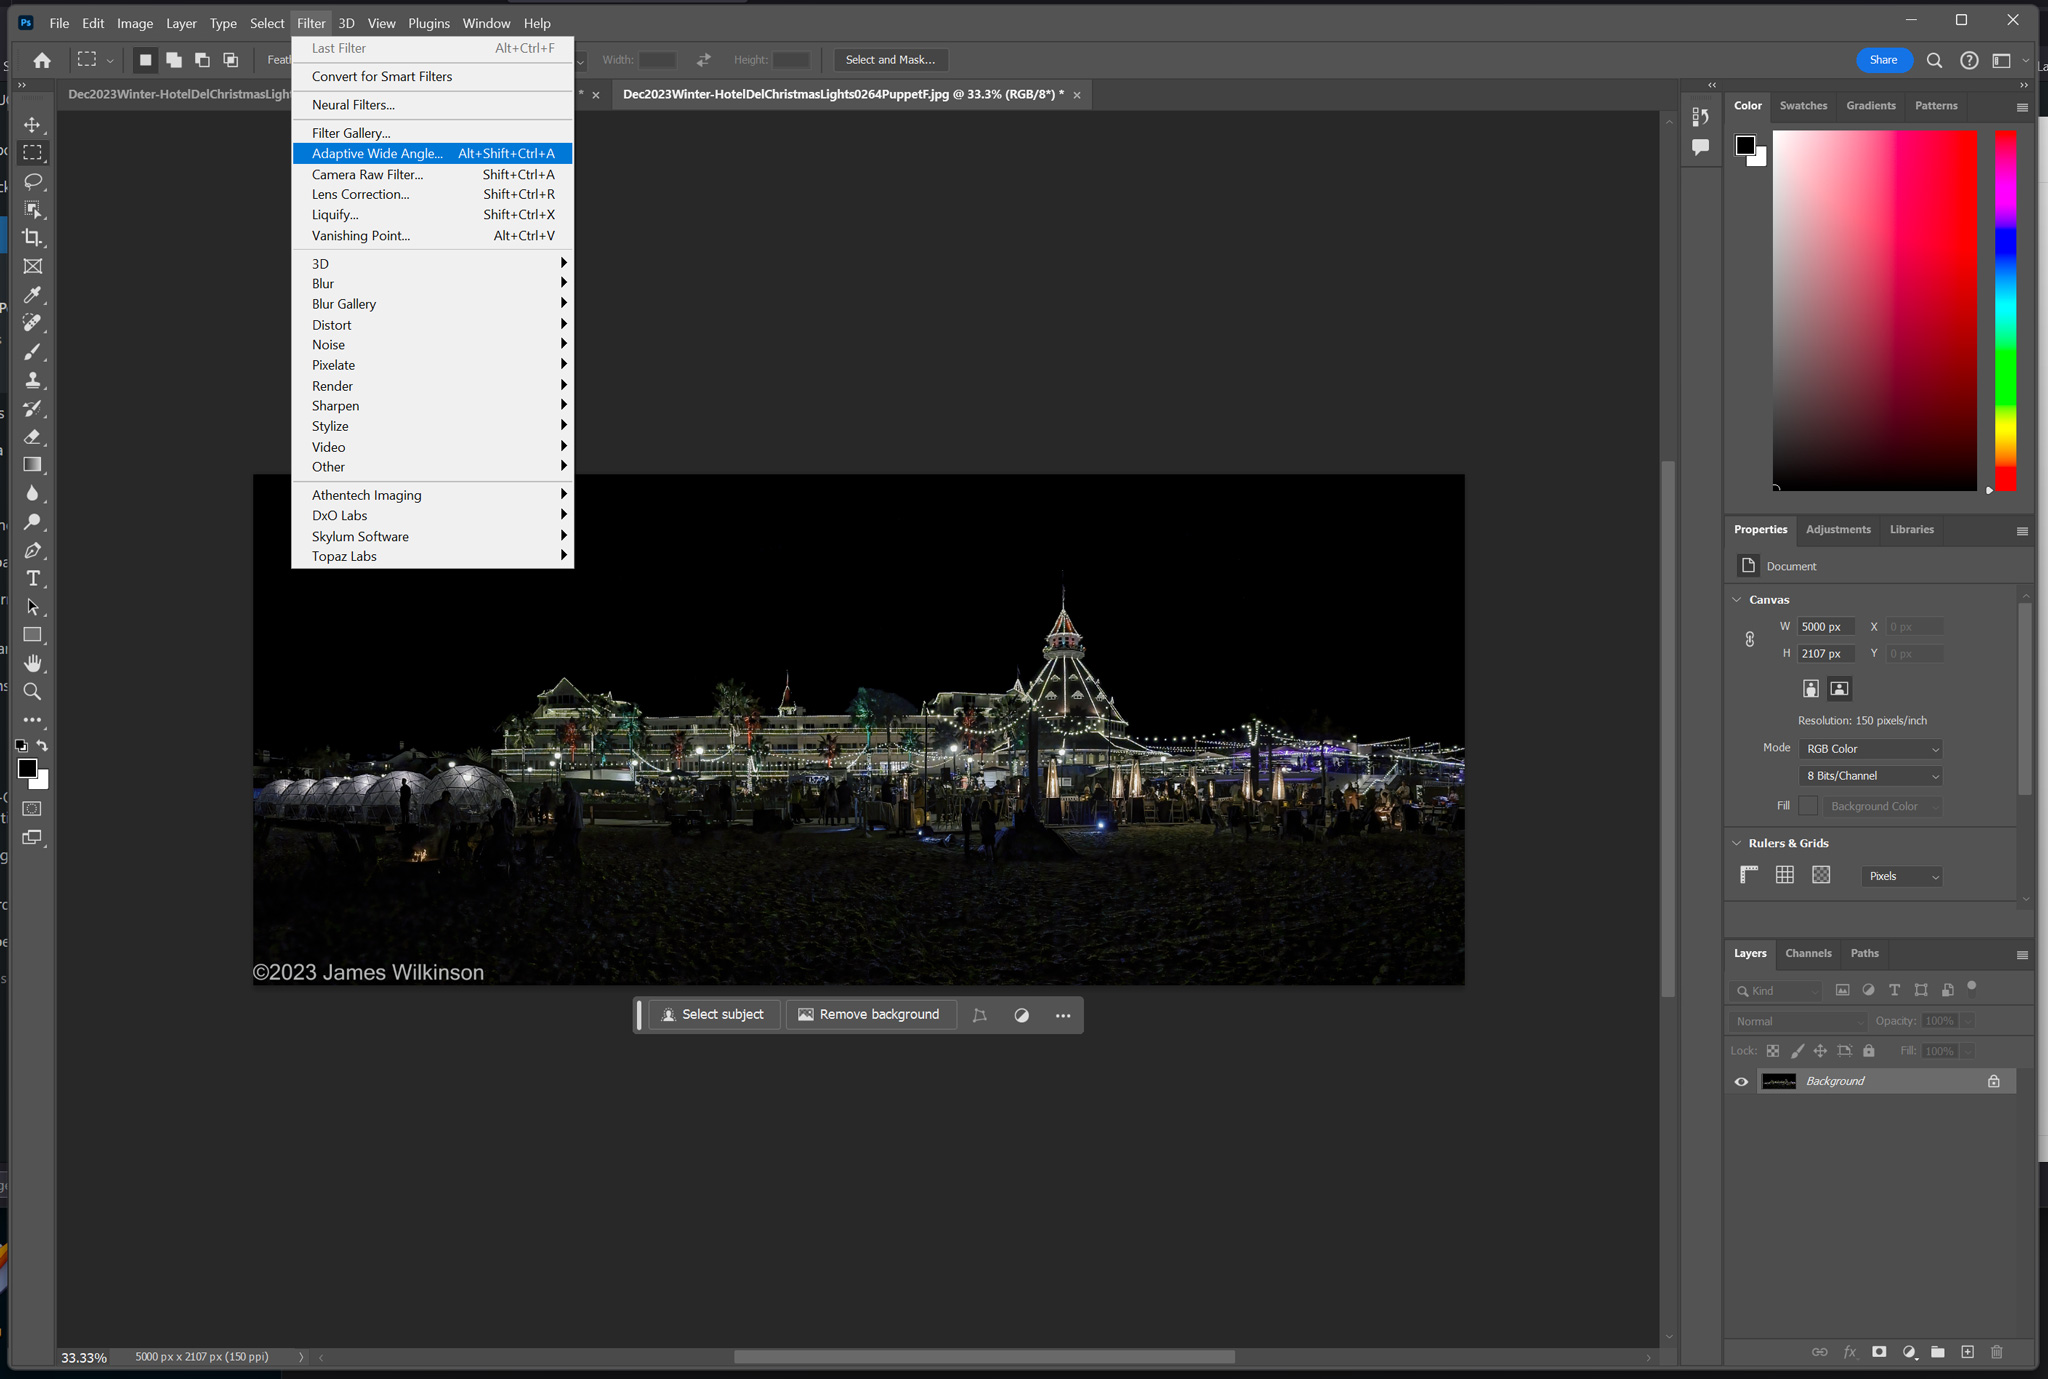
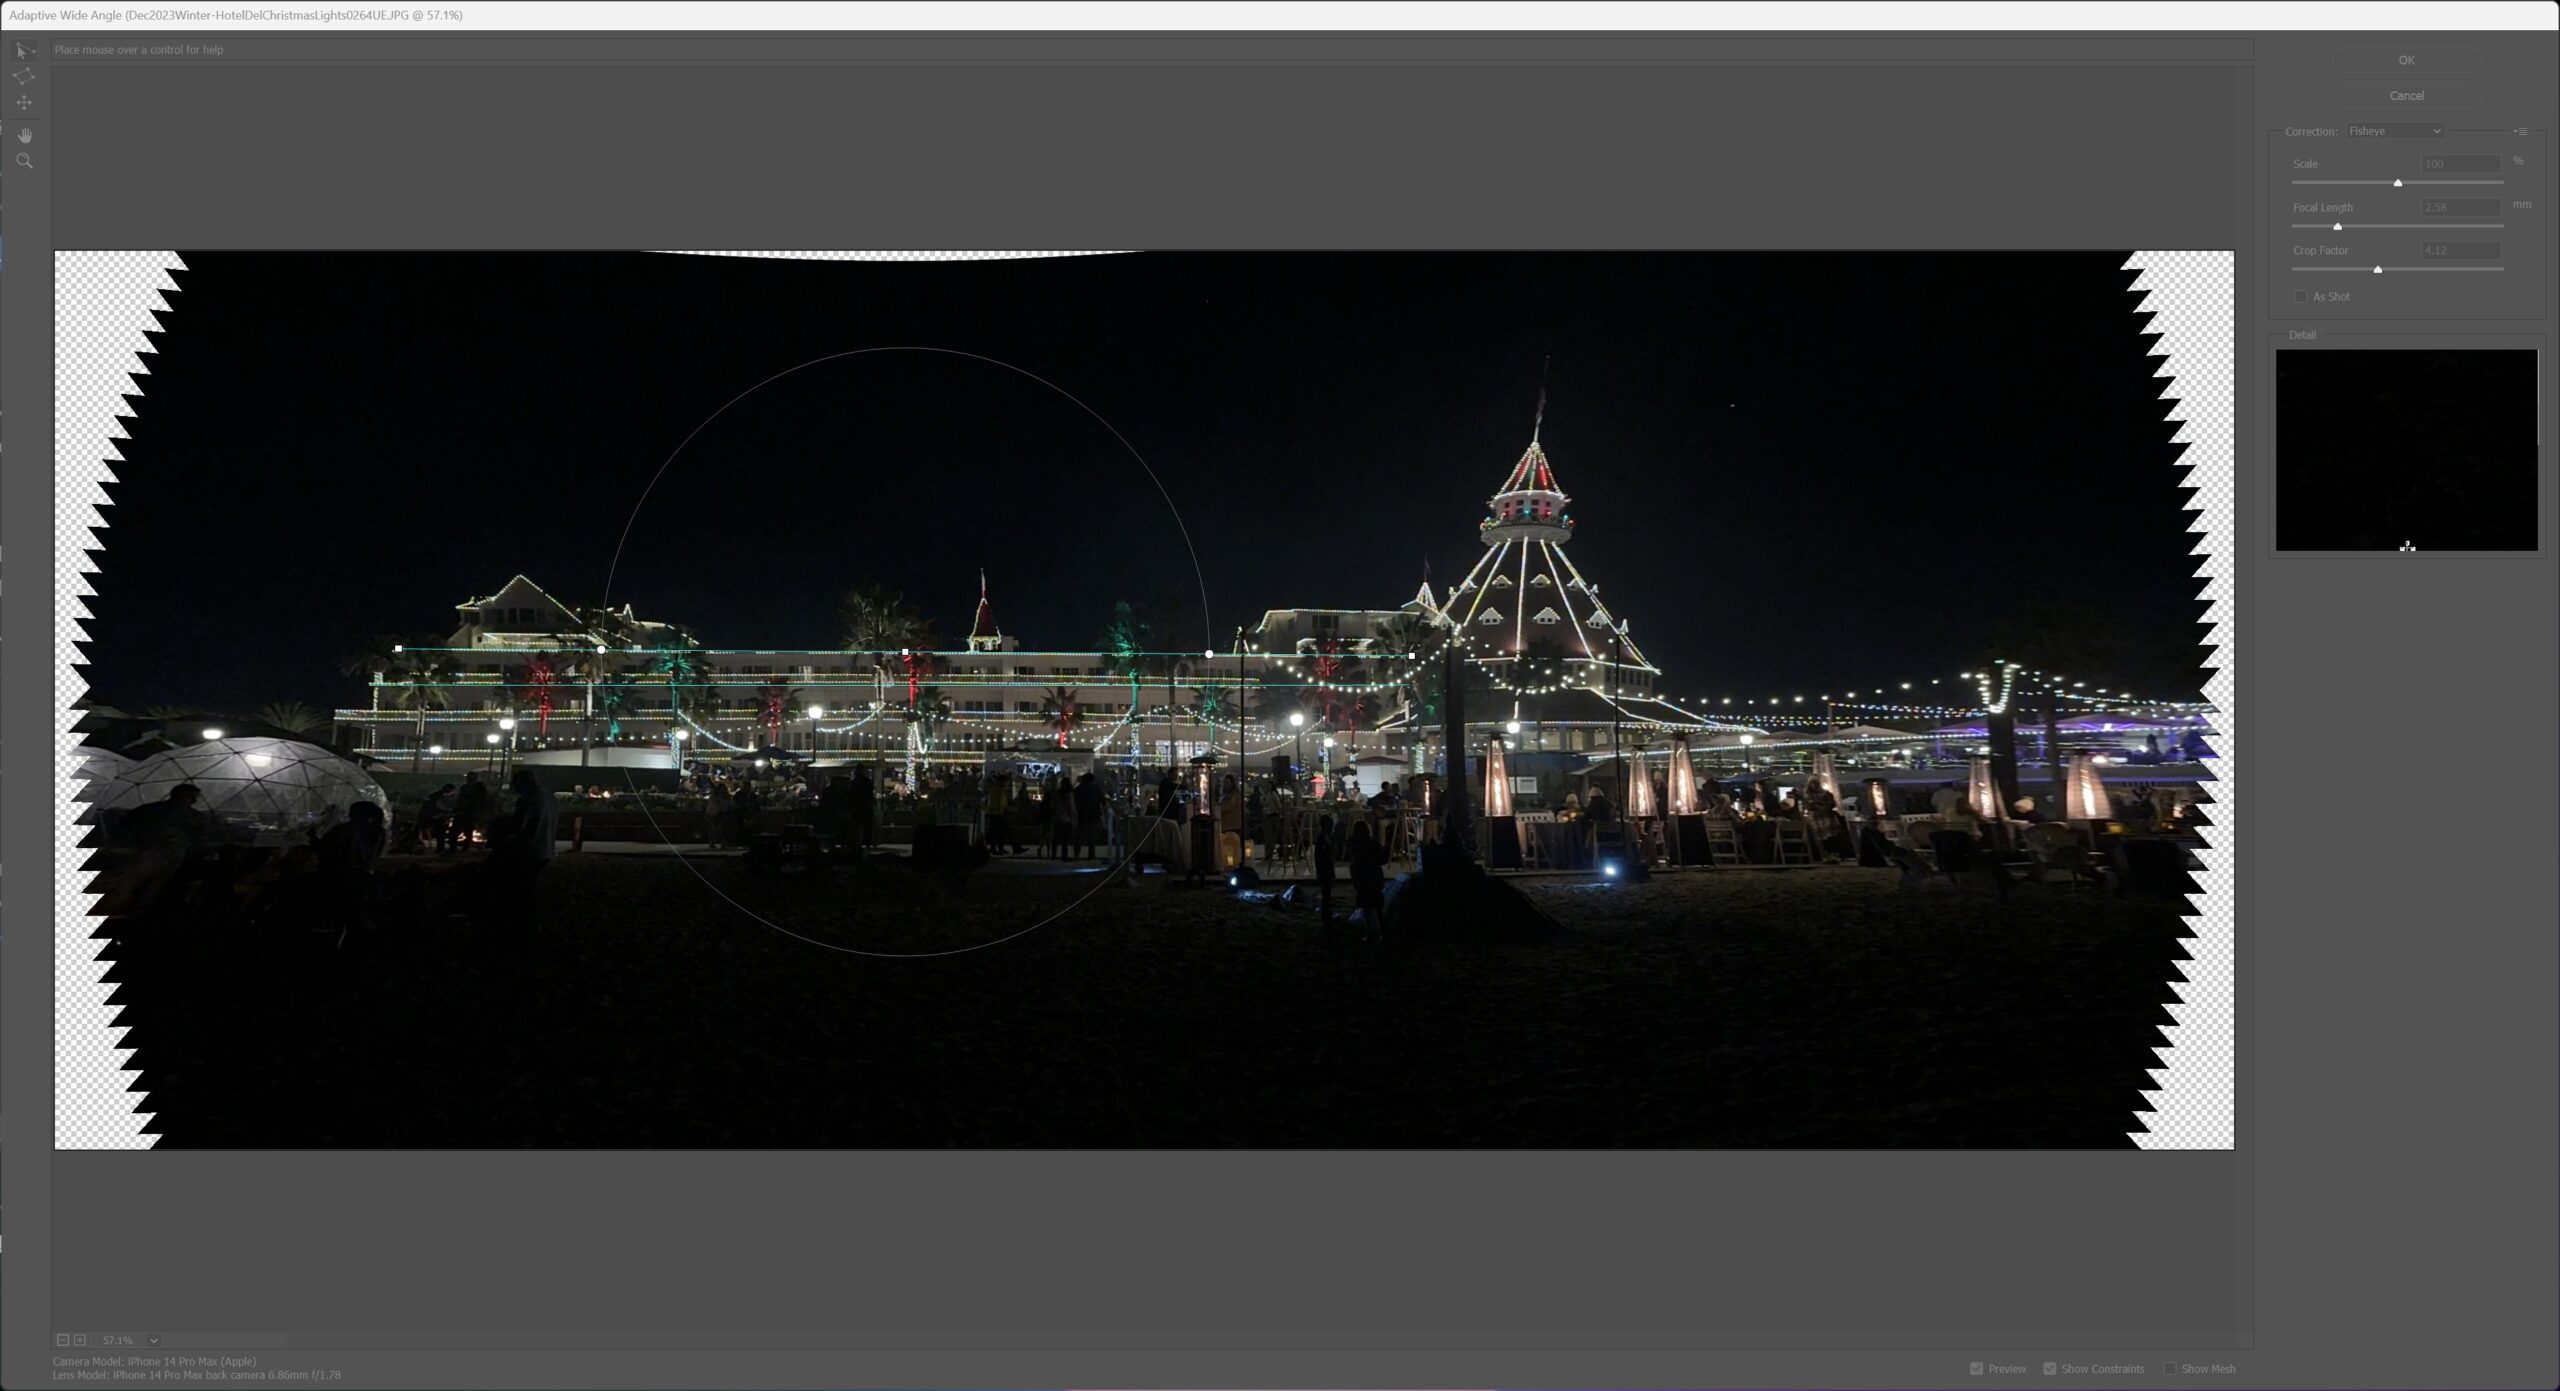
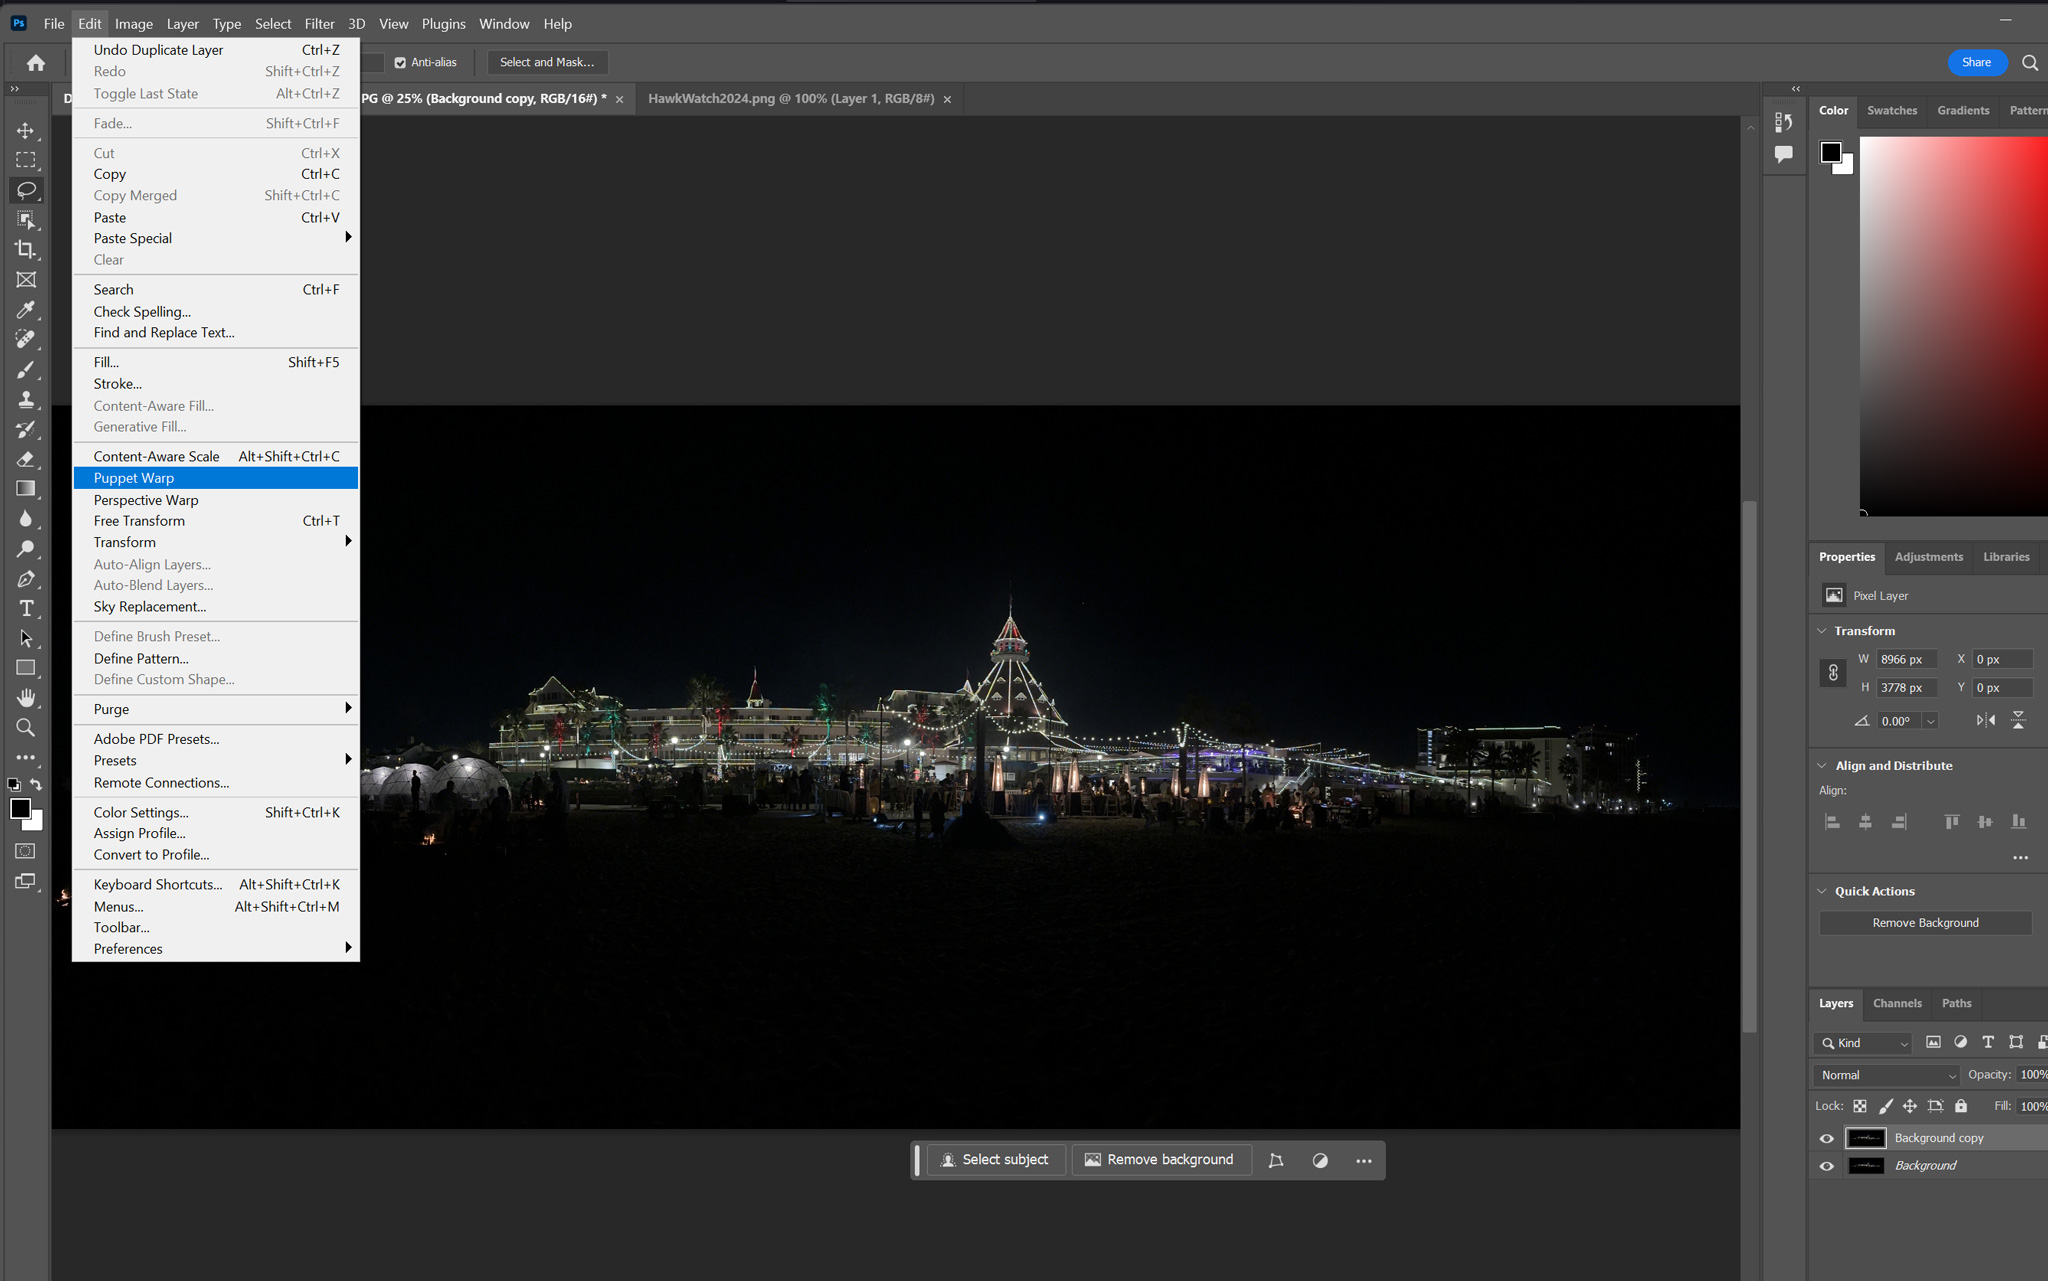
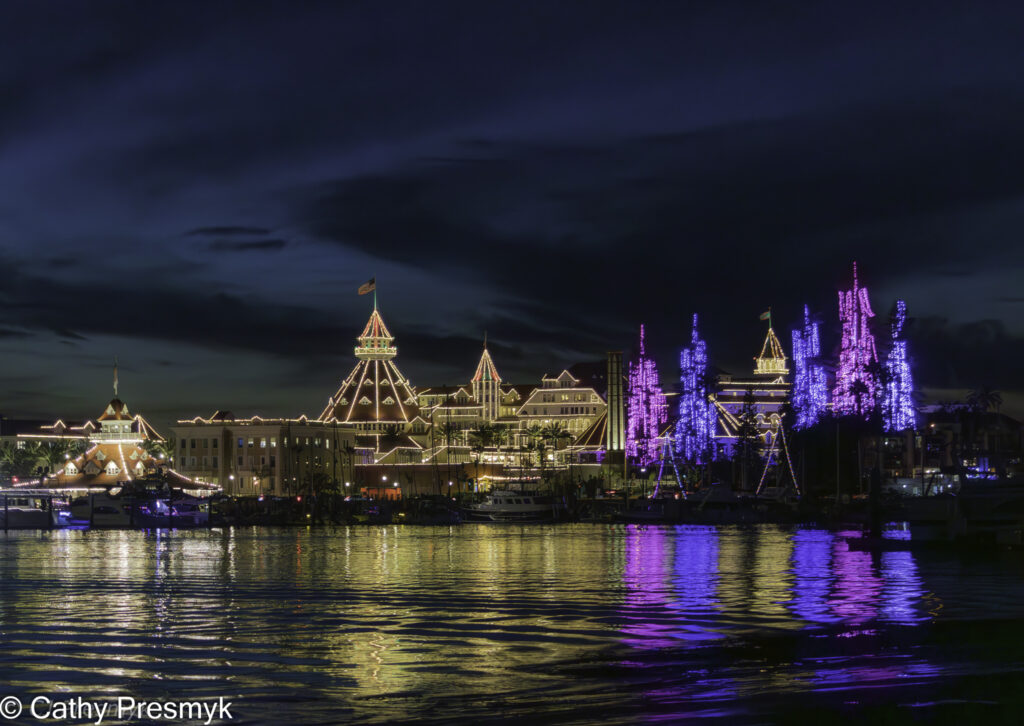
I enjoying taking panoramic photos with my cameras. iPhone photos, when held level, look pretty good. But sometimes an iPhone or stitched panorama is has barrel distortion and is bowed in the middle. If you google how to repair such issues, the search will recommend using Photoshop’s Filter-Adaptive Wide Angle. This can straighten the center of the image but can cause side-effects on the left and right sides. Photoshop’s Edit-Puppet Warp can correct specific areas of the image, leaving the rest unaffected. Here is an example of an iPhone Panorama with both corrections applied.
Note: these correction require a working layer (ie background copy) so if the controls are greyed-out. Create a background layer to activate these commands.
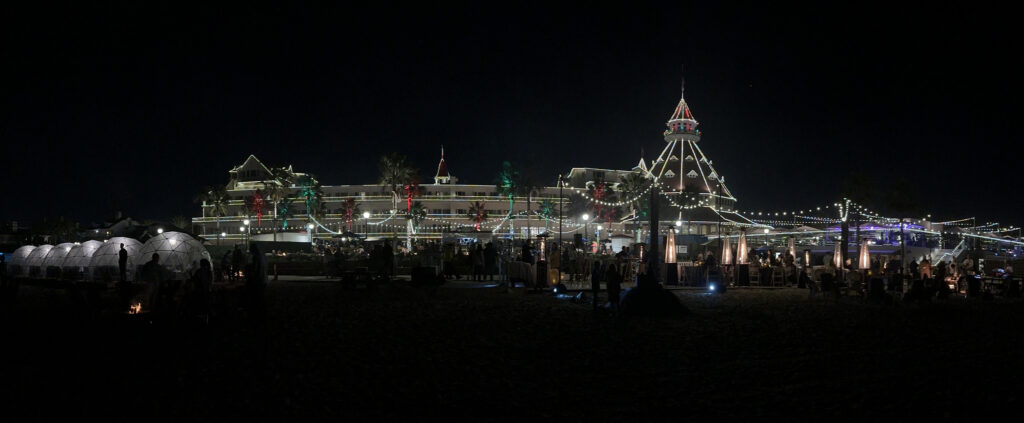
iPhone Hotel Del Coronado panorama uncorrected
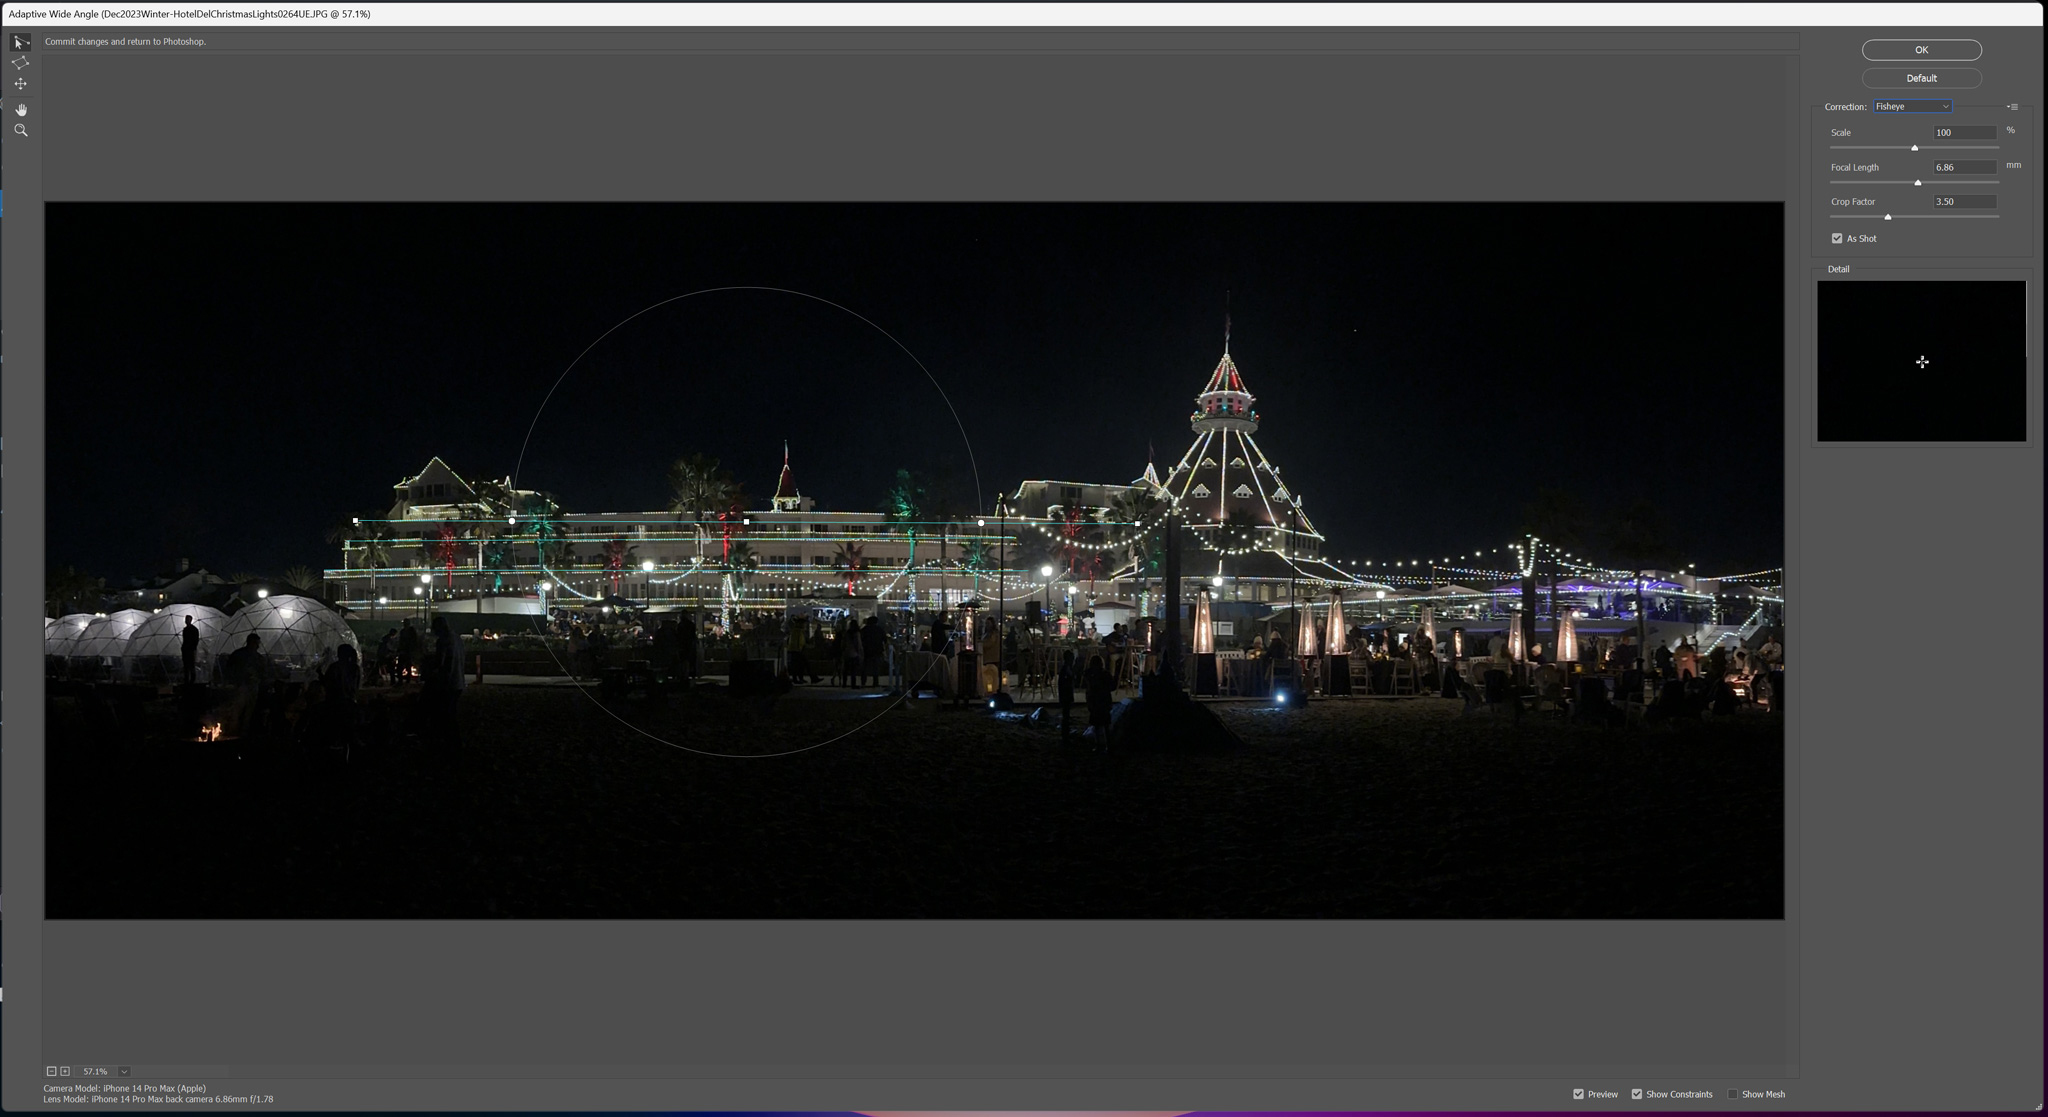
iPhone Hotel Del Coronado panorama, Adaptive Wide Angle corrected. There is still a slight bow plus the image is slightly cropped.
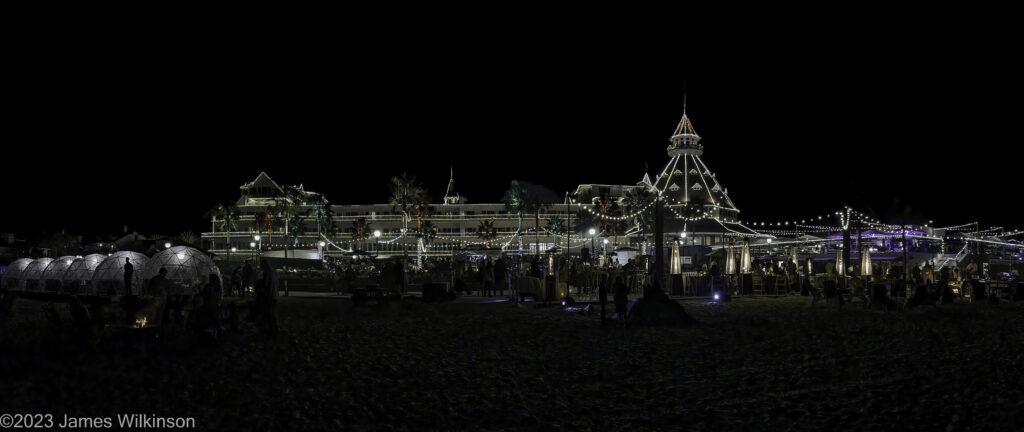
iPhone Hotel Del Coronado panorama, Puppet Warp corrected. Notice the left and right edges are not straightened but also not distorted
Adaptive Wide Angle
Using Photoshop Filter Adaptive Wide Angle requires setting two horizon points, drawing a straight line as a guide then bending the line along the horizontal plane. Then you select & apply the lens correction (Auto, Fisheye, Perspective, Full Spherical). Fisheye will straighten the building but distorts the sides.
Puppet Warp
This is my first try at using Puppet Warp and I was impressed with its flexibility. You can apply corrections to specific areas without affecting the entire image. Adaptive wide angle affects the entire image, puppet warp affects only the area you work on.
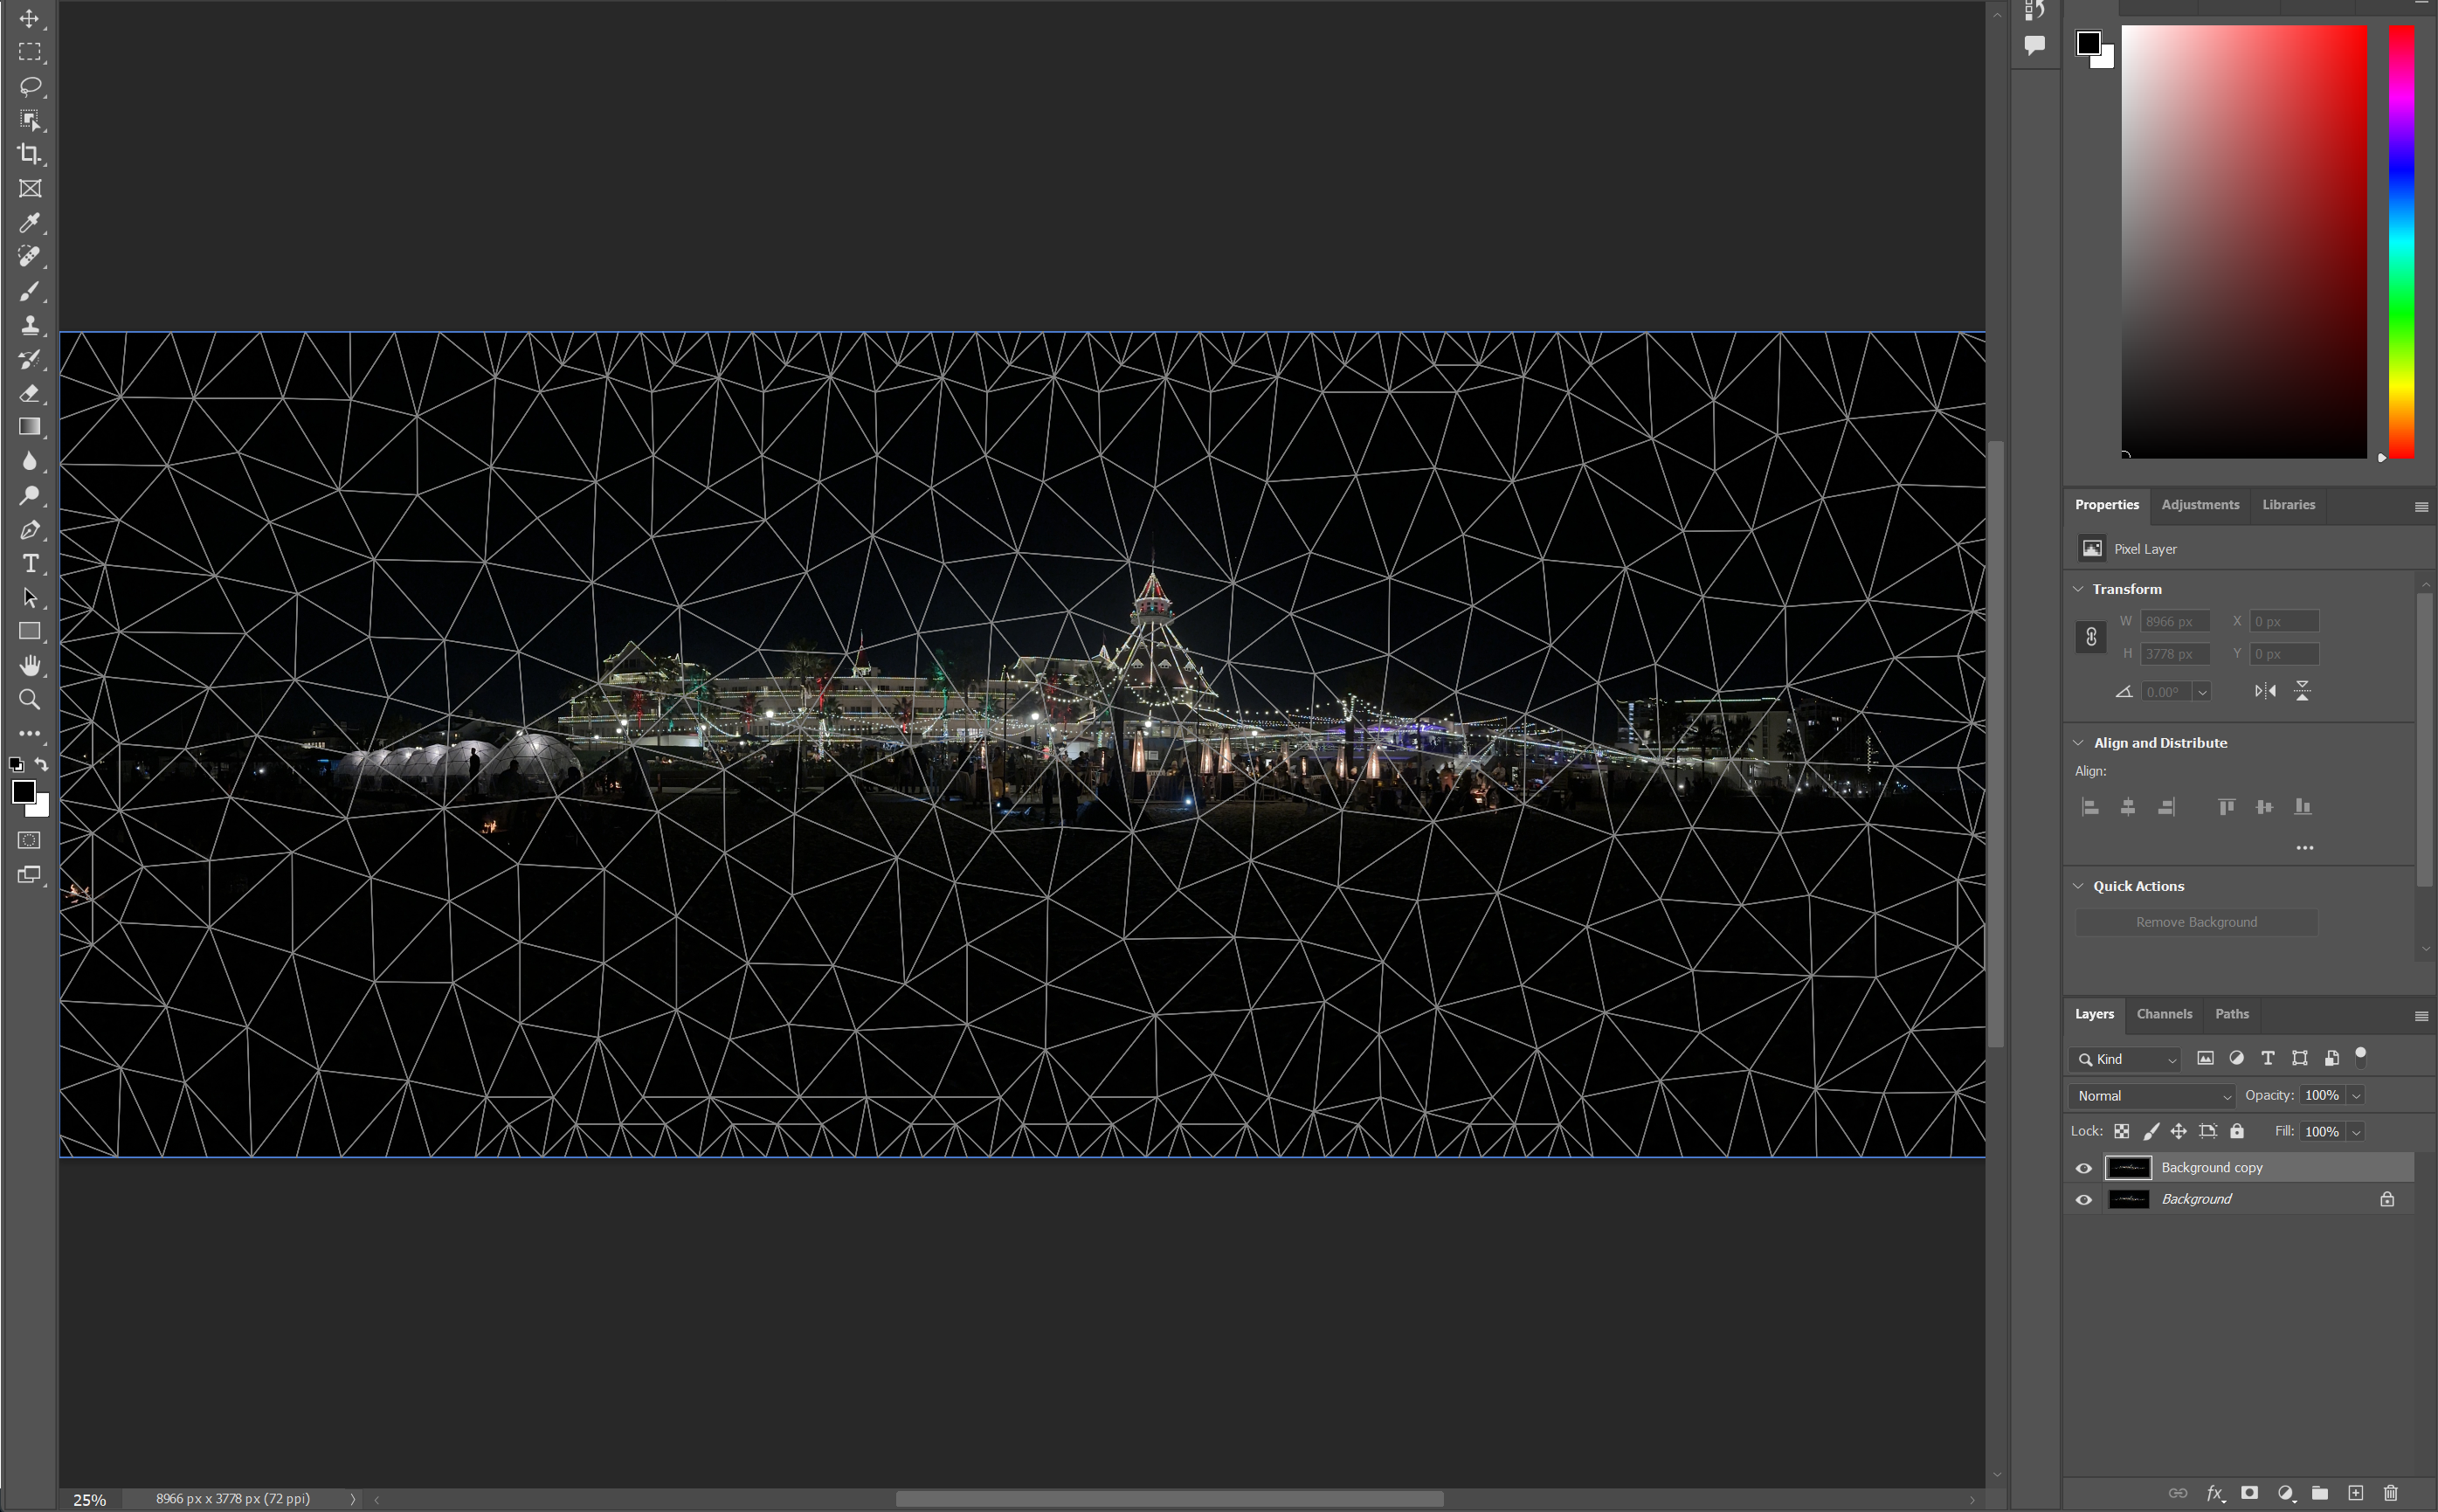
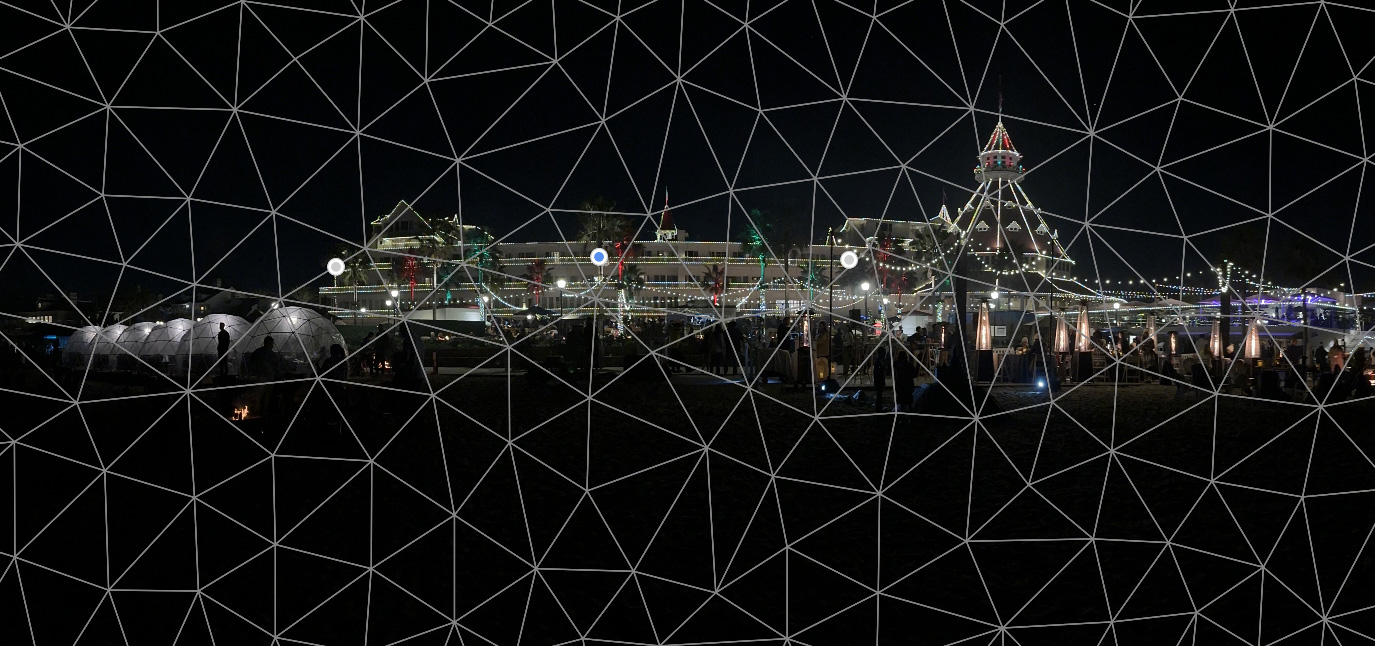
Both corrections have their application. But I prefer the Puppet Warp’s ability to just affect the hotel and leave the edges unaffected. The Adaptive Wide Angle would be more for correcting wide angle lens distortion as I’m sure it designed to do.
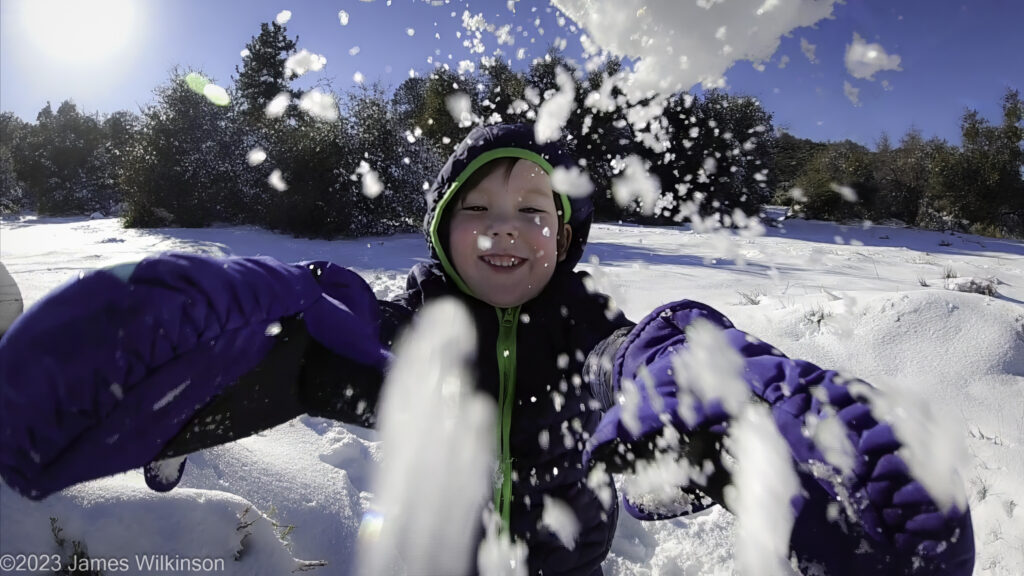
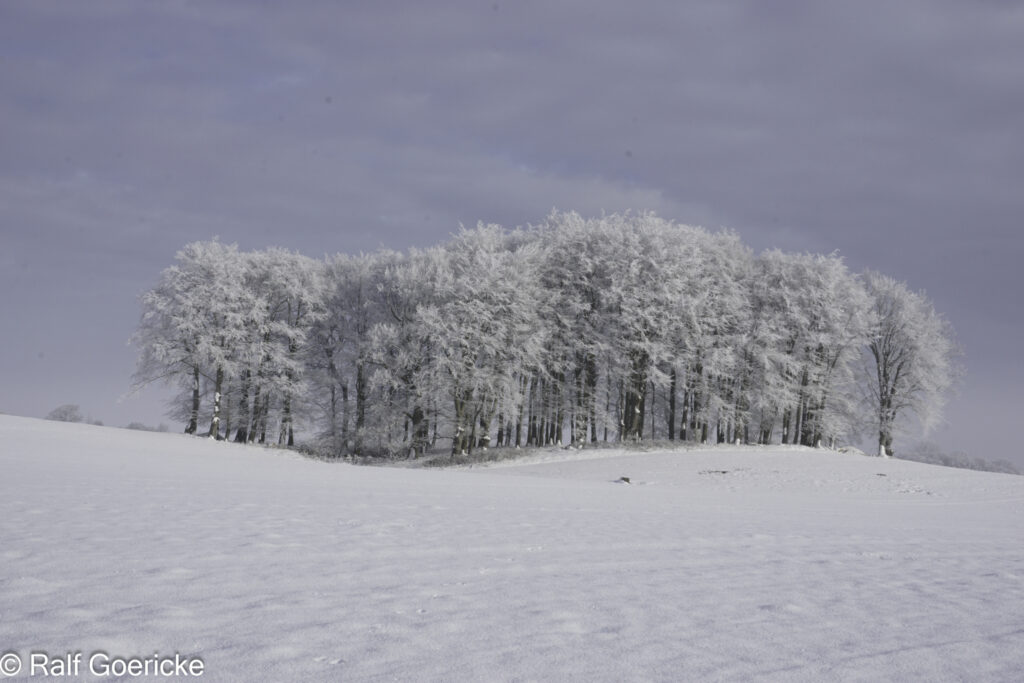
The December theme proposed last meeting by Jerry was ‘Winter’. Eight participants of the December 20th meeting shared theme-related photos as well as others. Finding photos in Southern California is often challenging so many we from travels to colder climates or holiday-related. Here are the photos presented by the group:
Barbara


Cathy


Gary


Jerry


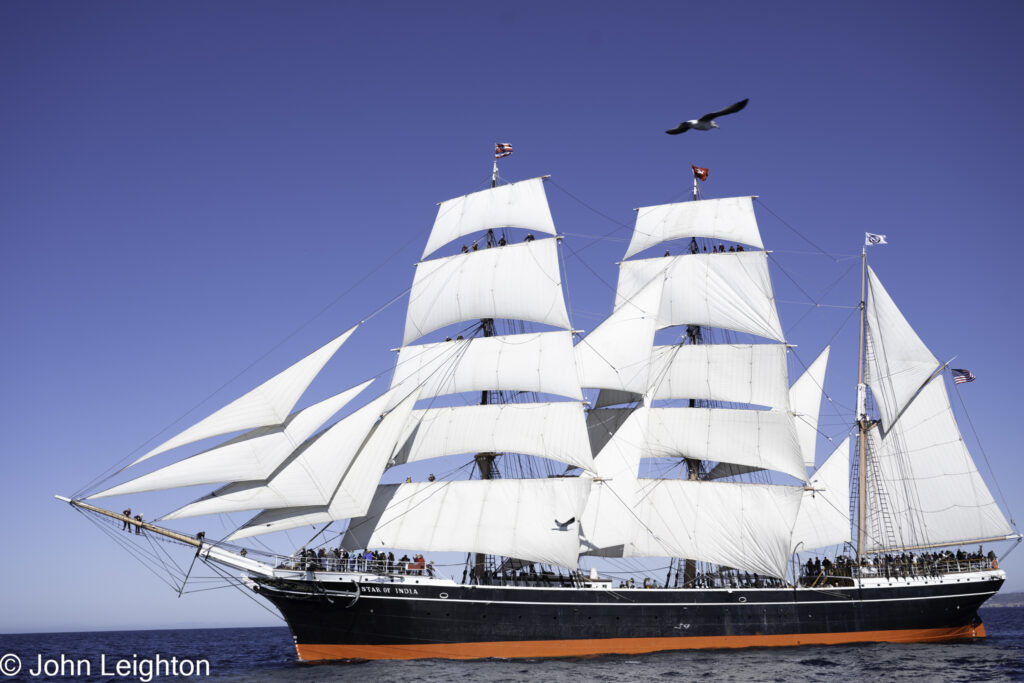
John


Jim


Ralf


Sharon


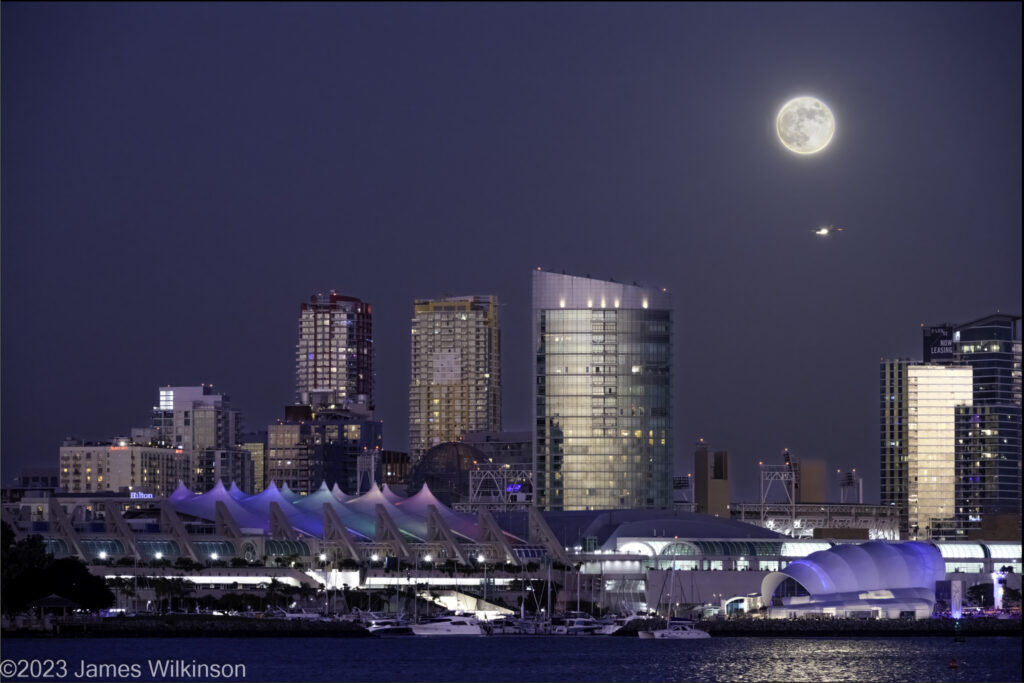
Several photographers from the UCSD Photography Interest Group met-up at Bayview Park to photograph the full moon rising over San Diego. The weather cooperated and it was a fairly clear evening and sunset. Some atmospheric haze was visible in the distance but overall the San Diego Skyline was clear. The moon rose towards the south bay so its position was not ideal for a shot of the taller buildings. It rose over Petco Park and the San Diego Convention Center.
Ideal photographic conditions of blue hour and the moon only lasted ~15mins. It will be interesting to see the variety of photos taken. There’s only so much you can do but post-processing can make a difference.


Jerry – Here are some images Jerry took


Jim – Here are some of the best images Jim shared


Cathy


October’s photography theme was Fall – an appropriate topic for the season. Meeting participants shared photos that matched the theme. The meeting was hosted by John Leighton since Jim Wilkinson was off on a photo scouting trip to Lone Pine/Alabama Hills in the Eastern Sierras of California. Here are some of the photos shared:
Jerry


Sharon


Gary

Cathy


There will be a full moon rising over the San Diego Skyline ~6pm Saturday Oct 28th. Cathy proposed a meetup to photograph this event. I entered some different spots into the Photographer’s Ephemeris webpage and grabbed some projections for potential locations. Some members of the Photography Interest Group are already pretty familiar with such locations. But these projection should give us a good idea where the moon will rise so we can set up at an ideal location.
To check out the Photographer’s Ephemeris; click here for a pin location. You can create a free account on their website if you want to use the planner. A iPhone app is also available for $10.
Harbor Island East (looks too far north for a skyline moonrise)

Coronado Bayview Park

Coronado Ferry Landing – this has already been proposed so check out the moonrise projection

Coronado Bridge Viewpoint – not ideal for a skyline shot but including the bridge might be interesting

Hotel Del Coronado – alternative to San Diego Skyline, moon rising over the Hotel Del

The UCSD Photography Interest Group met via Zoom meeting Wednesday Sep 20 2023 at 2pm. The theme this month was “Animals/Insects/Birds/Wildlife/Pets/Critters”. Everyone shared several images that followed the theme – critters are a pretty popular photo subject. Photo sharing started around 2:15 and went till 4:10. Integrated into the photo sharing were discussions about the new Photoshop 2024 generative fill AI; Lightroom shadow & highlight masking; Topaz DeNoise & SharpenAI; cell phone macro photography. Here are the photos that were shared & discussed:


Some members of the UCSD Photography Interest Group are interested in astrophotography. This can be a challenging genre to master. Here are some tools & information that may help photographers create better images of the night sky.
Night sky photography requires a fast lens to help keep the ISO & shutter speeds as low as possible. Star movement or streaking occurs if the shutter speed is too long for the focal length. One tool that helps with this is a star tracker. I use a MoveShootMove Star Tracker and it allows minutes-long exposures (I use 2mins, ISO 1600, f4) with no star movement when properly align with Polaris. This is a very compact, affordable, simple to setup and use rechargeable device you attach between your camera and tripod. There are several affordable star trackers but it’s also possible to layer multiple shorter exposures and composite a night sky image.

If you do not use a star tracker, then image stacking software can help improve the image quality by reducing the noise. Image stacking software can also improve star-tracked image quality even further. Programs like Sequator will overlay and align several images to improve the resolution & noise of the night sky & stars. But if there is a foreground subject, it will require a separate single exposure to merge with the Sequator starry sky image.
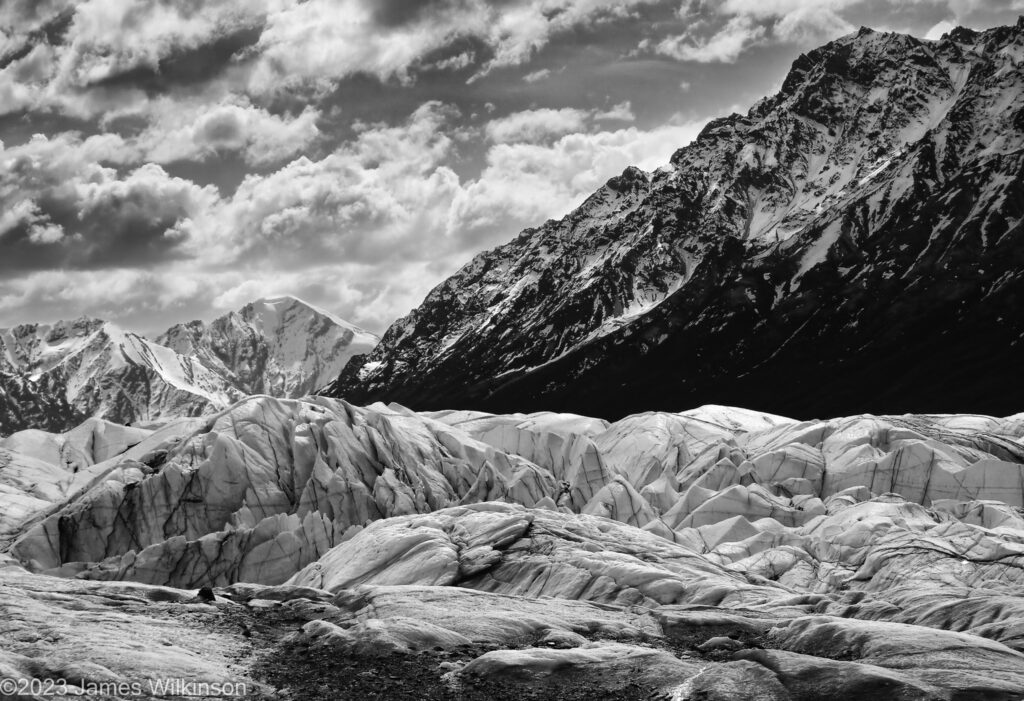
This month’s UCSD Photography Interest Group’s photo theme is “Black&White”. Here are the photos sent by participants in August’s meeting. Note that any photographs that members want to share are welcome even if they do not fit the theme.
Cathy


Barbara


Jerry


Sharon


Gary


Jim


John

Mikky


