- December 20 2023 Meeting Notes: Gary shared details on his recent trip down under to Australia and New Zealand. His ‘winter’ photos were also of his recent trip, which is summer in the southern hemisphere.
- Gary talked about his recent trip to Australia, Sydney in particular, and New Zealand. He shared photos of his trip.
- Photos with the Winter theme and other subjects were shared and discussed
- John wanted to discuss how to setup a Star of India portfolio on portfolio.adobe.com with a custom domain. If you are a Adobe Creative Cloud subscriber, you can setup up to 5 ‘free’ portfolio websites. Custom domain names cost ~$10-$15 for an annual domain registration.
- Hawk Watch in Jan-Feb 2024 was discuss and a possible meetup to photograph rescued raptors and other birds.
- A brief demo of adding photos to the UCSDPhIG Uploads Google Drive
- A discussion of using Photoshop’s ‘puppet warp’ feature to straighten curved sections of a panoramic photo
- Nov 15 2023 Meeting Notes: a brief discussion of recent trips, participants shared recent images following the travel theme for this month. Also, more photos from our moonrise meetup have been posted. The difficulty of balancing exposures of the moon and skyline were discussed while viewing the images. Moon photography is challenging and something we will continue to pursue.
- I’ve set up a google drive share for image uploads to streamline the process of uploading images for the meetings. Here is the link and I will post it on the website soon. Please test it soon so if there are any hiccups, I can work them out before the next meeting. Create a personal folder and upload a test image:
- Moonrise link:
- Travel photos from Nov 15th meeting:
- Next month’s (20 Dec) meeting theme proposed by Jerry is ‘Winter’. But as always, all images regardless of theme are welcome.
- Oct 18 2023: Theme for October is ‘Fall/Autumn’
- Jim Wilkinson was unavailable to host so John Leighton did the honors
- Photos were shared by participants
- Sep 20 2023: Theme for September is “Animals – Birds/Zoo/Wildlife/Insects/Pets”
- Photo-sharing took up the entire meeting from 2:15-4:15pm so all the discussions were photo-critique & technique related.
- Photoshop 2024’s new generative fill was discussed with examples.
- Lightroom shadow & highlight masking to improve images taken on bright sunny days was discussed.
- Cell phone macro photography examples were presented and discussed.
- Discussed planning a possible Alabama Hills Photography Excursion, Jim will research and propose details at a future meeting/email
- We plan on setting a Hawk Watch group excursion in Jan or Feb, a Doodle Poll will be conducted to find the best weekend date.
- Oct 28th Full moon at sunset excursion to Harbor Island or nearby is proposed and tentatively planned. A rendezvous spot will be forthcoming based on the Photographer’s Ephemeris or PhotoPills for the best spot to setup.
- Photoshop Virtual Summit 5 is coming October 30-November 3 – Free and paid VIP Passes are available (Thanks Cathy)
- Aug 16 2023: The theme for August was ‘Black&White’. Participants shared their favorite photos, some in black&white & some color favorites.
- Photo-sharing took up the entire meeting from 2:10-4:10pm so all the discussions were photo-technique related.
- Black&White conversion of color images were discussed. The best black&white photos having strong light and graphical elements.
- Additionally, because of the recent (Aug 12-13 2023) Perseid Meteor Shower, astrophotography techniques were also discussed.
- July 19 2023: The theme for July was ‘Water/4th of July‘. Participants shared up to 10 photos that followed the theme or non-theme-related.
- Travel plans were discussed and potential outings – Del Mar horse races or horse workouts
- Most of the discussion were related to the photos shared, particularly Gary’s Canada kayaking trip. Other topics were macro-photography related and my fav – film simulation presets.
- Jun 21 2023: The theme for June was ‘Travel‘. Submission of up to 10 photos that followed the theme were shared. Other non-theme-related photos were also shared.
- Photographing in weather and how it affects gear selection was discussed
- Film simulations were also a short topic of interest (at least to Jim Wilkinson)
- May 17 2023 2pm-4pm, hosted by John Leighton
- Apr 19 2023 2pm-4pm, hosted by Jim Wilkinson
- Theme – ‘Eyes’, hosted by Jerry Vaughn
- Mar 15 2023 2pm-3pm, hosted by John Leighton
- Theme that week was ‘Opportunistic‘
- Feb 15 2023 2pm-4pm
- Tutorial – Masking in Lightroom & Adobe Camera Raw
- Discussion – Setting up a group website
- Photo Sharing – open theme
- Continuing issues with our Google Drive share was discussed and anyone who has trouble can go back to emailing the photos to me.
Month: December 2023
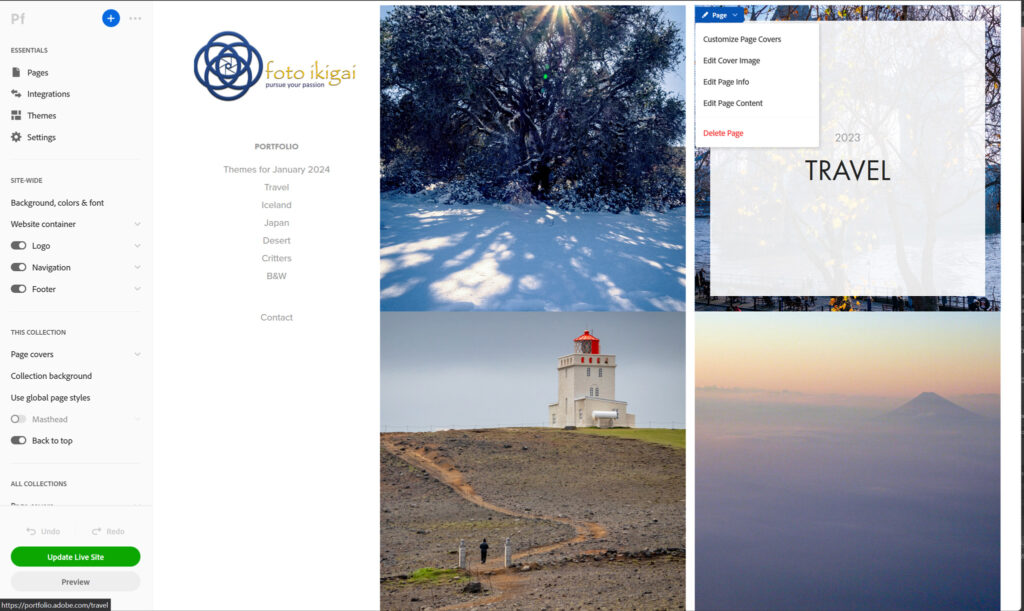
Tutorial: Creating an Adobe Portfolio
If you subscribe to Adobe Creative Cloud, you can create a free online portfolio. It’s not really free since it requires a subscription but it is a nice addition to their software suite.
There are plenty of YouTube tutorials on how to setup an Adobe portfolio website:
https://www.youtube.com/results?search_query=adobe+portfolio+for+photographers

Or you can follow the instructions below to get started, it’s easy if you’ve created web content before:
- Sign into portfolio.adobe.com using your Adobe login credentials
- Select Full Portfolio or Welcome; they’re basically the same but with
Welcome, you start by creating a personalized cover page then adding portfolio pages.
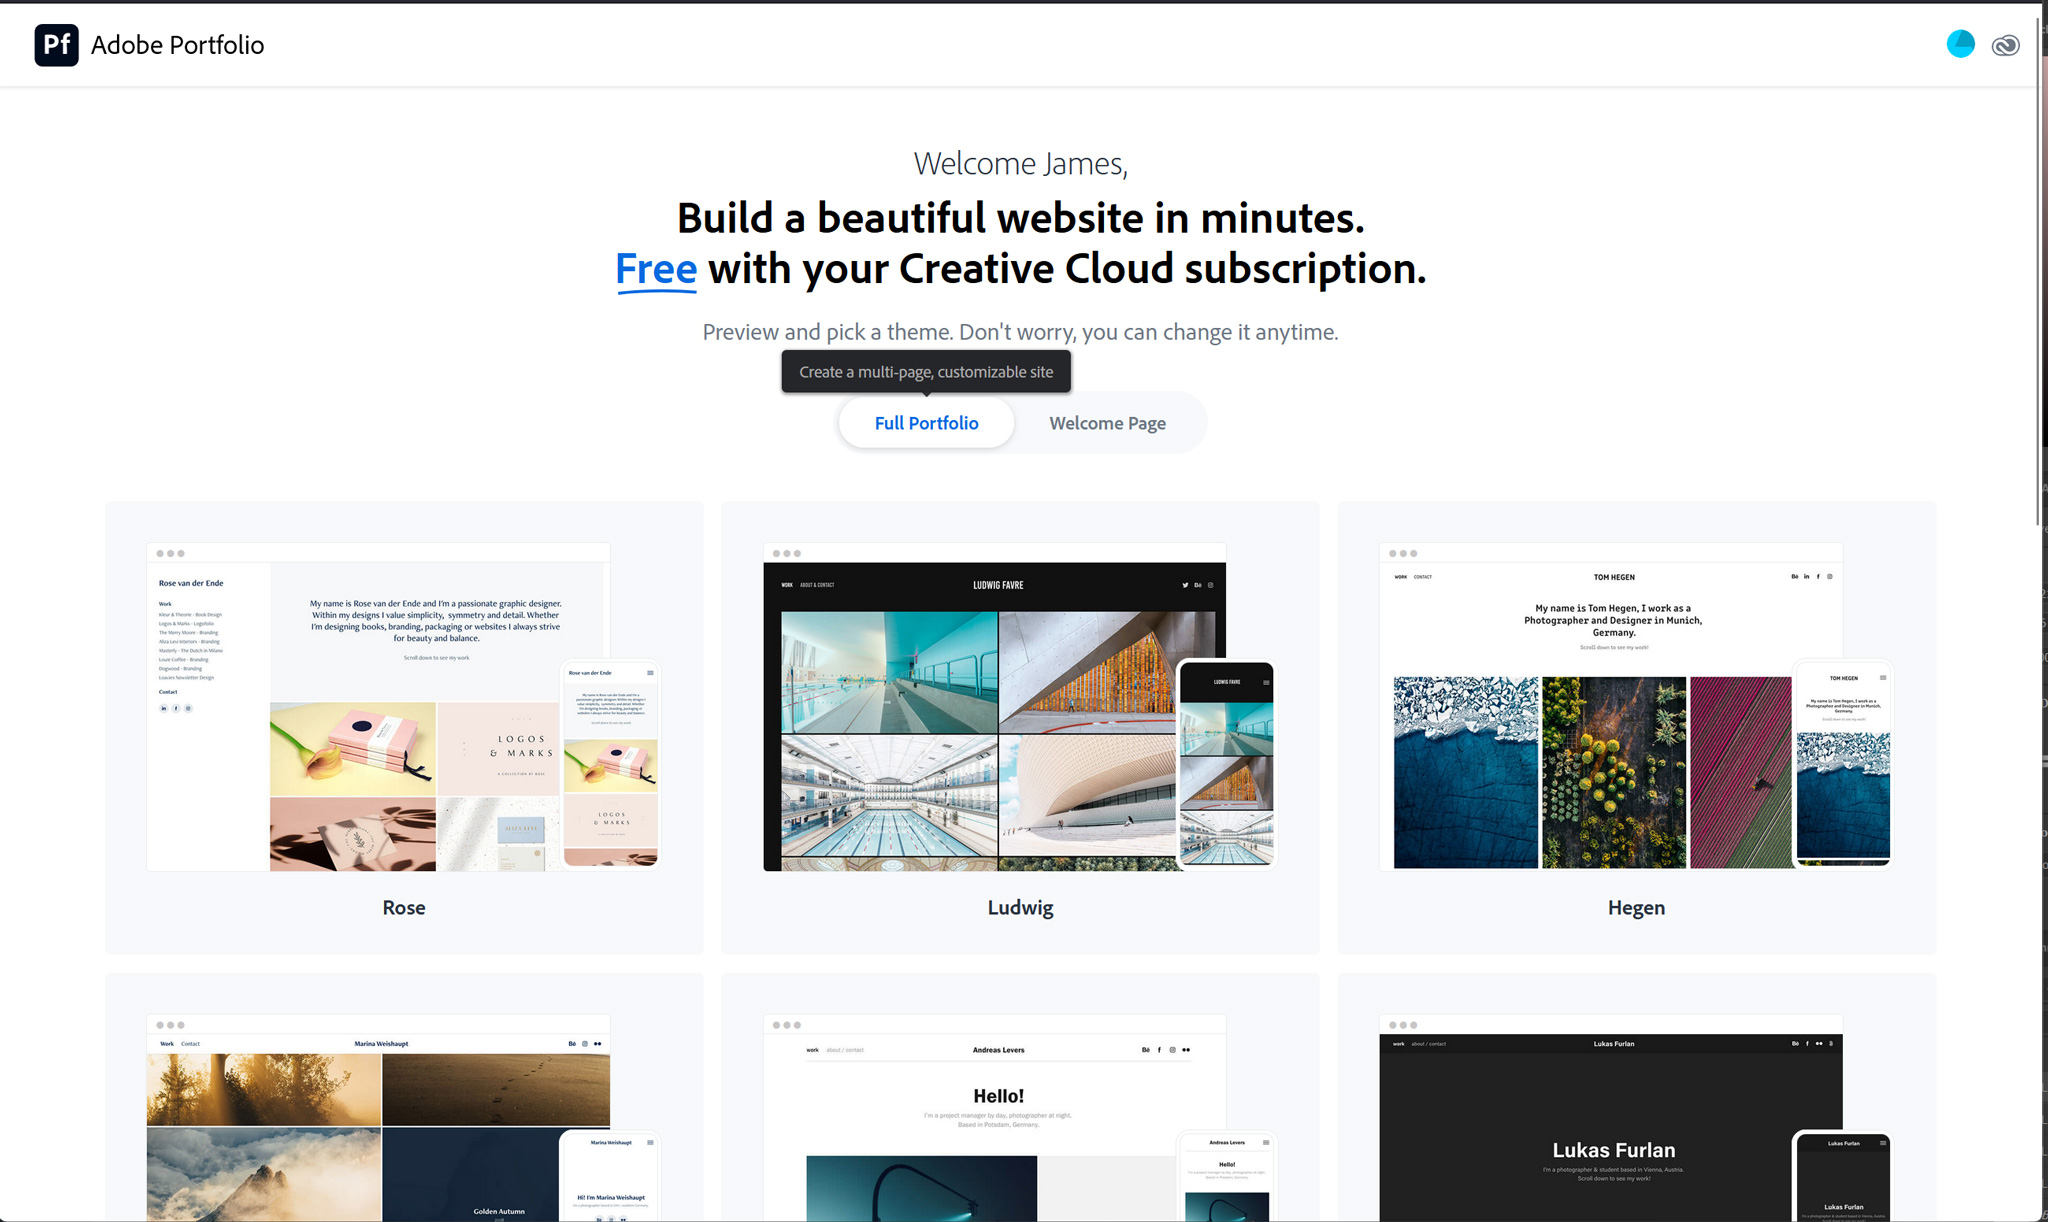
Full Portfolio builds a home page with a cover image for every gallery page-album. You can create a cover page later if you decide you prefer a simpler home page. Since it really doesn’t matter, I selected Full Portfolio- Full Portfolio has 12 themes to choose from so select your favorite. You can always change your theme later. Example site: fotoikigai.myportfolio.com (note that I have assign a custom domain jrwilkinson.com to this portfolio site).
- Welcome has 6 themes so if you start by creating a Welcome page, select the theme. You can always change your theme later. Example site: jrwilkinson.myportfolio.com
- With either Full Portfolio or Welcome selected, pick a theme. You can scroll through the different themes to get an idea of their look. Once you find one that looks promising, click on Use This Theme in the upper right to create your portfolio website.
- You are ready to add content to your portfolio – click the blue circle + in the upper left to begin, next select what kind of page you want to build
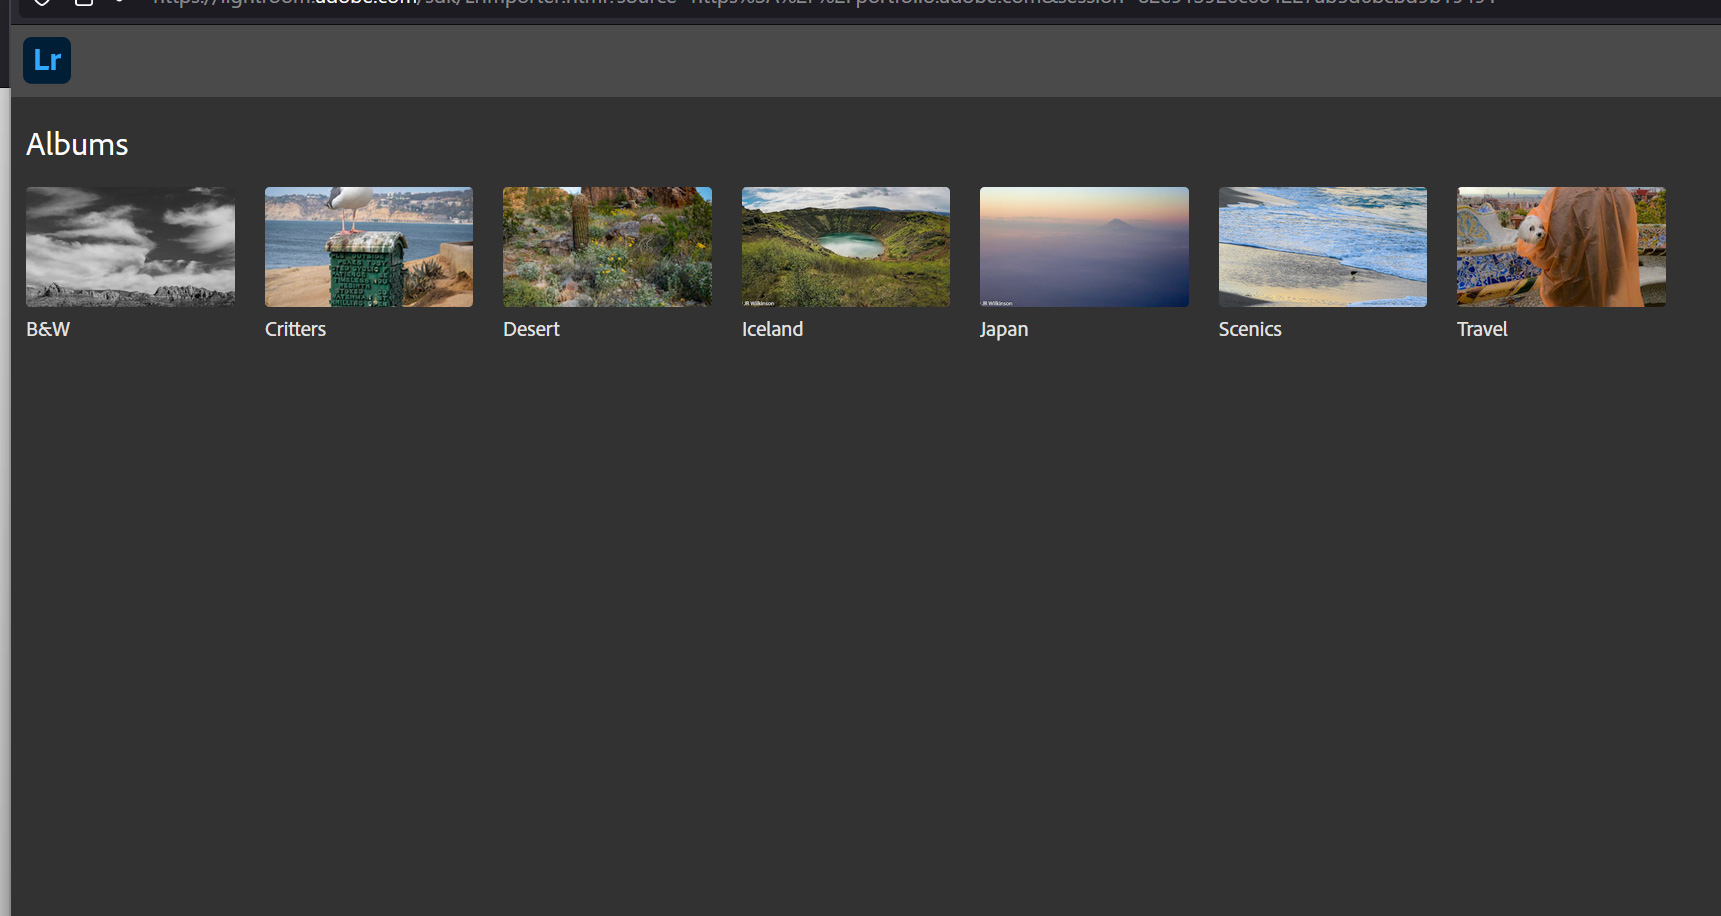
- I uploaded photos at lightroom.adobe.com, organizing them into albums. Your Creative Cloud subscription provides 100gb of space to store photos. Storing images here makes them easily available for building your portfolio pages. Right now, I only use this cloud storage for my website portfolio. But if you work on multiple devices like laptop, desktop, and tablet. Storing your content here makes them available everywhere.
- In the editor, click the + button and select Lightroom Albums. This will take you to your Lightroom.adobe.com webpage, & display your albums.
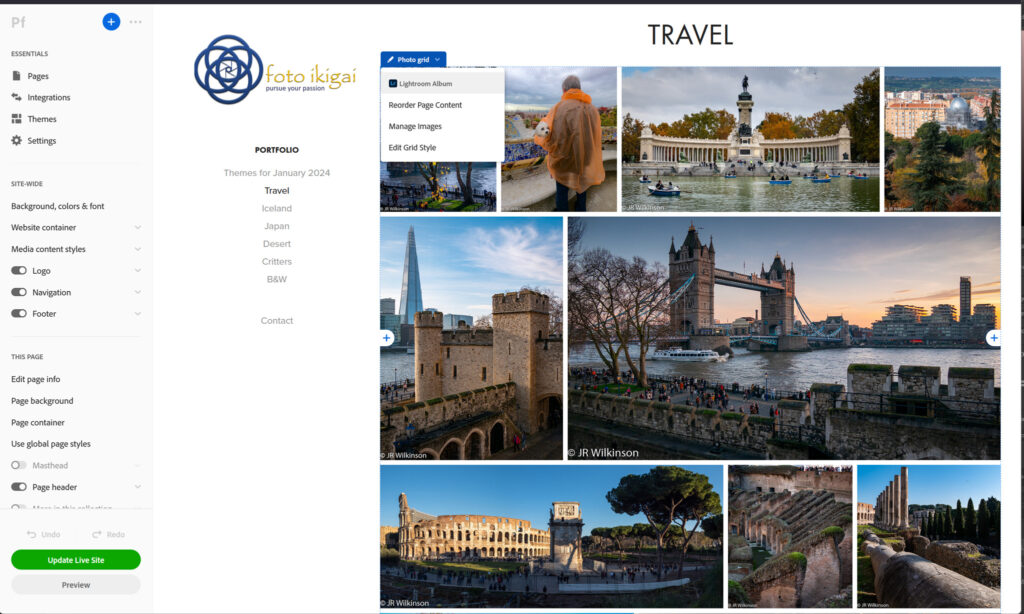
- Select a Lightroom Album then Import Selected in the lower right. A new webpage will be created with those images.
- Under Settings/Domain Name: the portfolio website will be labeled <your adobe account name>####.myportfolio.com. Under Settings/Site Subdomain, you can change the first part of myportfolio.com. I changed mine to fotoikigai.myportfolio.com. They allow you to change this up to 5 times so it isn’t permanent.
- Custom domain – if you own or want your own custom domain for your portfolio. Under Settings/Domain Name, you can register/buy one through Adobe third party, NameCheap (good affordable domain registrar), or link one you already own or registered elsewhere.
- If you do not own a domain yet, it’s simplest to use Adobe’s recommended registrar NameCheap. The nameserver settings should be automatic.
- If you own a domain name or register elsewhere, follow the instructions on how to set the nameserver A table to the Adobe IPs here:
https://help.myportfolio.com/hc/en-us/articles/209448927-Using-a-custom-domain-with-Adobe-Portfolio
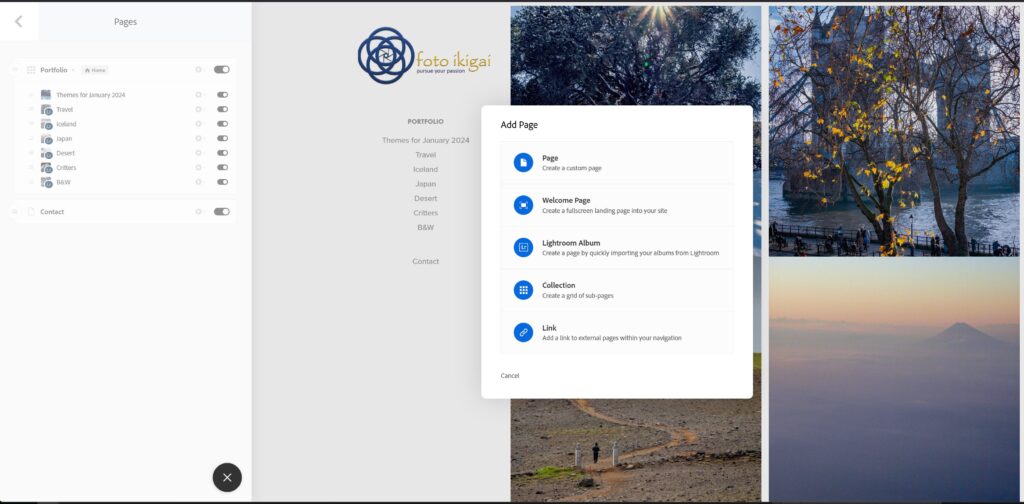
To create a Page, click the blue circle Add Page + in the upper left. Then select the type of content – I’ve been using Lightroom Album.
Once you create your portfolio pages, there are a few tips to reorganize your images. In the page editor, there are blue boxes in the upper left corner of each webpage element. Single-click these boxes for options on reorganizing the gallery.
If you choose not to have a cover page and end up with a collection of album thumbnails. You can change which photo from an album is the cover image. Hover over the cover image you want to change, single-click the blue box labeled Page, then Edit Cover Image. Select the new image from the photo album to use as the cover then click Update Live Site to save the change.
As long as Adobe keeps the webhosting feature part of the Creative Cloud subscription. I think it’s a great add-on to their powerful photography, video, and graphic art software suite. 100gb of storage is plenty unless you store full-resolution images. They offer additional storage for a price of course. I’ll keep using Adobe myportfolio and assess its performance compared to independent webhosting. So far it looks pretty promising although the template themes are limiting.
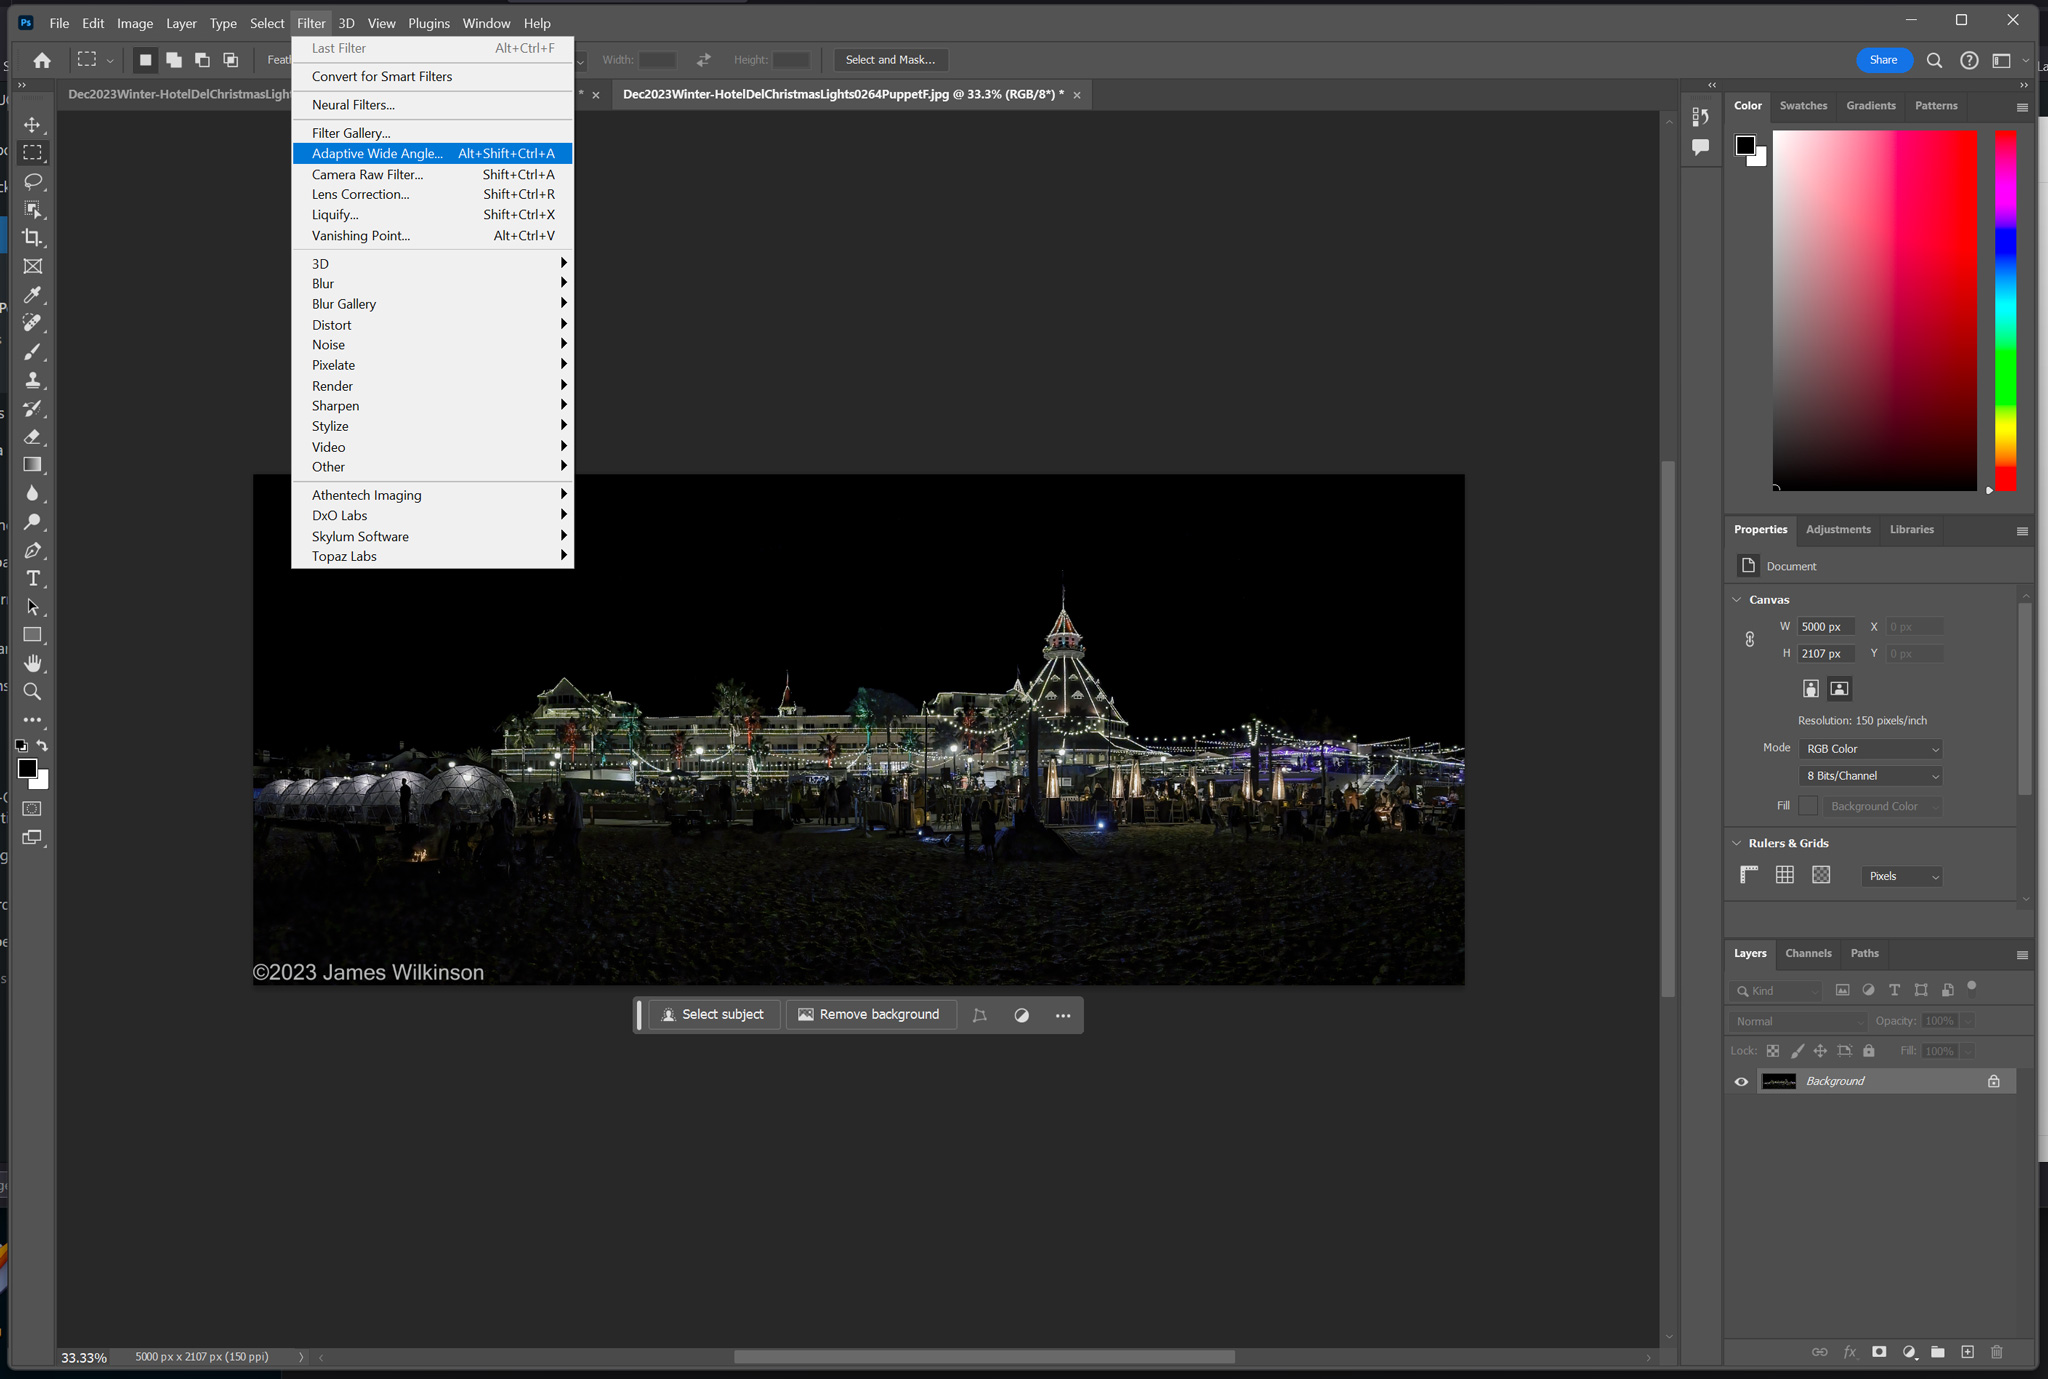
Tutorial: Using Photoshop To Fix Curved Pano
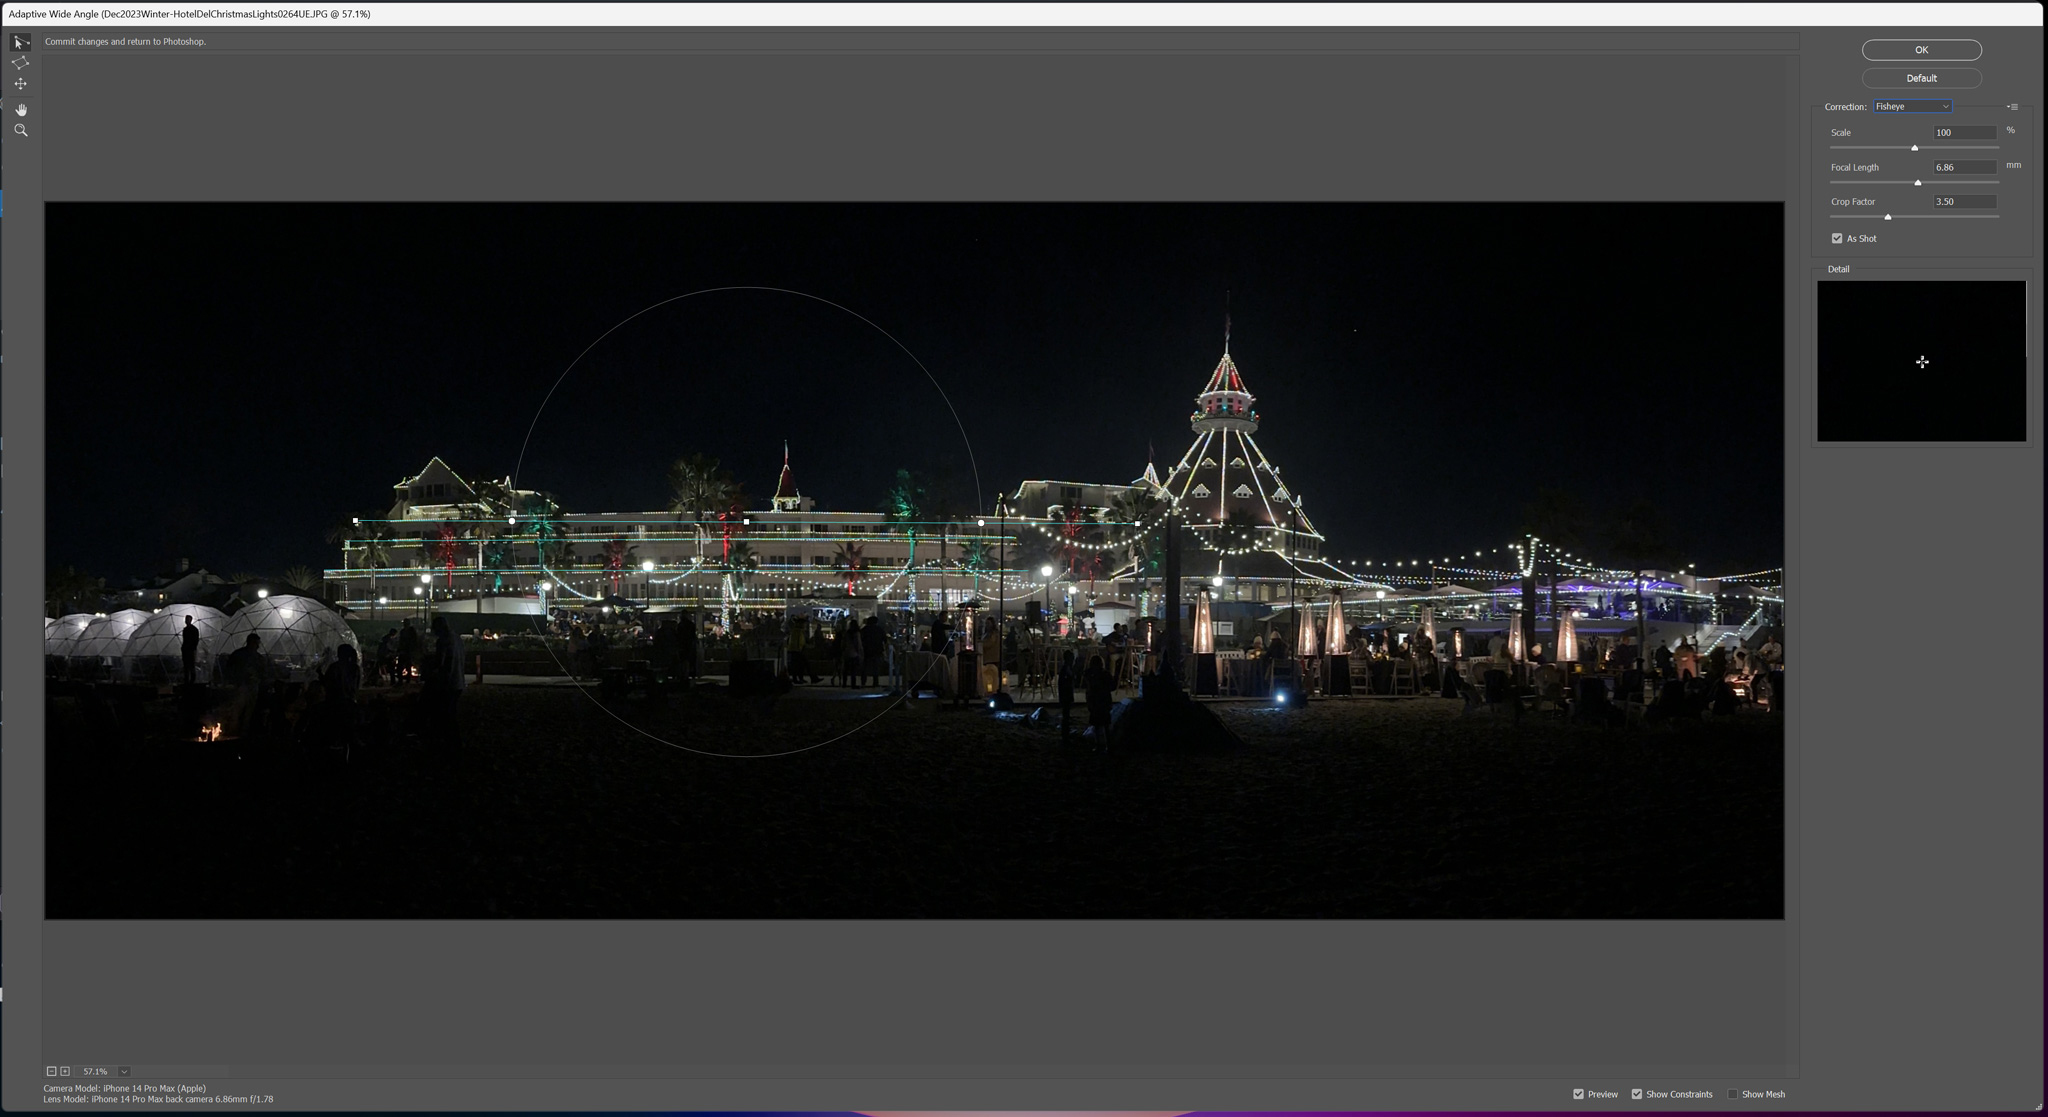
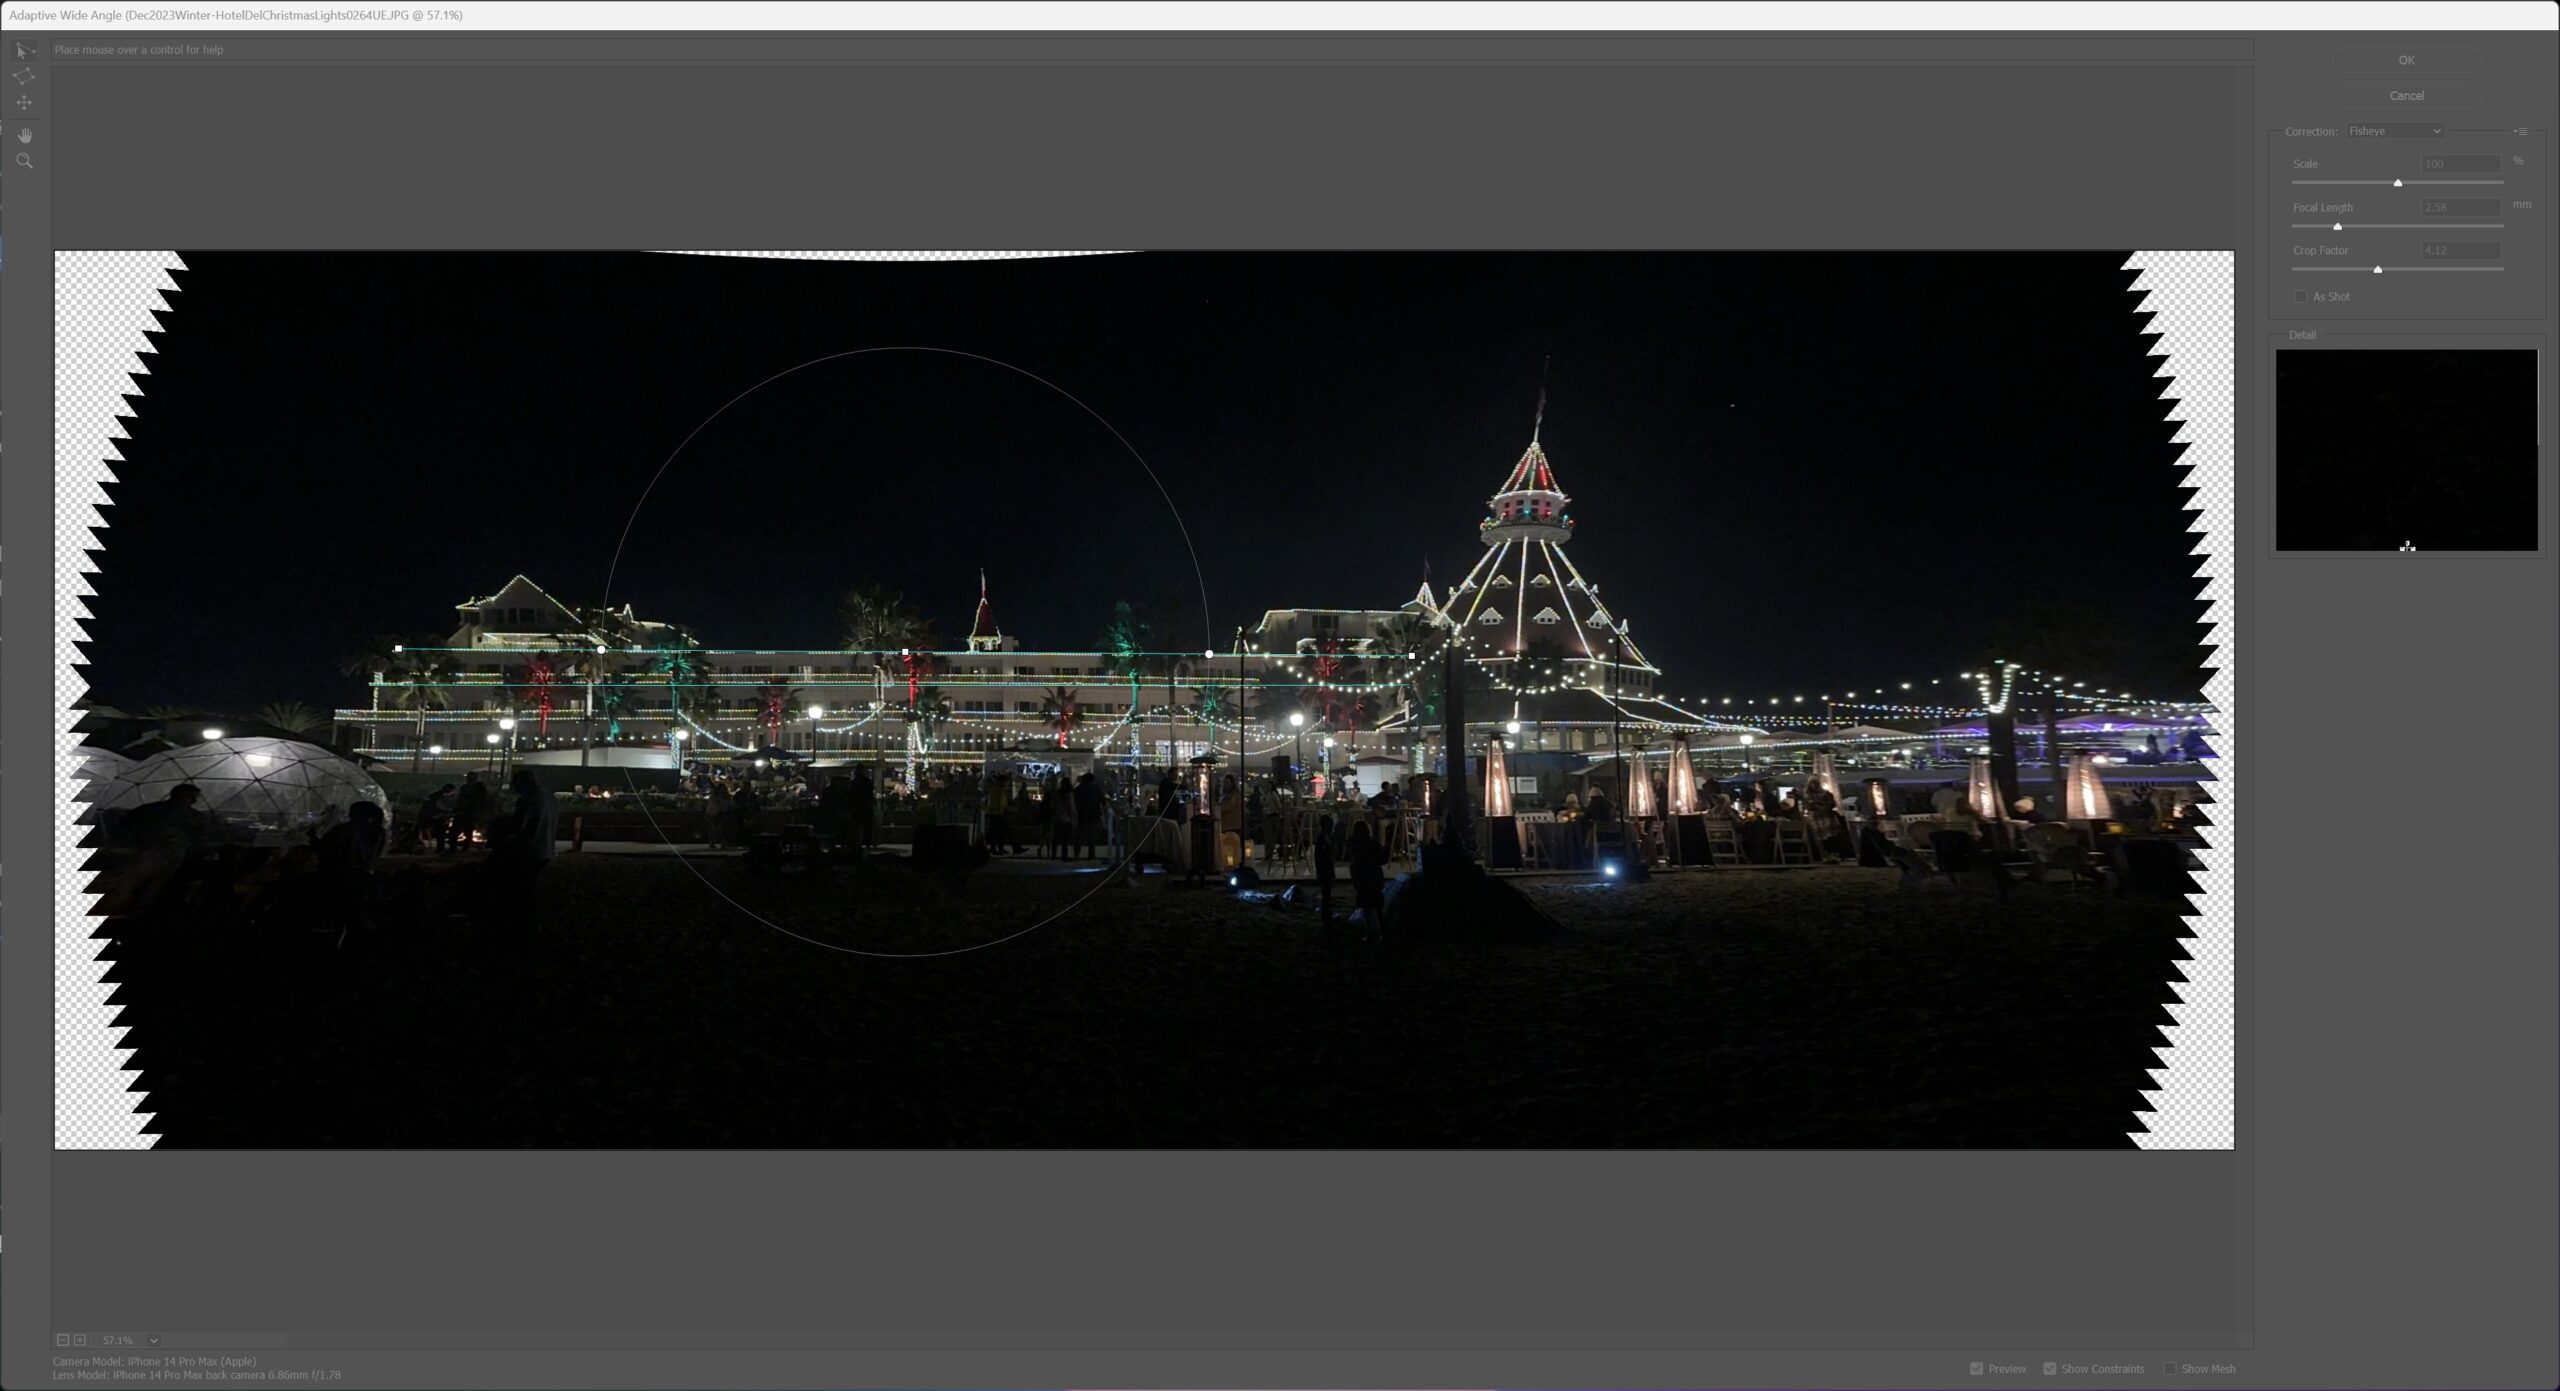
I enjoying taking panoramic photos with my cameras. iPhone photos, when held level, look pretty good. But sometimes an iPhone or stitched panorama is has barrel distortion and is bowed in the middle. If you google how to repair such issues, the search will recommend using Photoshop’s Filter-Adaptive Wide Angle. This can straighten the center of the image but can cause side-effects on the left and right sides. Photoshop’s Edit-Puppet Warp can correct specific areas of the image, leaving the rest unaffected. Here is an example of an iPhone Panorama with both corrections applied.
Note: these correction require a working layer (ie background copy) so if the controls are greyed-out. Create a background layer to activate these commands.
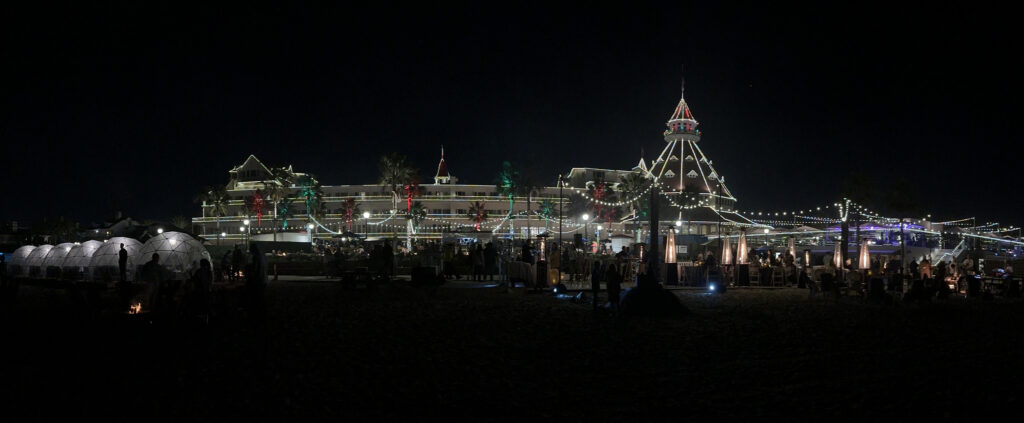
iPhone Hotel Del Coronado panorama uncorrected
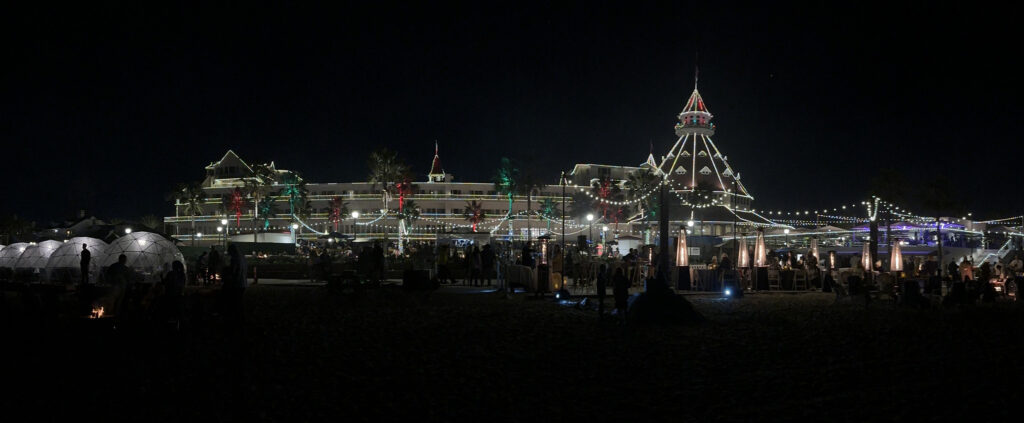
iPhone Hotel Del Coronado panorama, Adaptive Wide Angle corrected. There is still a slight bow plus the image is slightly cropped.
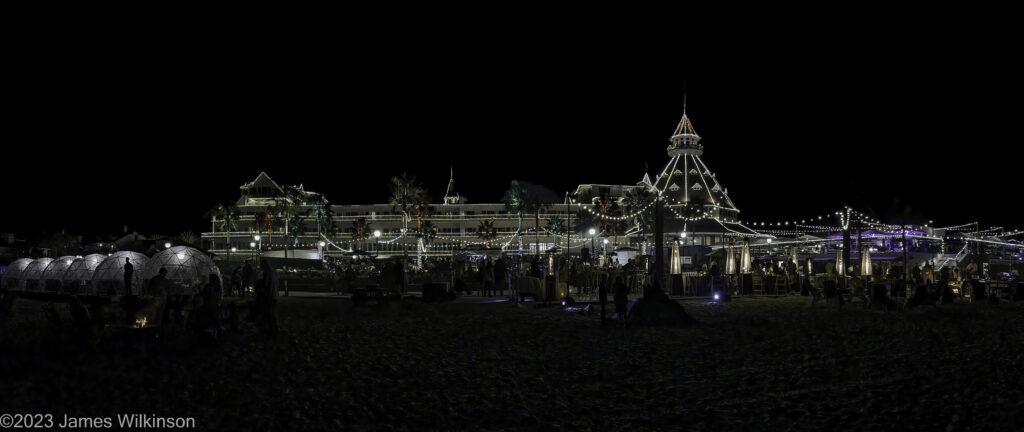
iPhone Hotel Del Coronado panorama, Puppet Warp corrected. Notice the left and right edges are not straightened but also not distorted
Adaptive Wide Angle
Using Photoshop Filter Adaptive Wide Angle requires setting two horizon points, drawing a straight line as a guide then bending the line along the horizontal plane. Then you select & apply the lens correction (Auto, Fisheye, Perspective, Full Spherical). Fisheye will straighten the building but distorts the sides.
Puppet Warp
This is my first try at using Puppet Warp and I was impressed with its flexibility. You can apply corrections to specific areas without affecting the entire image. Adaptive wide angle affects the entire image, puppet warp affects only the area you work on.
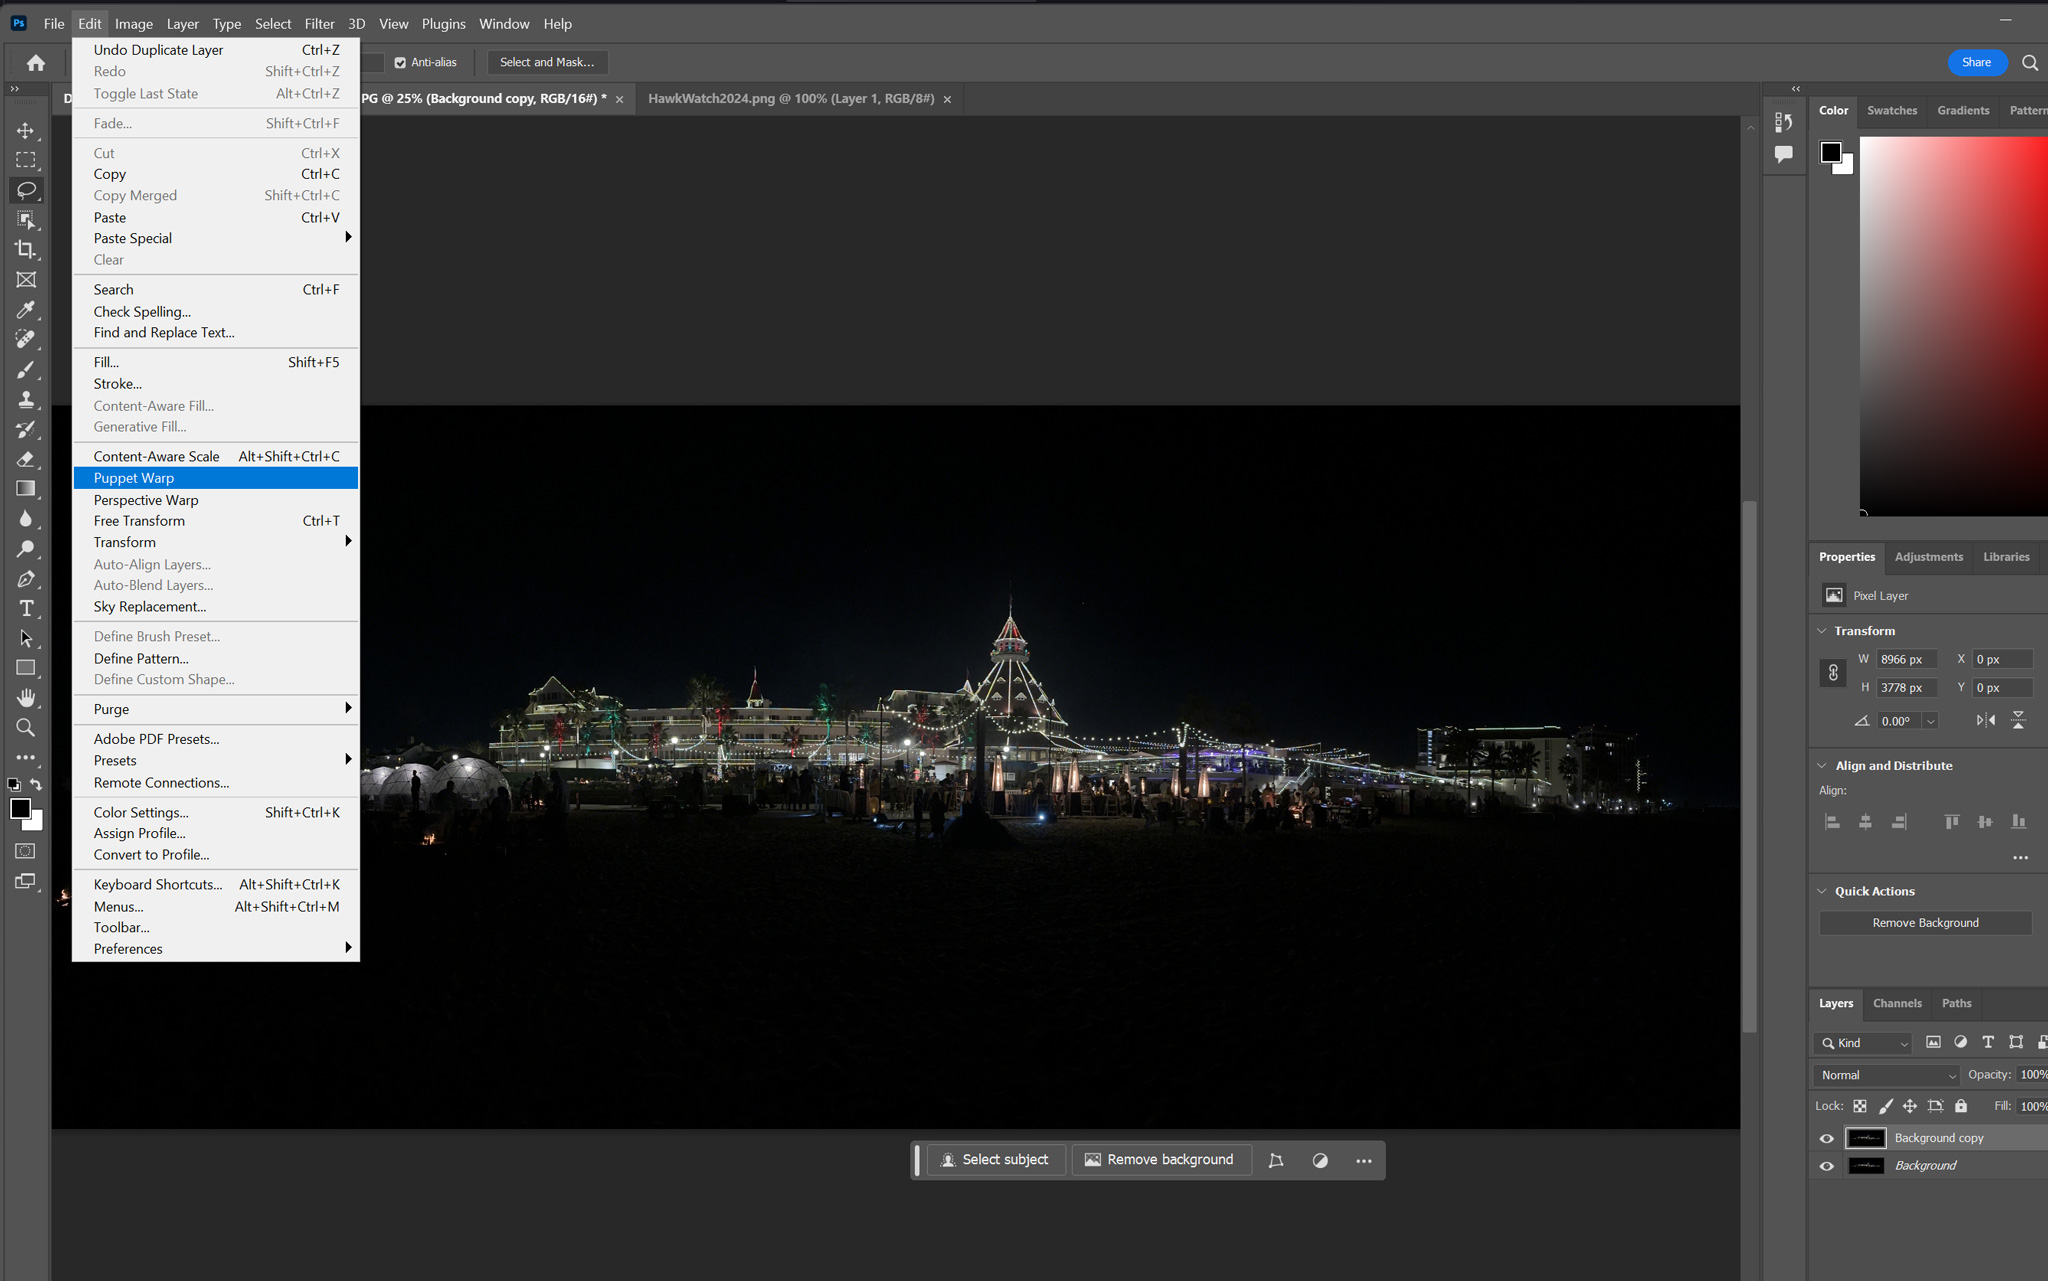
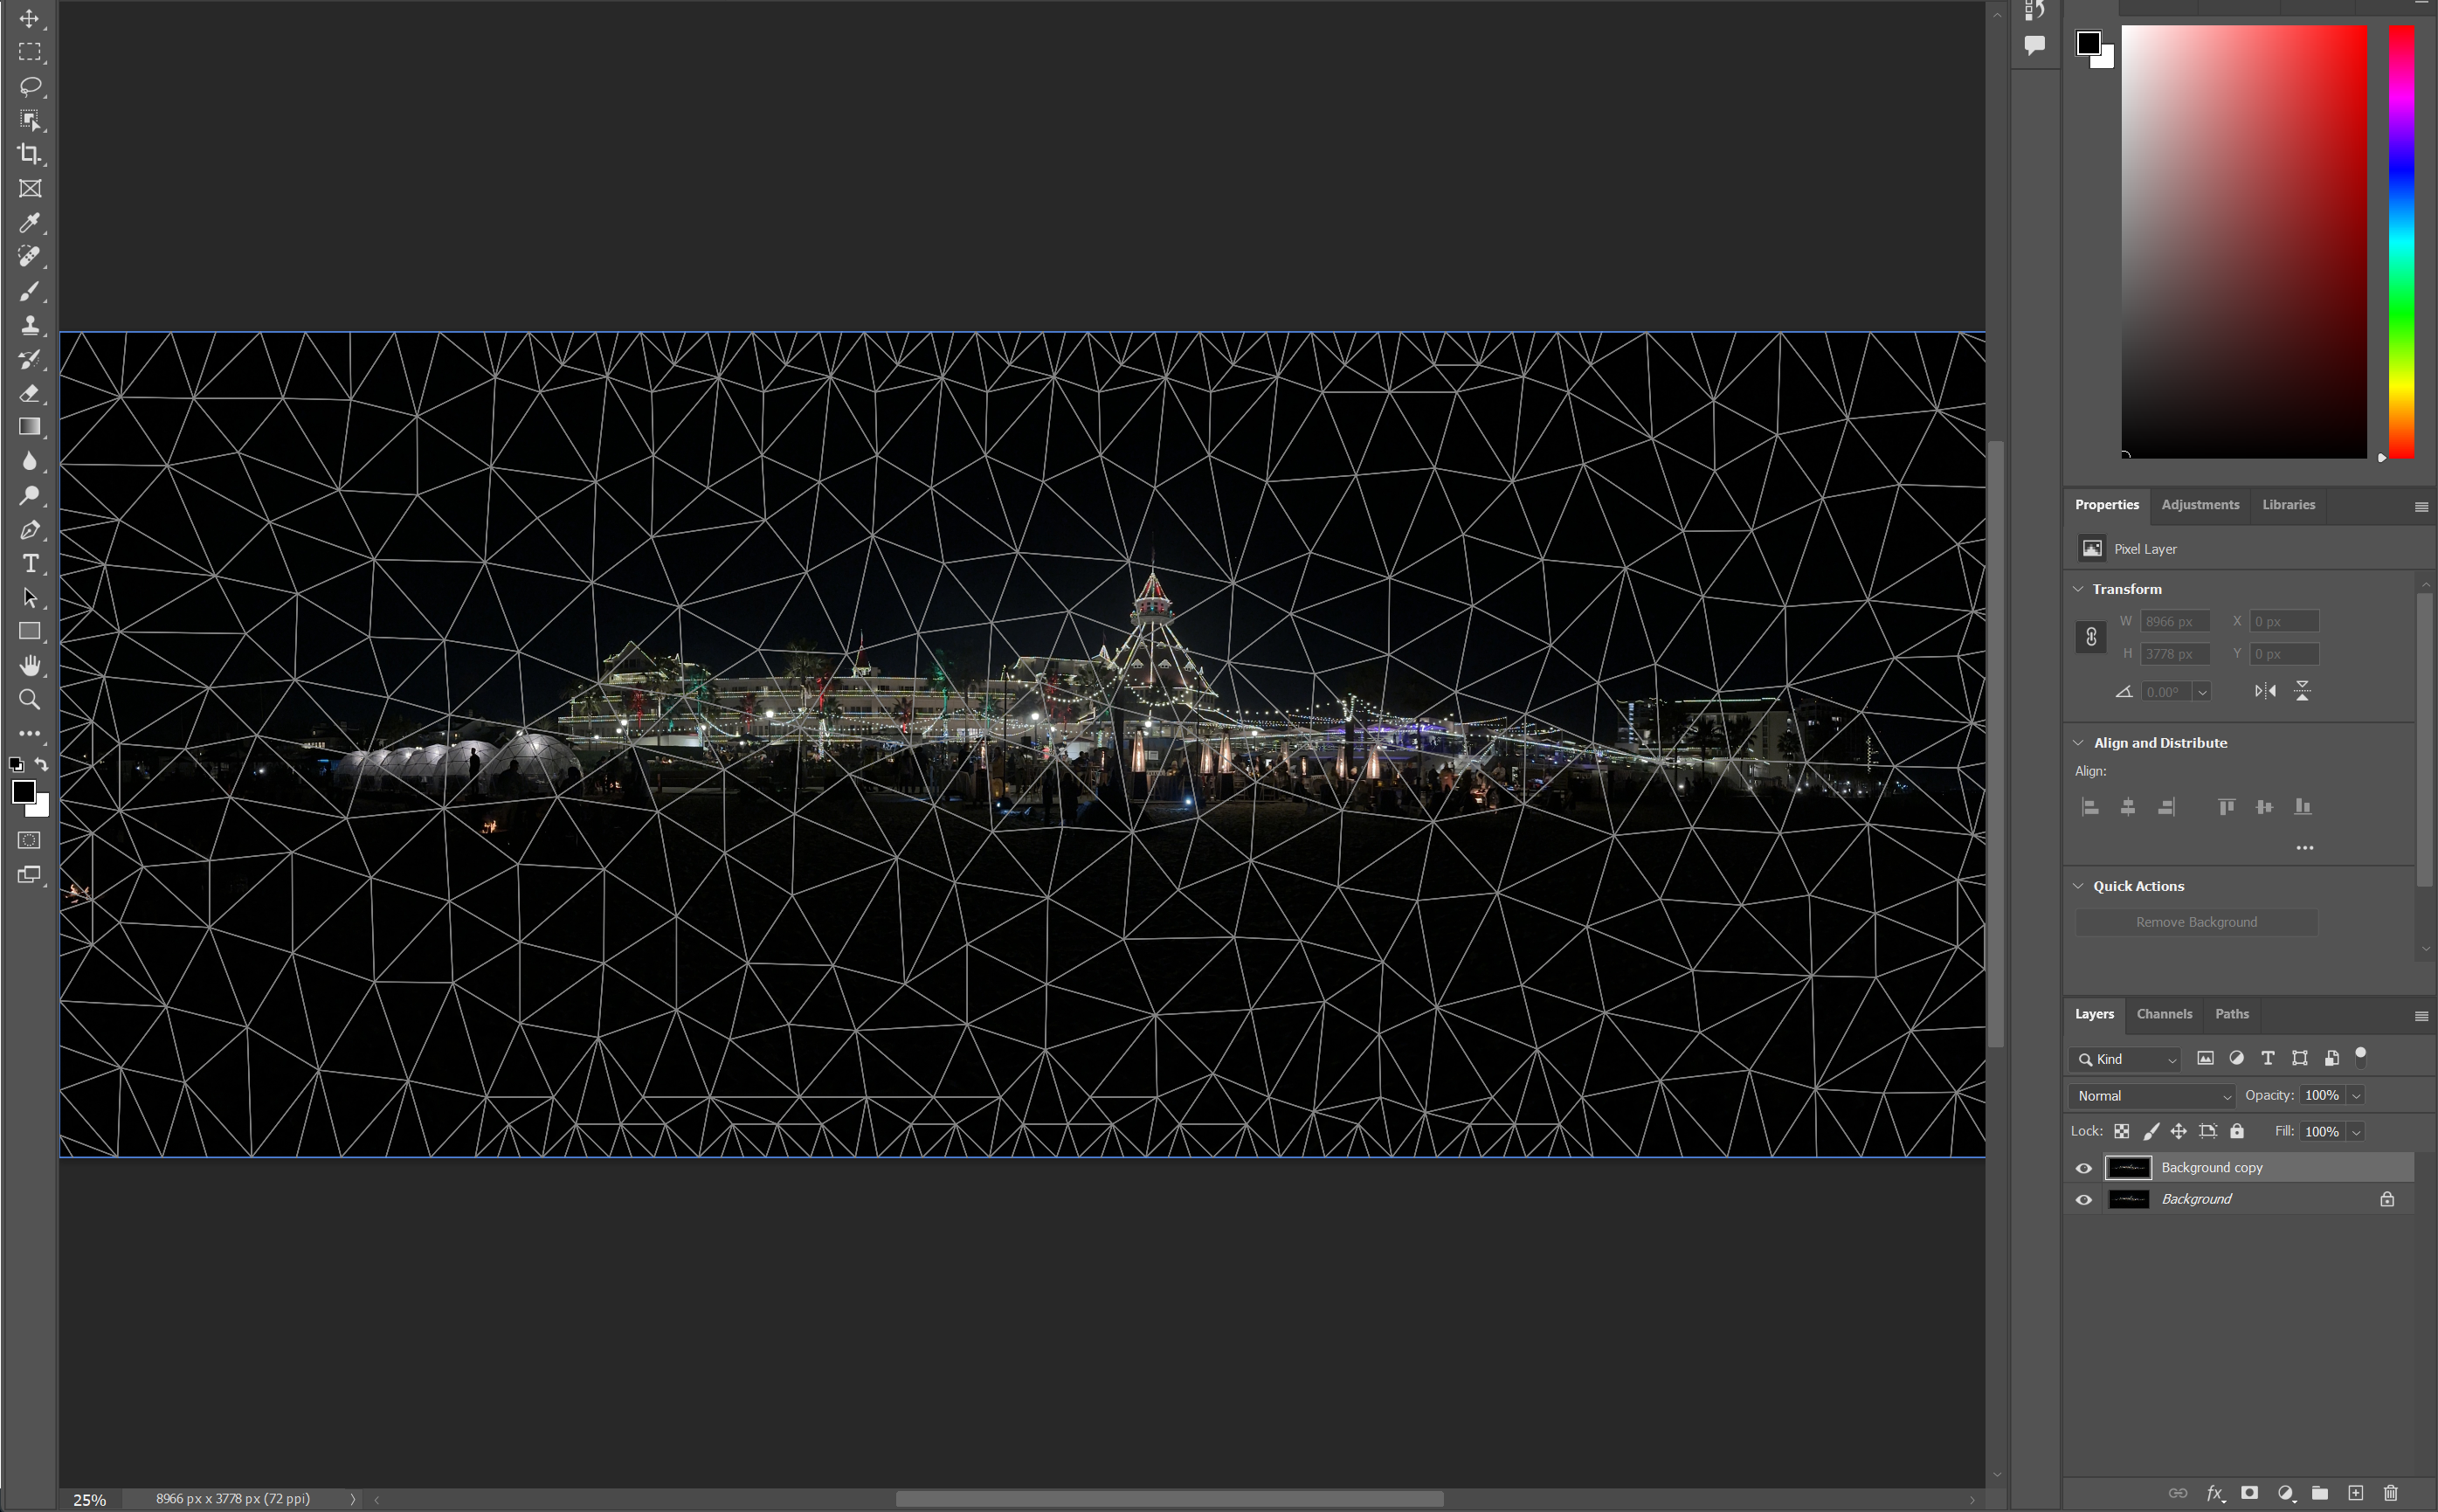
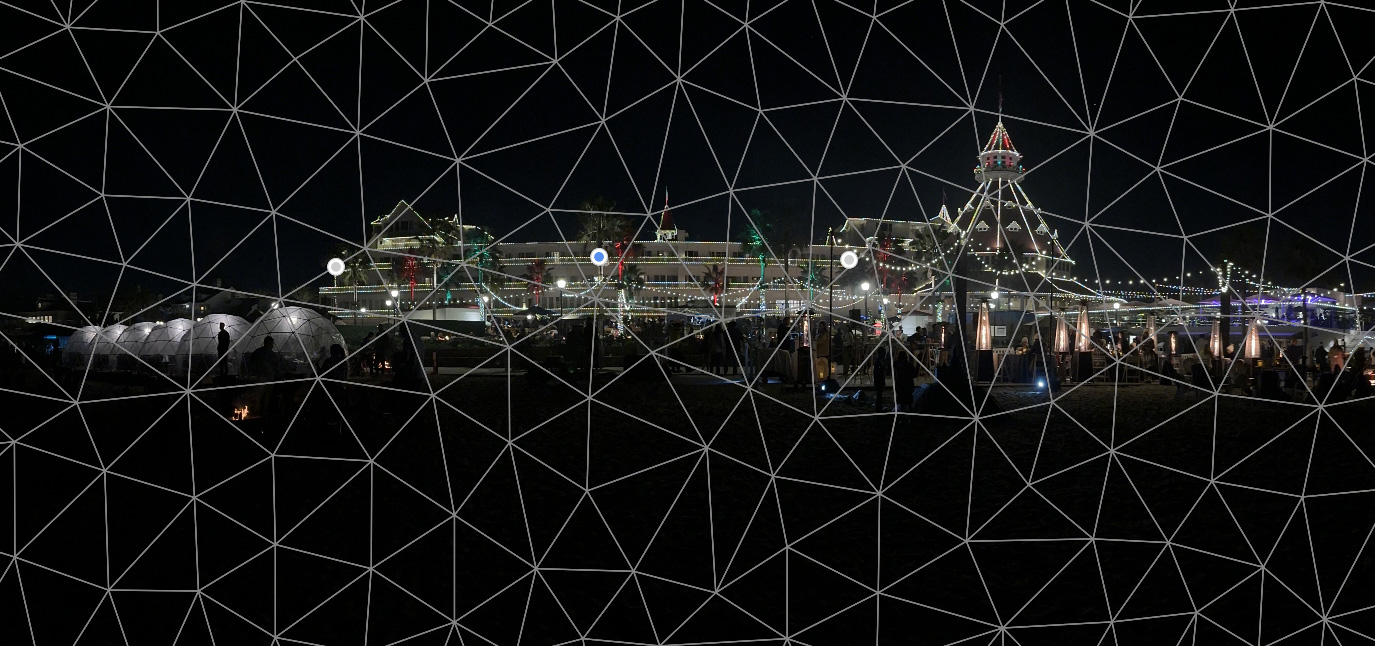
Both corrections have their application. But I prefer the Puppet Warp’s ability to just affect the hotel and leave the edges unaffected. The Adaptive Wide Angle would be more for correcting wide angle lens distortion as I’m sure it designed to do.

20 Dec 2023 Theme Winter: Sharon
Sharon shared some wonderful Currier & Ives-ish photos of Hotel Ladina in Bergün Switzerland. Plus some seasonal holiday photos of Santa Chick-a-fil, Christmas lights & decoration.


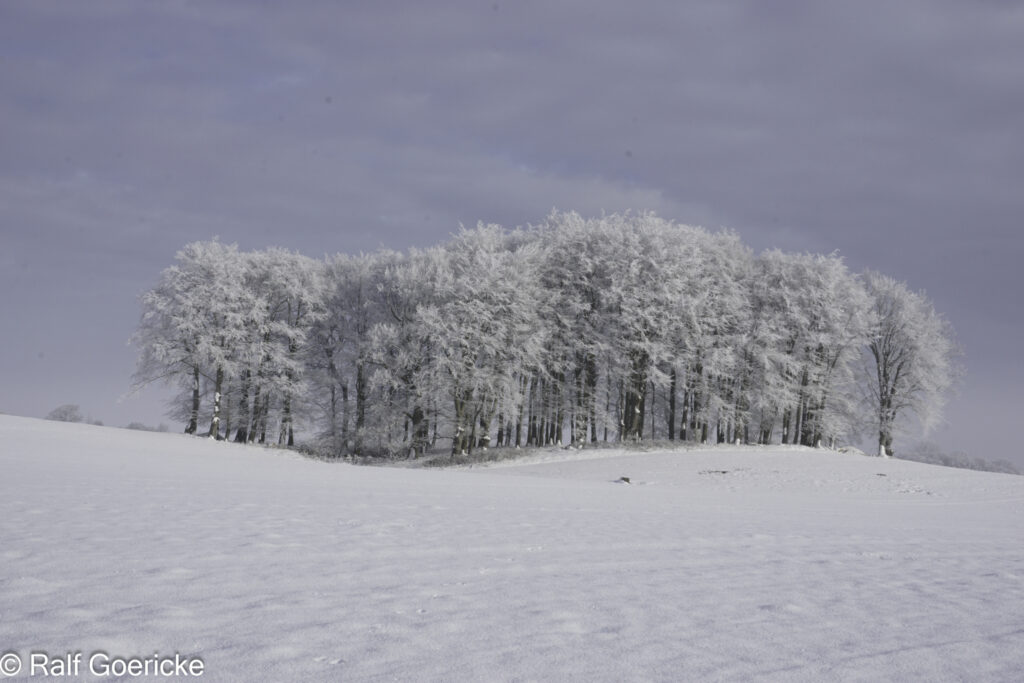
20 Dec 2023 Theme Winter: Ralf
Ralf shared some beautiful winter landscapes from Northern Germany. Some of the best winter-themed images taken during a walk where conditions changed from clear to white-out.


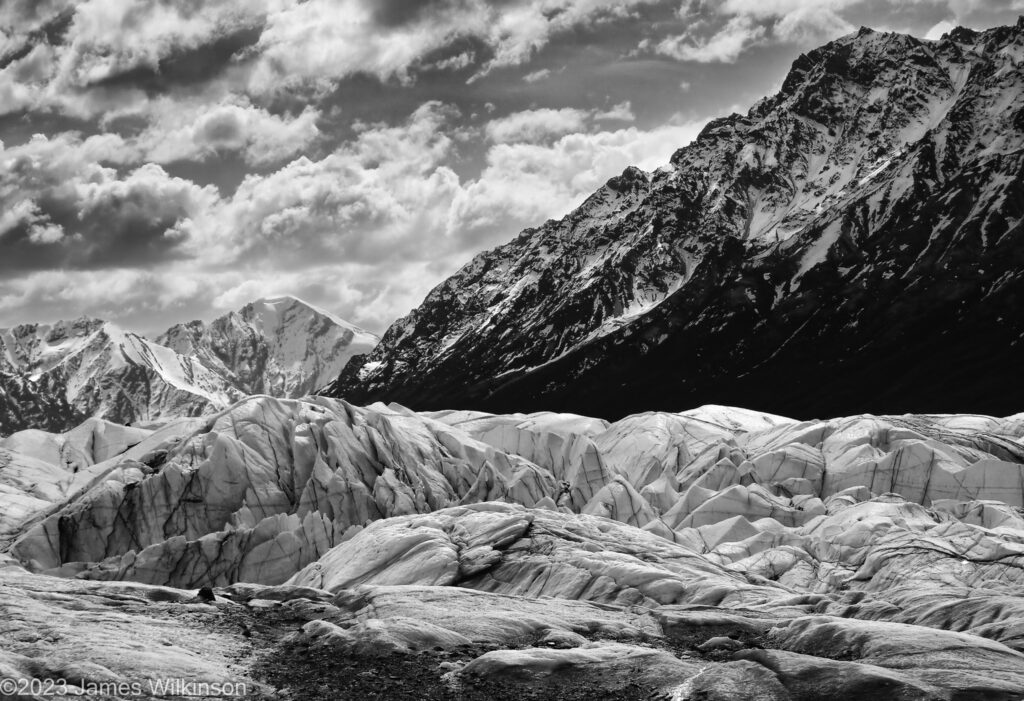
20 Dec 2023 Theme Winter: Jim
Jim’s recent travels have been to non-winter locations so he dug into his archives for photos from a trip to Alaska. Particularly, the Matanuska Glacier northeast of Anchorage. Other images were from a snow day with grandkids, and Christmas lights of Hotel Del & Quail Gardens Lightscapes.


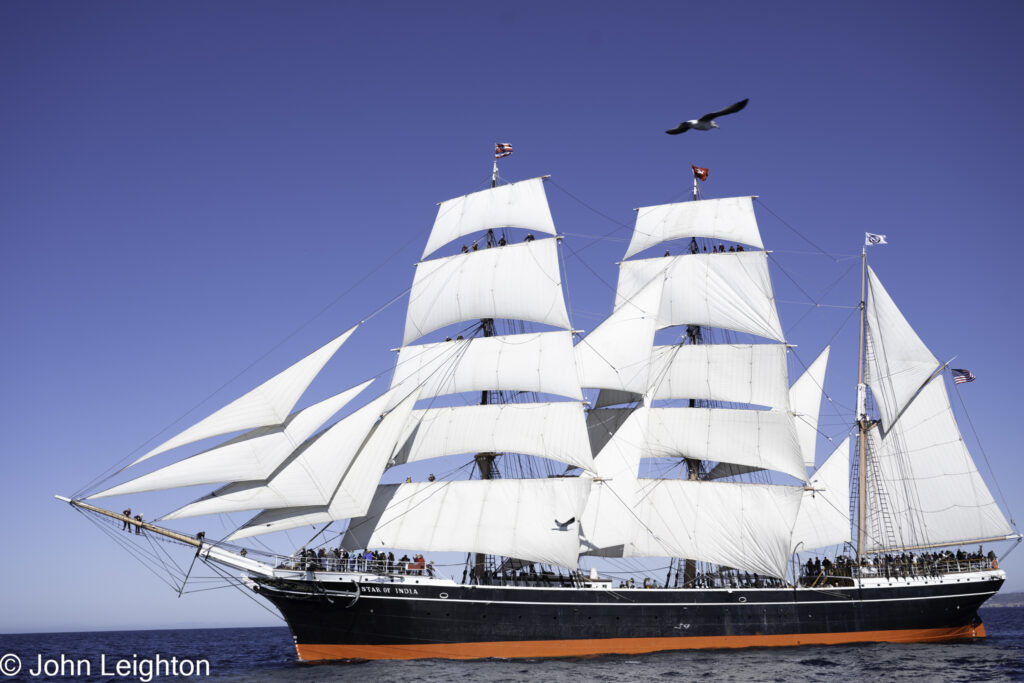
20 Dec 2023 Theme Winter: John
John shared some recent images of his work on the Star of India, a particularly well-choreographed group photo of the 100+ crew.


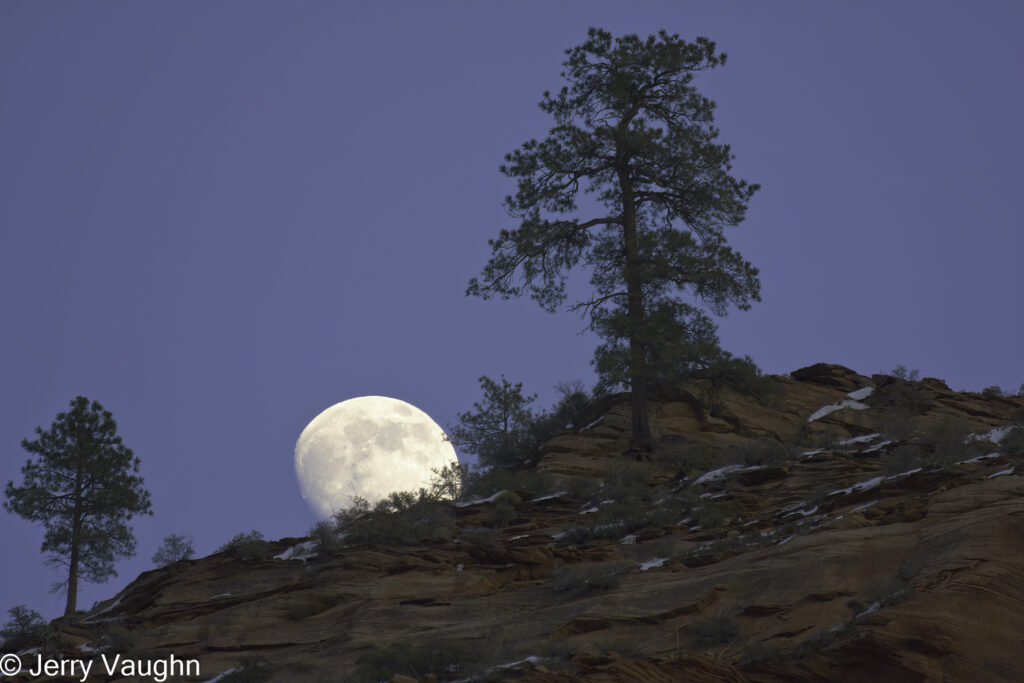
20 Dec 2023 Theme Winter: Jerry
Jerry shared some great winter images of Yosemite and Zion, as well as Death Valley, New Mexico and San Diego.


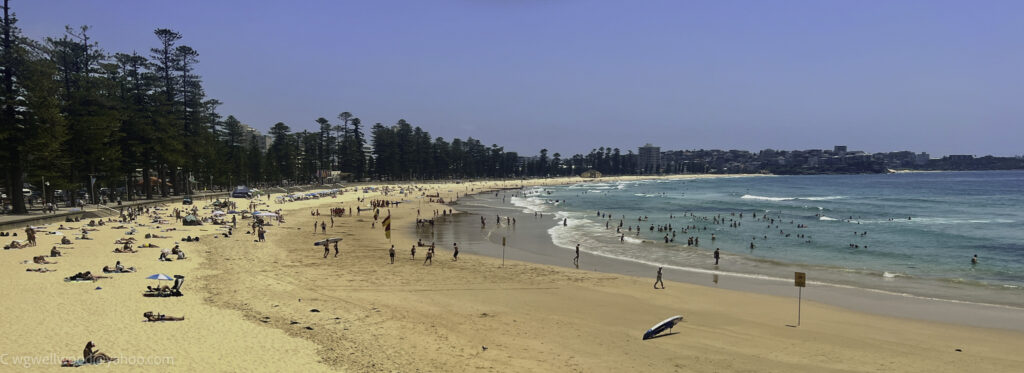
20 Dec 2023 Theme Winter: Gary
Gary took a recent trip to Australia-New Zealand during our winter – their summer. He particularly like Australia’s wonderful beaches, especially Manly Beach, and the city of Sydney. New Zealand travel hit many sites from Lord of the Rings.


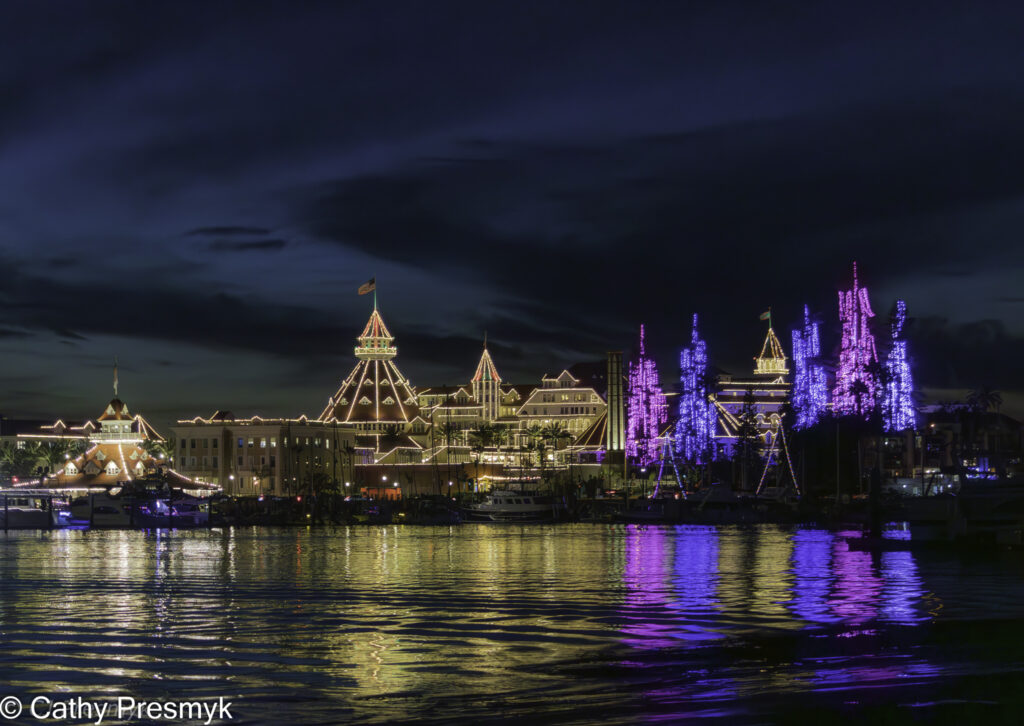
20 Dec 2023 Theme Winter: Cathy
Cathy shared some winter-themed recent images: a great blue hour shot of the Hotel Del from Glorietta Beach; ice skating father-daughter w/ retro film simulation; Liberty Station Christmas lights; and a roaming Elf.