Lightroom and Adobe Camera Raw have features that allow masking of photographic images. Masking is essentially ‘dodging’ and ‘burning’ your digital image, only supercharged. In addition to lightening or darkening areas of your photo, masking allows you to change much more, like saturation and contrast.
One of the best recent features is ‘intersecting masks‘ – the combining of more than one mask to resolve specific elements in a photo, like petals, leaves, or particular color.
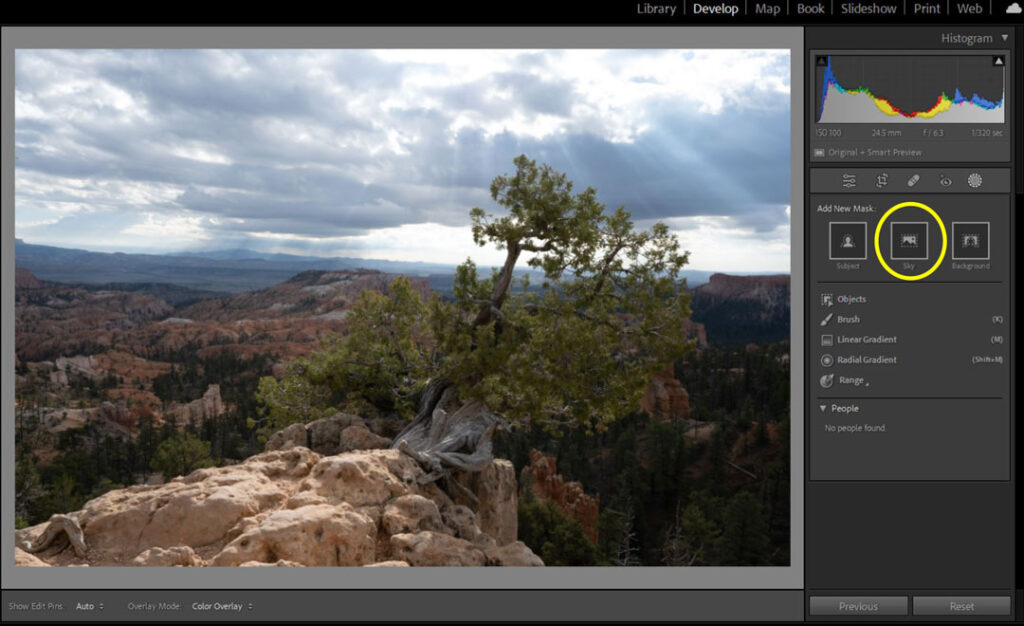
Applying A Mask
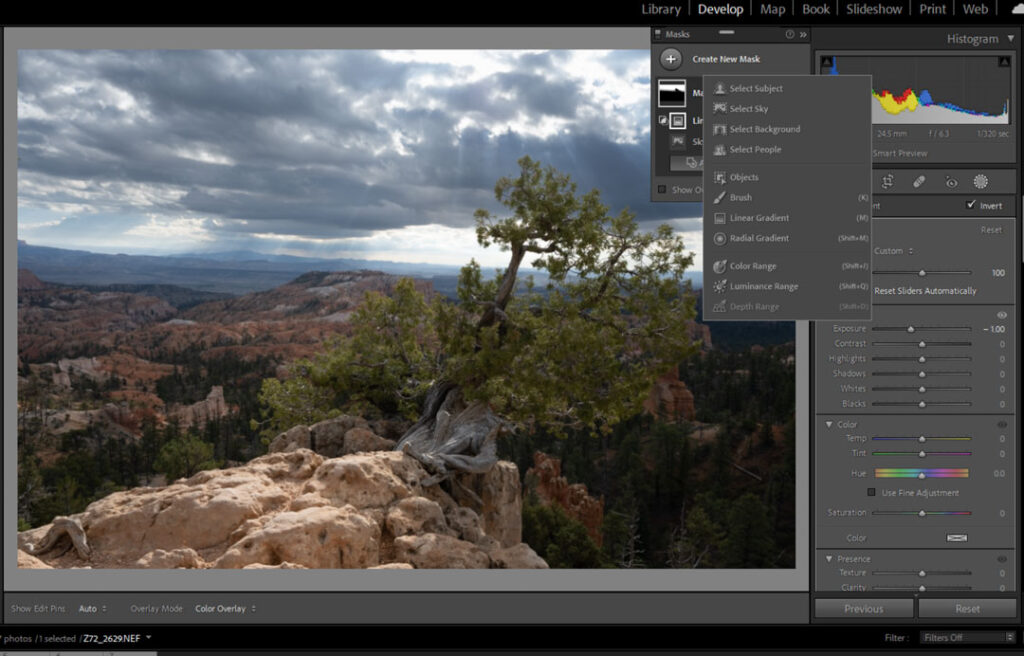
By applying a mask, the photographer can manipulate specific areas or objects in an image to emphasize and eliminate elements. Both Lightroom and Adobe Camera Raw have masking AI (artificial intelligence) that can automatically select specific areas of the photo, like a person, sky, or background. Additionally, you can add or subtract to the mask by selecting specific mask criteria like color or luminescence, or by using a brush or eyedropper to select a detail.
- Adobe Bridge – free photo organizer that integrates well with Adobe Camera Raw and other Adobe products. It works well stand-alone as well.
- Adobe Camera Raw – free plugin with Photoshop, ACR is a raw photo tool with many of the same capabilities as Adobe Lightroom
- Adobe Lightroom – my go-to photo organizer and editor.
Intersecting Masks
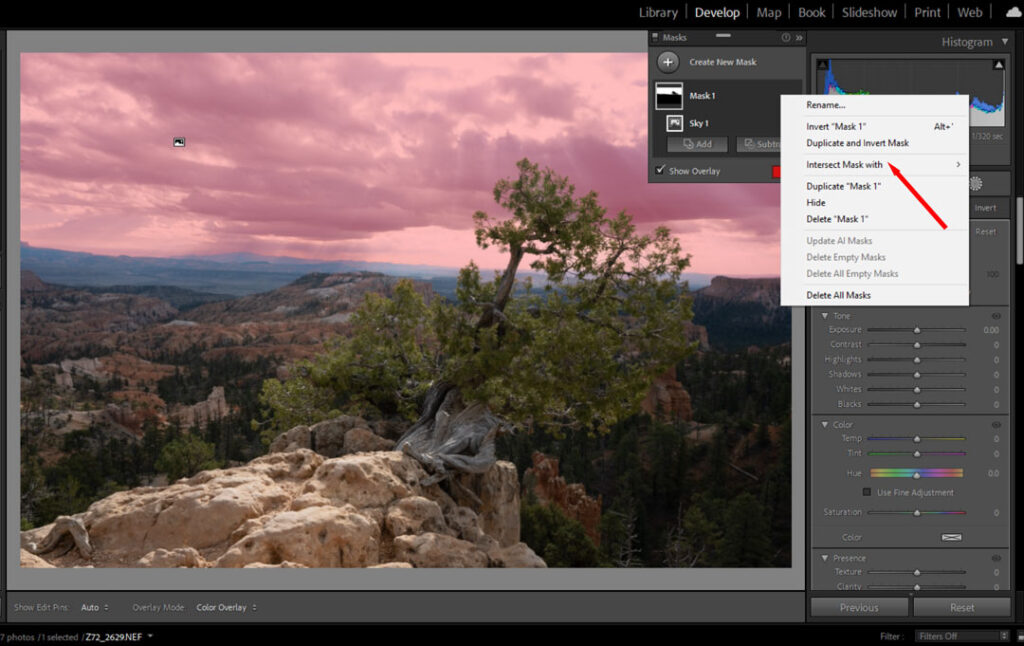
A recent feature I’ve been using a great deal in post-processing is Lightroom’s (or ACR’s) intersecting masks. The technique involves selecting a normal mask area:
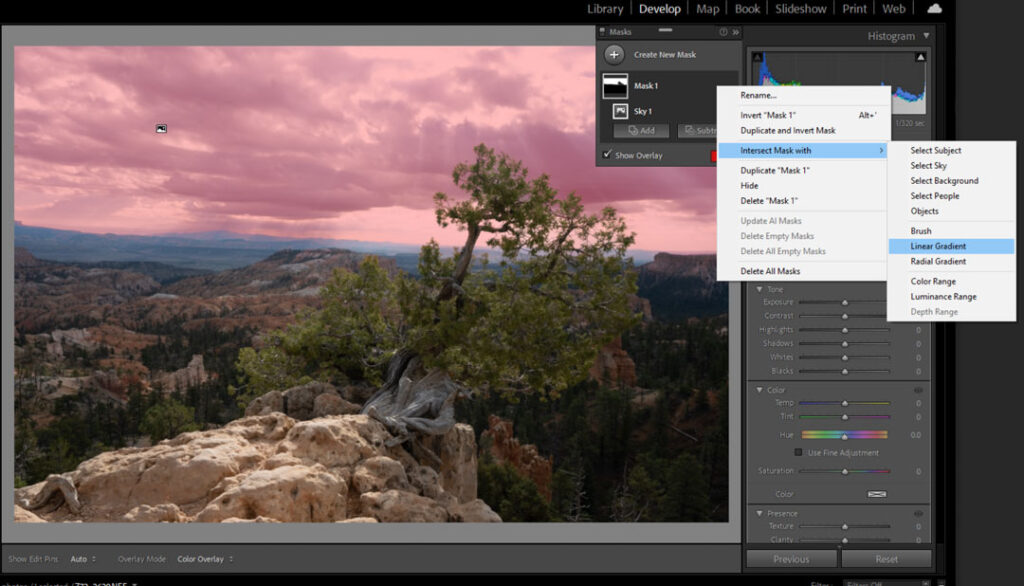
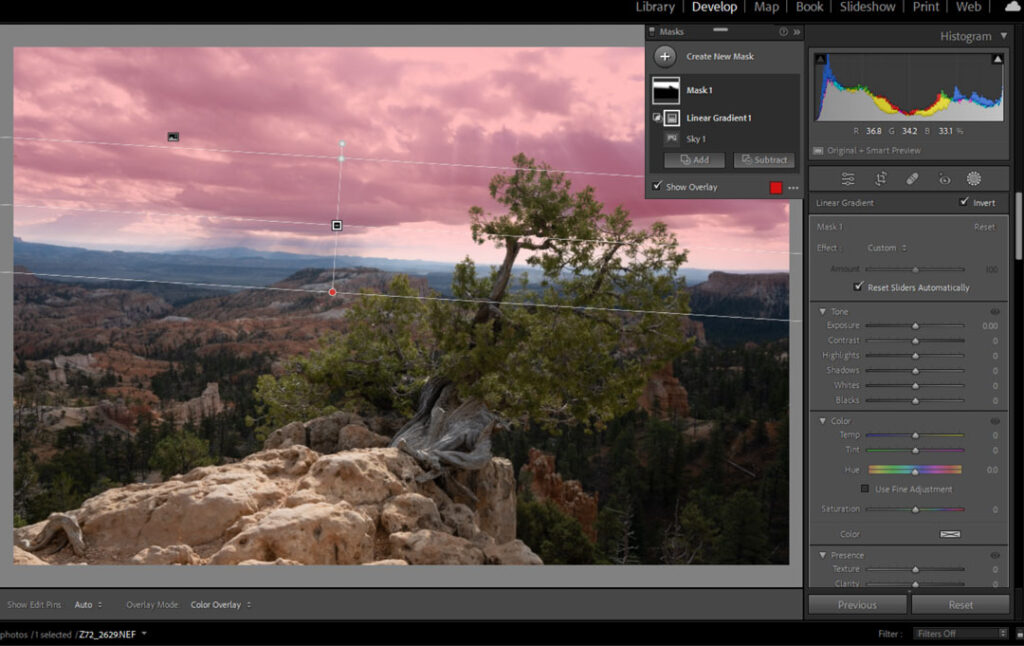
Mask 1 – select Sky then right-clicking on that mask’s ‘…‘ select ‘Intersect Mask With ‘ – ‘linear gradient‘. The combination of these two allows you to make changes to the sky but with a gradient that should help it appear more natural.
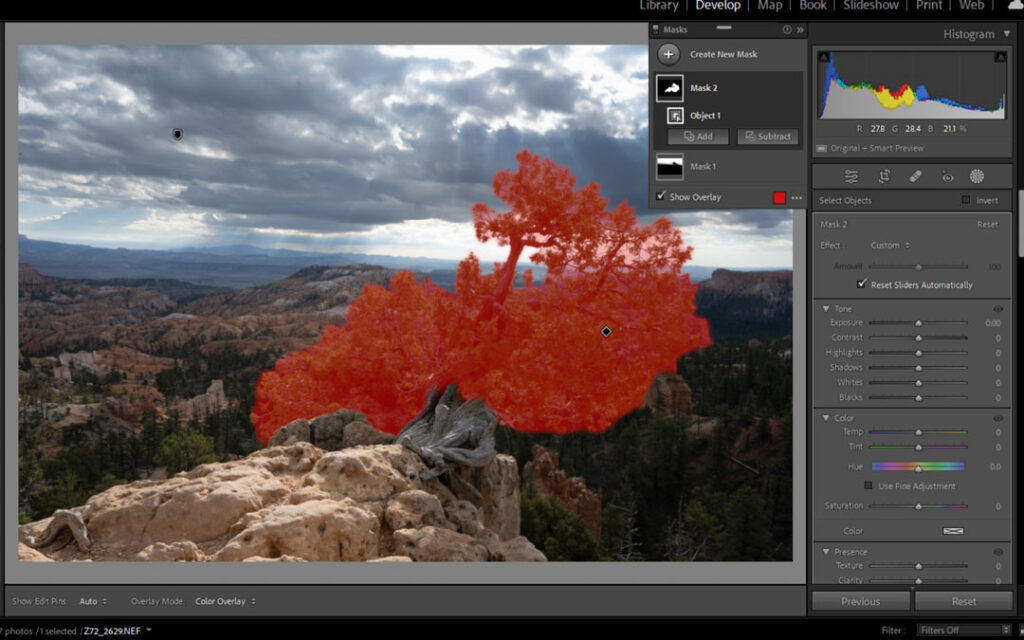
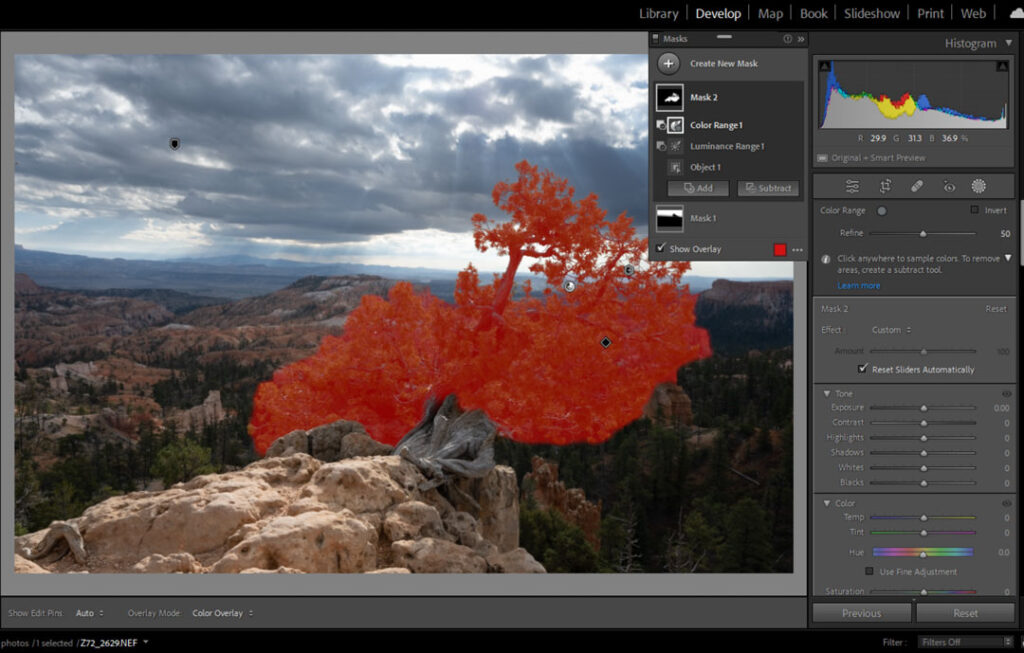
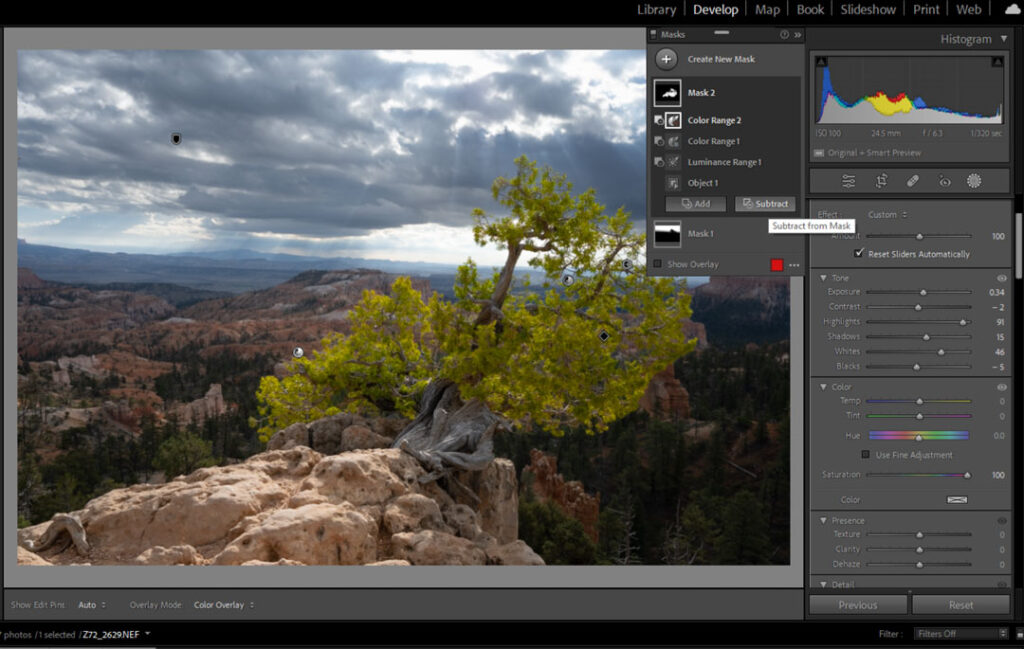
Mask 2 – select Object mask to select a tree’s foliage for example. When Object is selected, the tool becomes a content-aware paintbrush that will automatically find edges. This should create a mask that isolates the object – Add or Subtract may be necessary to fine-tune the mask. Often adding or subtracting Color Range or Luminescence or even Object will help isolate the object from the background.